Hiya Stichers
I have some FANTASTIC news, I am gonna be on the Great British Sewing Bee (Series 2) !!!!!!! so please make sure you tune in to watch me in action on the 18th at 8pm on BBC2 yipppie #teamchinelo . I’m sure you can tell how excited I am…
here is a link for the trailer and a link to see all the contestants
The Great British Sewing Bee 2014: Start Date and Series 2 Contestants Lineup Revealed
OK!!!! Back to class
What comes to your mind when you hear “stretchy fabric”? I have recently found out that loads of people are quite afraid of it, however you really need not be. Whenever I teach people to sew using the freehand cutting method, I find that using stretchy fabrics like a double jersey, helps them get the concept of the cutting quicker, than using lets say a cotton fabric which requires darting and becomes somewhat more complicated. Once you understand the basics involved in the craft of freehanding (to coin an awkward term), introducing darts becomes far less complicated, if you’re a complete novice, and will make soooo much more sense to you if you already sew.
The top I am showing you how to make today is quite easy and super cute, it will flare at the waist creating a peplum without you having to join at the waist (Its worth me mentioning, I love a peplum, it helps create an hour glass shape and hides a multitude of sins). I have uploaded loads of pictures to help you along the way, here is a pic of the finished top to encourage you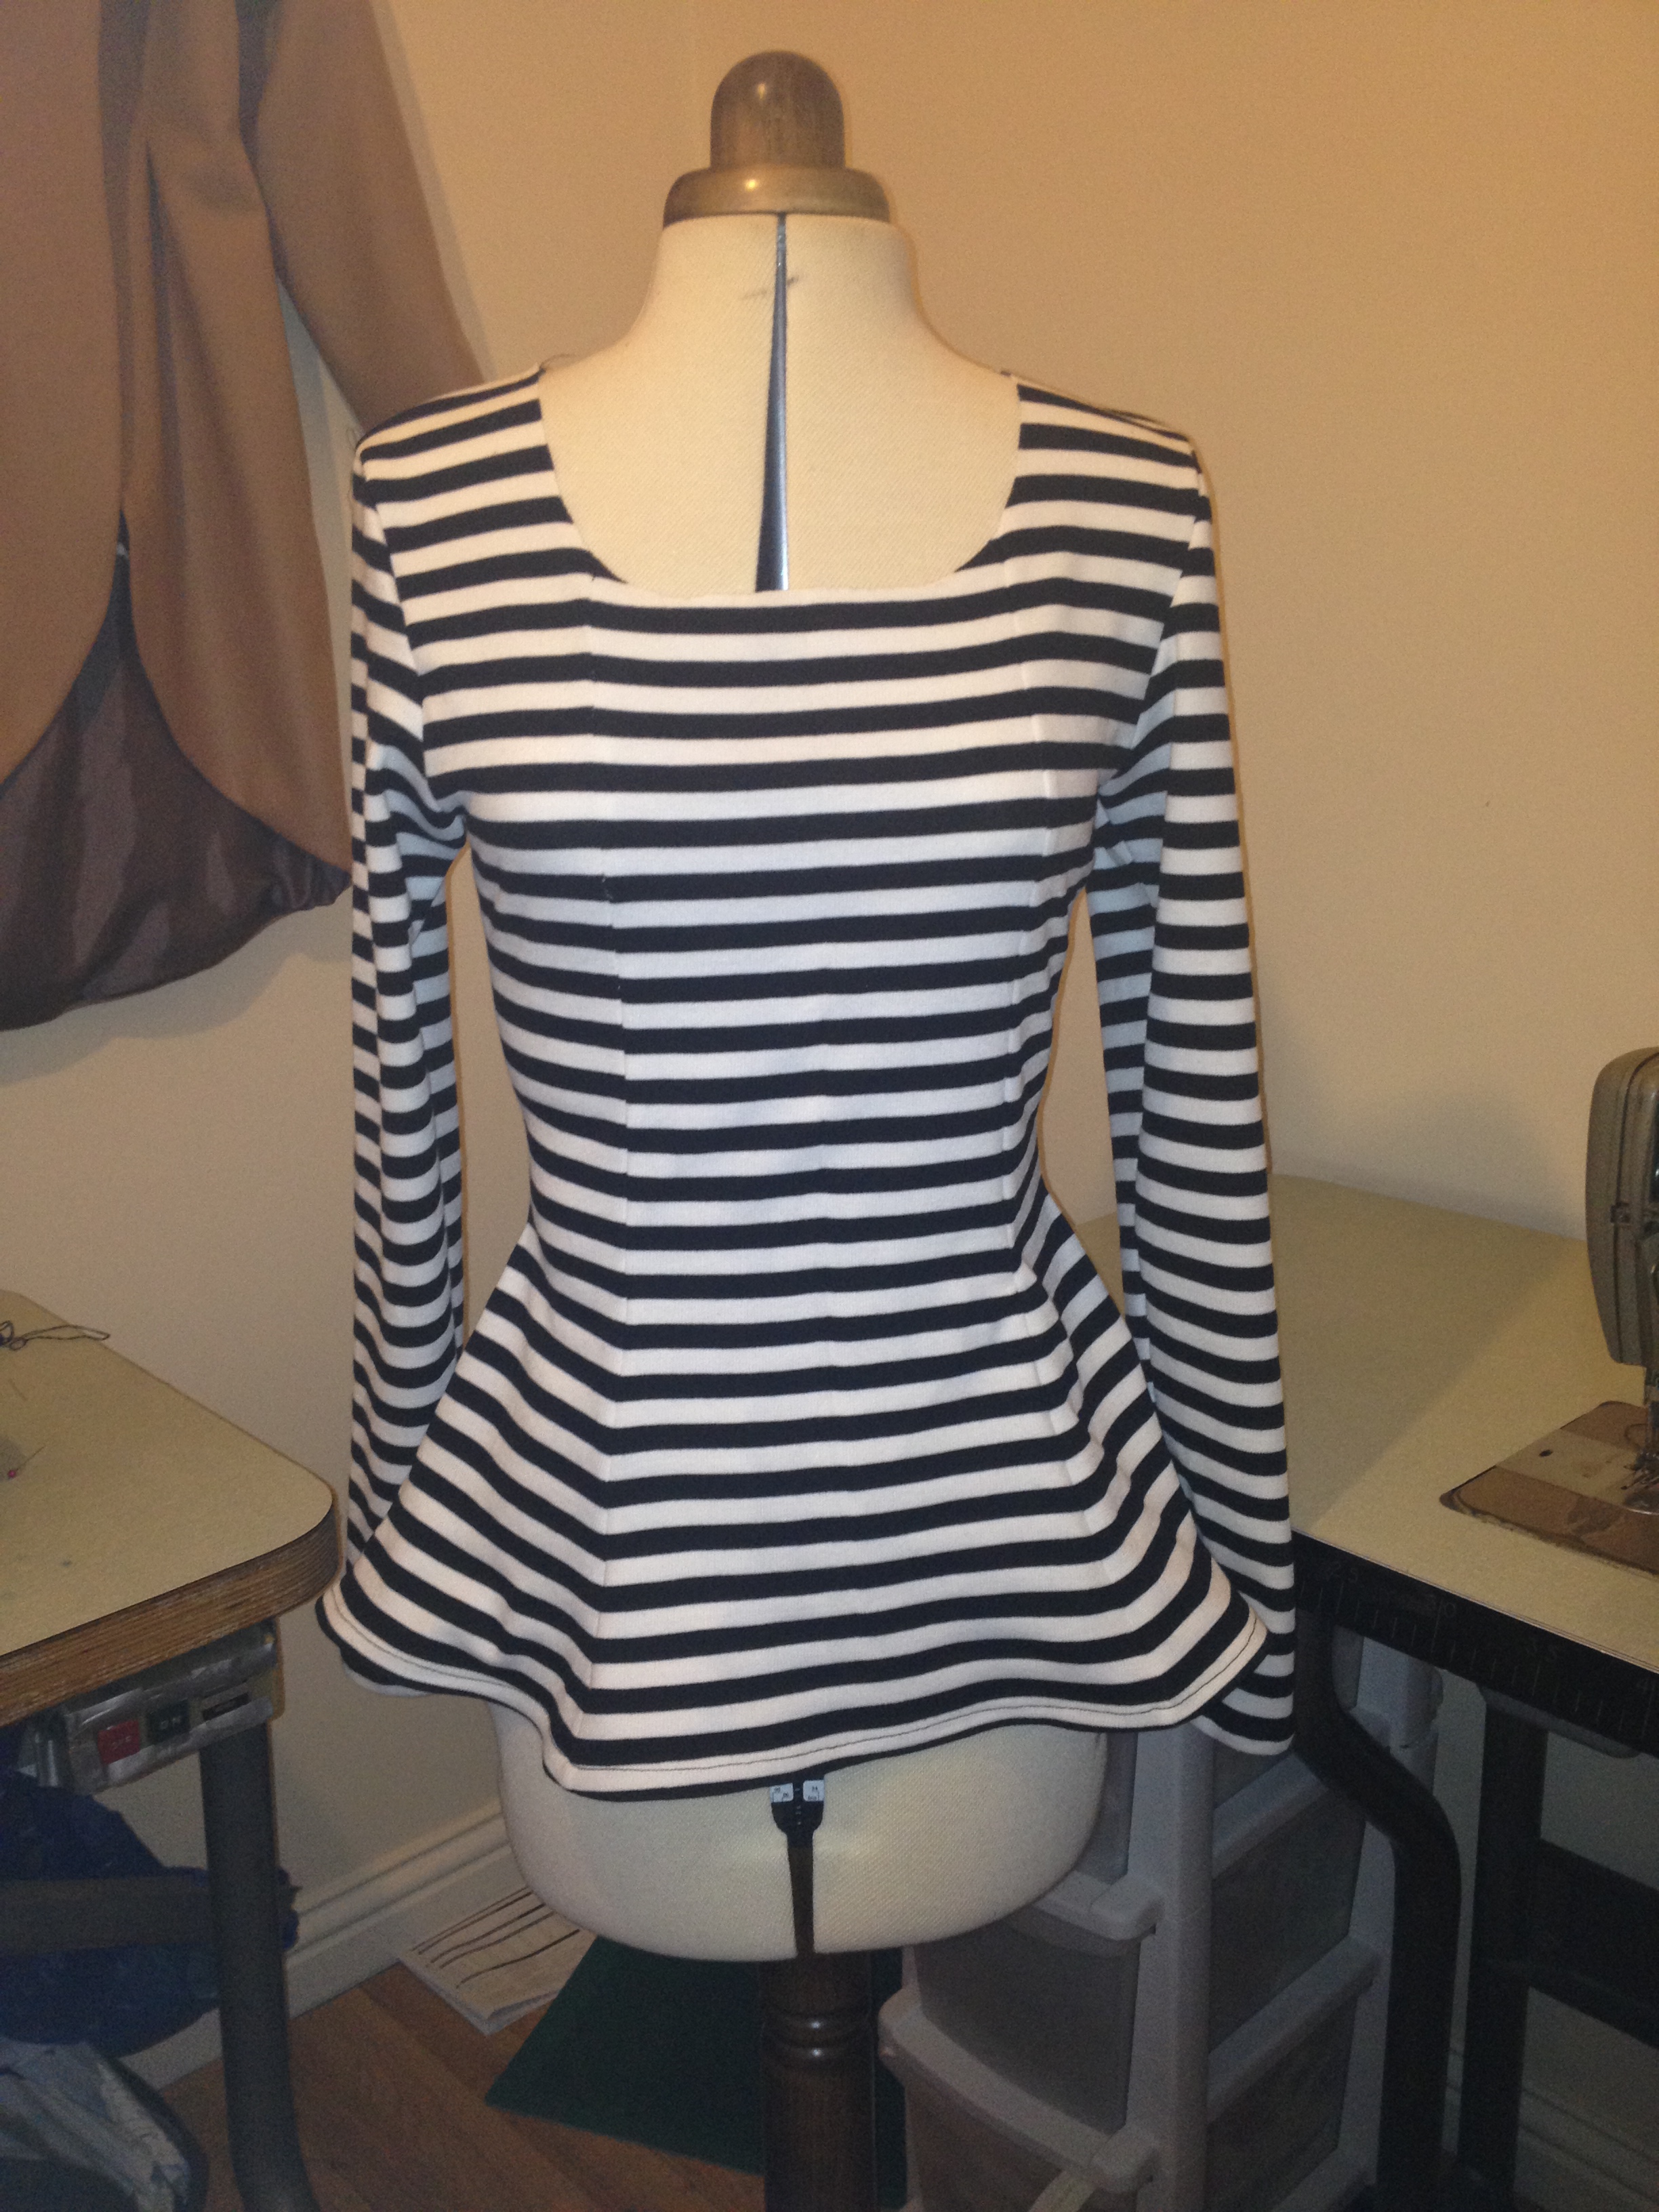 , happy sewing!!!!!!
You will need
- Fabric 60 inches wide and 26 inches long (make the length longer if you want more of a tunic)
- Measuring tape
- Your measurements written down ( http://chinelobally.com/2014/01/16/sew-essential-how-to-measure-yourself http://www.youtube.com/watch?v=dkywf2kGthg&feature=youtu.be )
- Something to mark your fabric (tailors, chalk, chalk pencil, pen)
- Scissors
- Ruler (or any straight edge…..Yes I can be THAT basic; who’s going to run to the shop because they don’t have a gadget when they fancy a midnight sew, improvise if you don’t have, that’s what I say)
- Sewing machine (the only alternative to this is a looooooot of patience to hand stitch the whole lot)
- Steam Iron
Tip: you will always use a 1/4″ seam allowance unless otherwise stated.
Method
Fold your fabric in half width way, right side facing in, and press (TIP: always press after every fold), then fold in 1″ of the raw edge in towards the folded edge and press; these two opposite ends are now your centre front and centre back (the centre back is the side with the 1″ folded inwards this will usually be for a zip insertion but you will not need a zip for this top)
Bring the centre front over to meet the centre back and press

On the top edge, starting from the centre front and back mark a 4″, then from the centre edge again make another 4″ where your shoulder to waist measurement point is. At the bottom starting from the centre front and back, measure in 6″ and mark. Using a ruler draw straight lines that connect the marks you have just made, it should look like this:
 cut it out.
take the top layer (the front of the top), of what you have just cut, flip it up side down, lay it on the remaining fabric with the cut edge facing outwards and as close to the edge as possible then cut around the cut edges like so:

mark the centre front’s top and bottom corner with a pin on the remaining fabric. flip the front top (which you have just used as a template) so that the cut edge is now facing the other way. now using the pin markers as a guide lay slide the front top inwards so that the centre is 0.5″ inside the pin markers. cut around the cut edge again, these are now your side panels and it should look like this:

With the front top still laid in position, notch the top outer corner (just a tiny notch, this will help differentiate the side panels from the centre front as the difference in size is so minimal. the centre front will have a notch on each side whilst the side panels will only have the notch on one side)
There are now six pieces; centre front, centre back. and 4 side panels; sew a side panel to each side of the centre front and centre back panel. Remember the centre back panel is still open in the middle! sew this shut (like I said you really wont need a zip for this, I feel the novice smiling 🙂 ). When you are finished it should look like this (but sewn, sorry I forgot to take a picture at that stage):

Now you are ready to “shape out” the top
Fold the tops back into their centre folds and be sure to lay the front top, on top of the back top like so:

Now mark all your vertical measurements from the top (shoulder to AF, shoulder to AB, shoulder to 9″ (this is the conventional bust line for freehand cutting I will always specify when you need to use a more personal one), shoulder to waist, shoulder to hips; or wherever you want to top to stop)
 like so (these are just reference points for your horizontal measurements)
half your back measurement + 1/3″ and mark in from the centre front and back, along the top edge, like this:

then along the same edge mark 4″ in from the centre again< this is the point for your neck hole. Along the centre edge measure down 2″ and then 5″ and mark. These are the points for your back and front neck hole. draw quarter-circular arch that connects the 4″ mark to the 5″ mark, the draw another arch that connects the 4″ mark to the 2″ mark. It should look like this:

Using your first vertical measurement reference (shoulder to AF), half your AF+ 1/3″ and mark this, do the same for your across back. Now along the 3rd vertical ref point (shoulder to 9″) mark your bust measurement divided by 4. Draw a curved line that connects the back measurement to the AF and the bust, with the deepest point of the curve at the AF. now do the same for the AB and you should send up with something that resembles this:

Divide your waist measurement by 4 and mark this along the 4th vertical ref point (shoulder to waist), like so:

Using a ruler, join the bust and waist marks and the from the waist mark angle your ruler out towards the bottom edge corner and connect with a straight line:

Cut out. make sure that at the armhole curves and the neck hole curves, you only cut around the outer ones because essentially you are cutting out the back first although the front and back a still together. Then separate the front and back pieces and cut out the remaining arm and neck curve lines left on the front top, you will now have something that looks like this:

Make a mark 3/4″ down from the outer shoulder seam and connect with a straight line to the top corner of the inner shoulder seam: cut this to get the shoulder slope:

Now unfold the top front and back and lay on top of each other with the right side inside. Sew the sides and the shoulder seams together.

If you want to add a sleeve as I have, check out the post on cutting a sleeve freehand ( http://chinelobally.com/2014/02/04/busy-bee-how-to-cut-a-sleeve-without-a-pattern/ ) and follow those instructions.
The choice of finishing is up to you, you could either do a rolled hem or use some bias binding. I used bias binding for the hem, I also decided to have a little play and put my signature on this top 🙂 , I put a Kabani collar on it (whats a Kabani collar? I hear you ask, all will be revealed very soon 😉 ), and some shoulderpads. In the meantime here are a couple of pics of my top to wear out tomorrow 🙂 .


Give it a try and please send me pics of your own 6 piece top attempt, I hope this post is clear enough, apologies for the somewhat unclear pictures, I am working on getting a better camera; but if you have any questions just leave a comment and I will be happy to help. Have a great night and make sure you tune in to BBC2 on Tuesday 8pm to watch some sewing bee action, its gonna bee heaps of fun. Follow me on twitter and instagram @chinelobally.


