New Workshop Dates!!! Sew a Maxi dress with Chinelo….

Hello Guys!

Its been quite a while, and with mighty good reason. I have been busy writing my book, Freehand Fashion, which has now been published (available to purchase on amazon.com), and I have had loads of private commissions for made to measure dresses; its all been very exciting.

So summer is nearly here and if you know me, then you know I love the sun and I celebrate it with brightly coloured fabrics sewn into amazingly simple but flattering outfit. In light of summer, and loads of request for new workshops, I have set up a brand new project and have 2 dates currently available (sat 14th May 2016 & Sat 11th June 2016 from 10am – 5pm). Participants of this workshop can take advantage of buying a signed copy of my book at the discounted price of £15.

Pls check kazoova.com for details regarding the workshop.

Below is the beautiful dress we will be making.

8499b9e8e524498cb045aca0bfcddbb6

Classes are selling fast so get booking!

To book your place, pls click the link below.

https://www.kazoova.com/activity/697/

Looking forward to seeing you there

Happy sewing
Chinelo Bally

Party Top Tutorial.

6 piece bustier top
Hi there stitchers,
It’s been a while since my last post, but all for good reasons. I have been hard at work setting up my studio!!!! It has been quite difficult working from home; as a devout sewist you will identify with my plight; fabric everywhere, pins all over the house and the sewing equipment’s over spilling their allocated boundaries, oh and not forgetting a patient husband smiling his encouragement through gritted teeth lol. The move out of home was due and very welcomed.

Ok so Christmas is nearly here and I must warn you, I am one of those people who get very merry. I absolutely LOVE Christmas much to the annoyance of everyone around me. With this in mind (the fact that Christmas is around the corner), I decided to do a workshop for a Christmas party dress, there were a few options but the winner was the velvet wrap dress I made on the sewing bee. So before I move on to today’s tutorial, here is a quick breakdown; there are 2 dates available, one in October and one in November, the workshops are 2 days long, both days starting at 10am and finishing at 4pm for more information on what you will need and to book a place, click https://www.kazoova.com/activity/544/ Spaces are selling fast so get in there!!!

Right!! The top I’m showing you how to make today is super sexy and you can embellish it however you choose, I have gone with a black lace and red theme for added va va voom.

DSC_0124
You will need:
• Fabric (something stiff 60” by 60” wide)
• Zip
• Steam Iron
• Scissors
• Chalk
• Ruler
Measurements needed (please work in inches):
• Bust
• Underbust
• Waist
• Shoulder to Overbust
• Shoulder to Underbust
• Shoulder to Waist
• Shoulder to Hem

You will need to do some maths, label these measurements as:
• Shoulder to hem – Shoulder to underbust = Blouse length
• 9 inches – Shoulder to overbust = Bust line
• Shoulder to underbust – shoulder to overbust = Underbust line
• Shoulder to waist – shoulder to overbust = Waist line
These are all vertical measurements (our vertical measurements are used as reference marks along which we mark our horizontal measurements)
Method
1. Fold your fabric in half, right side facing in, and press (TIP: always press after every fold). From the top edge measure and mark the blouse length+1.5”, mark in intervals to enable you to draw a straight line across the fabric, cut along this line and set the longer piece of fabric aside.

DSC_0067

Fold 1″ of the open edge in towards the folded edge and press; these two opposite ends are now your centre front and centre back, the top is your top seam and the bottom, your hem.

DSC_0070
2. Bring the centre front over to line up with the centre back and press

DSC_0071
3. From your centre front and back fold, along the top seam measure and mark 4.5”. From the top seam (working vertically) mark the waist line. From the centre front and back fold, along the waist line, mark 4”, along the hem, from the centre folds, mark 6”.

DSC_0079

Join these marks with a straight line and cut along the line

DSC_0083
4. Take the fabric you put aside, fold it in half again so that you have four layers of fabric. You will now use your centre front panel as a template to cut out your 4 side panels. Lay your centre on the folded fabric and cut around the cut edges only.

DSC_0084

Flip the centre front panel so that it mirrors the cut you just made, pull it one inch towards the edge you just cut and cut around the cut edge again,

DSC_0088

(these 4 panels you just cut will be slightly smaller than the unfolded centre panel. It will now look like this:

DSC_0089

5. Sew one of the side panels to each side of the centre panels, press only the sewn seams (do not press out the centre front or back folds.

DSC_0091

Now you have one front piece made up of 3 panels and 2 back seams made up of 4 panels. Back in their centre folds, lay your front piece on top of the back piece.

6. from the centre folds from the top seam, measure down 2-4″ and mark (this is for the sweetheart dip so make it as low or as high as you like). from that mark, draw a line that slopes up towards the joining panels at the top seam. From the top seam measure down the bust line (this is a reference mark) along this mark, divide your bust measurement by 4 + 2″ and mark, from the mark you just made draw a straight line 2″ long towards the centre fold. Connect the end of this line and the panel joining along the top seam with a diagonal line, it should now look like this along the top

DSC_0095

7. With the head of your tape lined up with your top seam, mark your underbust line and your waist line; these are reference marks (remember the maths you did earlier, this is what I am referring to)
8. You will now mark your horizontal measurements along these vertical marks you just made, always remember that you are measuring from the centre folds. Quarter your, underbust and waist measurements, add 2 inches to each of these and mark this along the corresponding reference mark, join these marks with straight lines and from the waist mark slant your line to the corner of the hem. Cut around your lines through all layer (but when cutting along the sweetheart line, only cut the front layer)

DSC_0097

* notice I have drawn a different neckline for the back. I have made it much lower, you can also make it straight along the bustline in the back.

DSC_0098

9. Follow the darting steps in my Shirt Challenge Post (http://chinelobally.com/2014/02/26/the-shirt-challenge-my-giant-bow-boob-tube-tutorial/)

When you have sewn your darts. Place your pieces on fabric folded in the same was in the centre. Use your pieces as templates to create facings for your top.

DSC_0110

Interface your facing pieces and sew them to the matching section of your top.

DSC_0111

Turn your facings out, top stitch the seam excess to the facing and press

DSC_0115

Insert your zip into the back (I have use an invisible zip)

DSC_0118

Lay the front of the top on top of the back matching the centre waist lines. you will now pin the sine seams ready for sewing, ensure that the pieces are completely flat at waist and bust level, this will mean that the side seams to match up but this is fine.

divide your bust measurement by 4 and mark this along the bust line from the centre of the top, like the picture below. so this for the underbust and waist also

DSC_0121

Join your marks with a line, this will be the line you sew along.

DSC_0122

Copy this seam allowance to the other side and sew your top together

DSC_0124

Here is my finished product!!! I have embellished the neckline with some trimmings from scraps of black guipure lace I had left over from another project

As always I would really love to see your attempt at this. Please send me any questions you may have and I will endeavour to reply as soon as I can

lots of love

Chinelo

xxx

Maxi Dress!!! Summer is nearly upon us

Hi Guys

I really hope everyone’s been enjoying the few days of sunshine we have had in the UK so far? I’m a real heat freak and I just love the sunshine. I really love to welcome the warmer months (or days, as is the case in the UK) with some lovely floral prints and I absolutely love maxi gowns for this time of year, they are just perfect; easy to wear and extremely versatile, a maxi dress is a must for every wardrobe. Imagine the possibilities and the combinations you can achieve from making your own maxi dress; you could colour block for a fresh look, go floral for some feminine chic, and embellish or accessorize your dress to you heart’s content, to make it as understated or as overstated as you wish. With this in mind and the numerous requests for new workshop dates, i have decided to add new workshop dates!!! and you guessed it, we are making this pretty number:

CSC_0095 - Copy


I have added only 5 dates for this workshop so spaces are very limited; get booking guys!!! Here’s the link https://www.kazoova.com/activity/454/

I have been extremely busy working on my new studio and other things, all very exciting, but have kept me completely busy. I will do a tutorial for something as soon as I possibly can, I’m thinking something up-cycled, let me know your opinions and watch this space for it

Till we meet again, stay fabulous and have a blessed week

xxx


Hi-low Top Tutorial – The “hide it all but still chic” Top

Hi guys!!!

Its been a long time since I posted a tutorial, but it has all been for very good reasons, aside from expanding my waistline with one to many treats (as you do), I have had a lot on and promise to spill the beans all in good time. Talking about expanded waistlines, dont you just hate it when we get those sudden bursts of sunny days that you haven’t conditioned your body for? you know, that “OMG summer is here and I still haven’t kicked these kgs” moment. Well, worry not!! I have taken it upon myself to provide you with this tutorial for an uber cute top that will hide all your wintry sins; yes I am that considerate (and I have an occasion to attend tomorrow, the sun is shining and quite frankly my summer body isnt ready, but I still gotta look cute, O the dilemmas of a Lady!!!) .

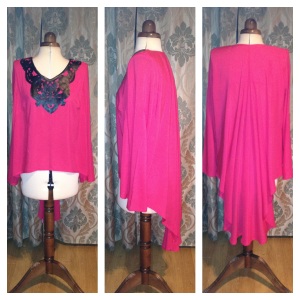
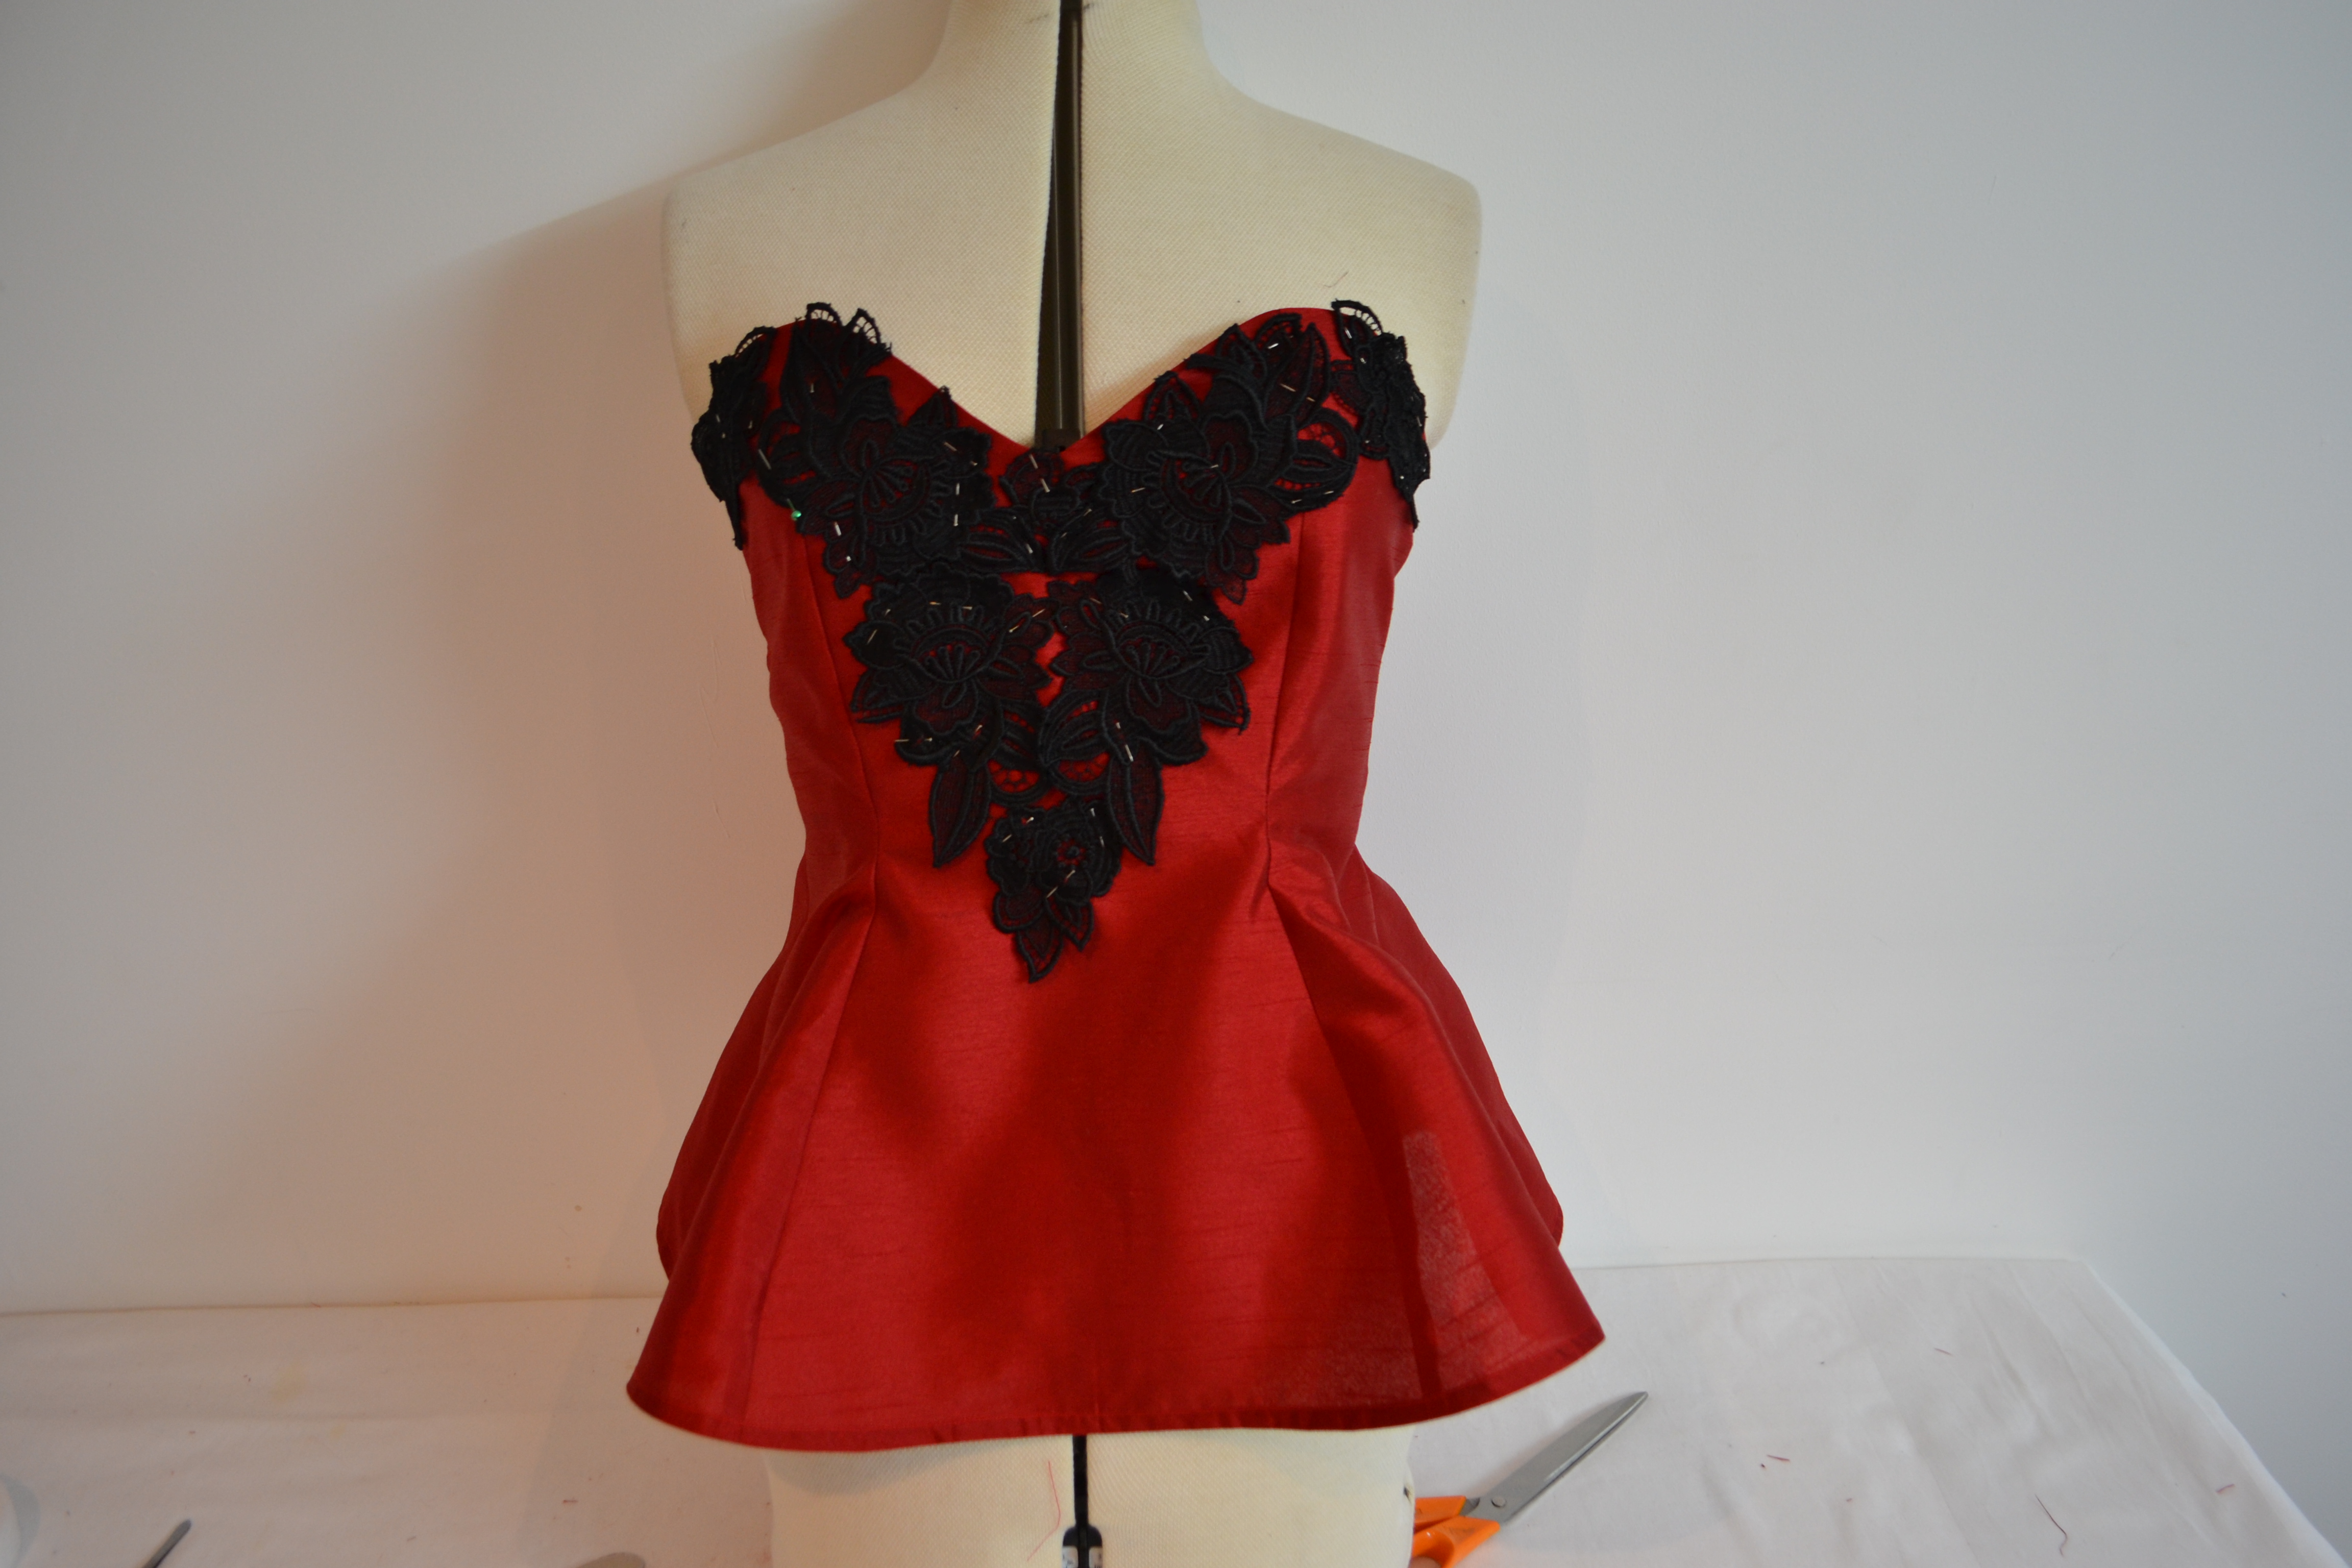
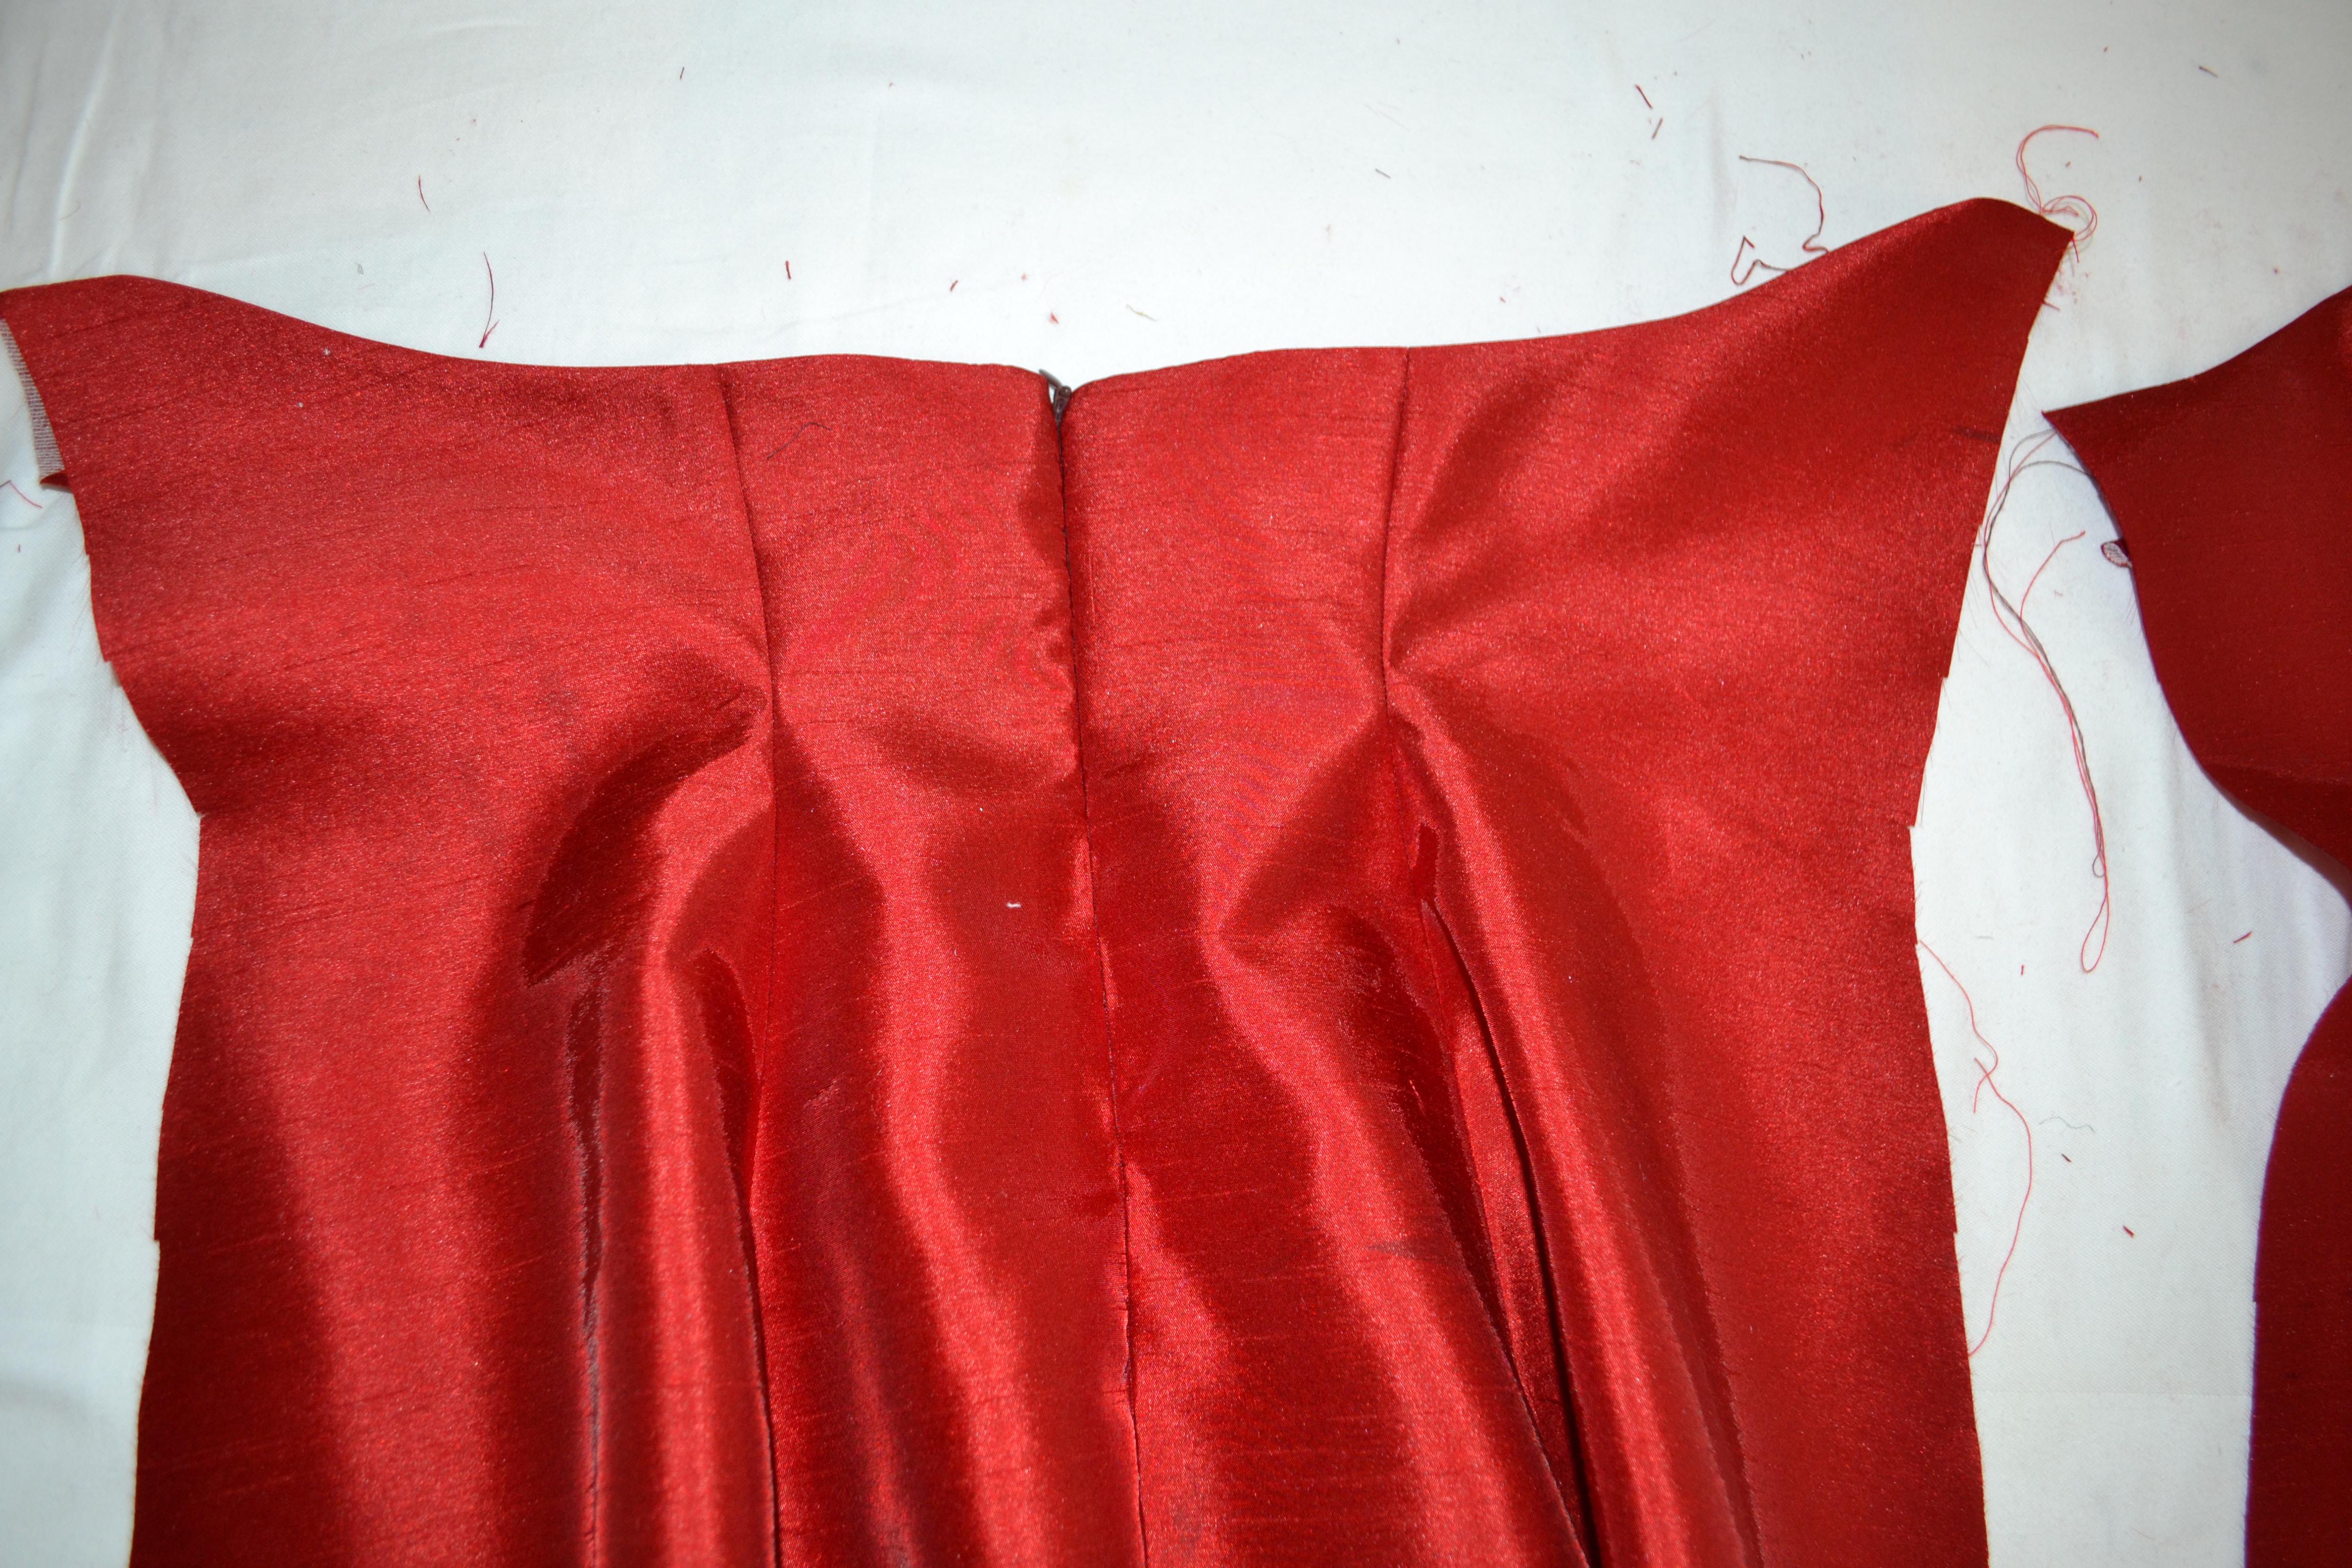
Ok, so here’s what we are making:

image (6)

You will need;

DSC_1016


Fabric

Fusible interfacing

scissors

Pinking sheers

Measuring tape

Ruler

large piece of paper (I have brown paper roll but even newspaper will do)

Chalk and a pencil (with a rubber at the end)

Steam iron.

Measurements needed

Back

Bust

shoulder to bust

shoulder to waist

shoulder to hips

Round sleeve, Round Elbow

Sleeve length, Elbow length

Method

Essentially your piece of paper is going to be used to make a template that will be laid on the bias folded fabric; this is what gives you the voluptuous fall in the back of the top; however, since I always cut the front and back of a bodice together, we will make a template for the front and back in the same manner. I would normally do all what I’m about to show you directly onto the fabric but I have chosen to do a template because of how we will angle it on the folded fabric.

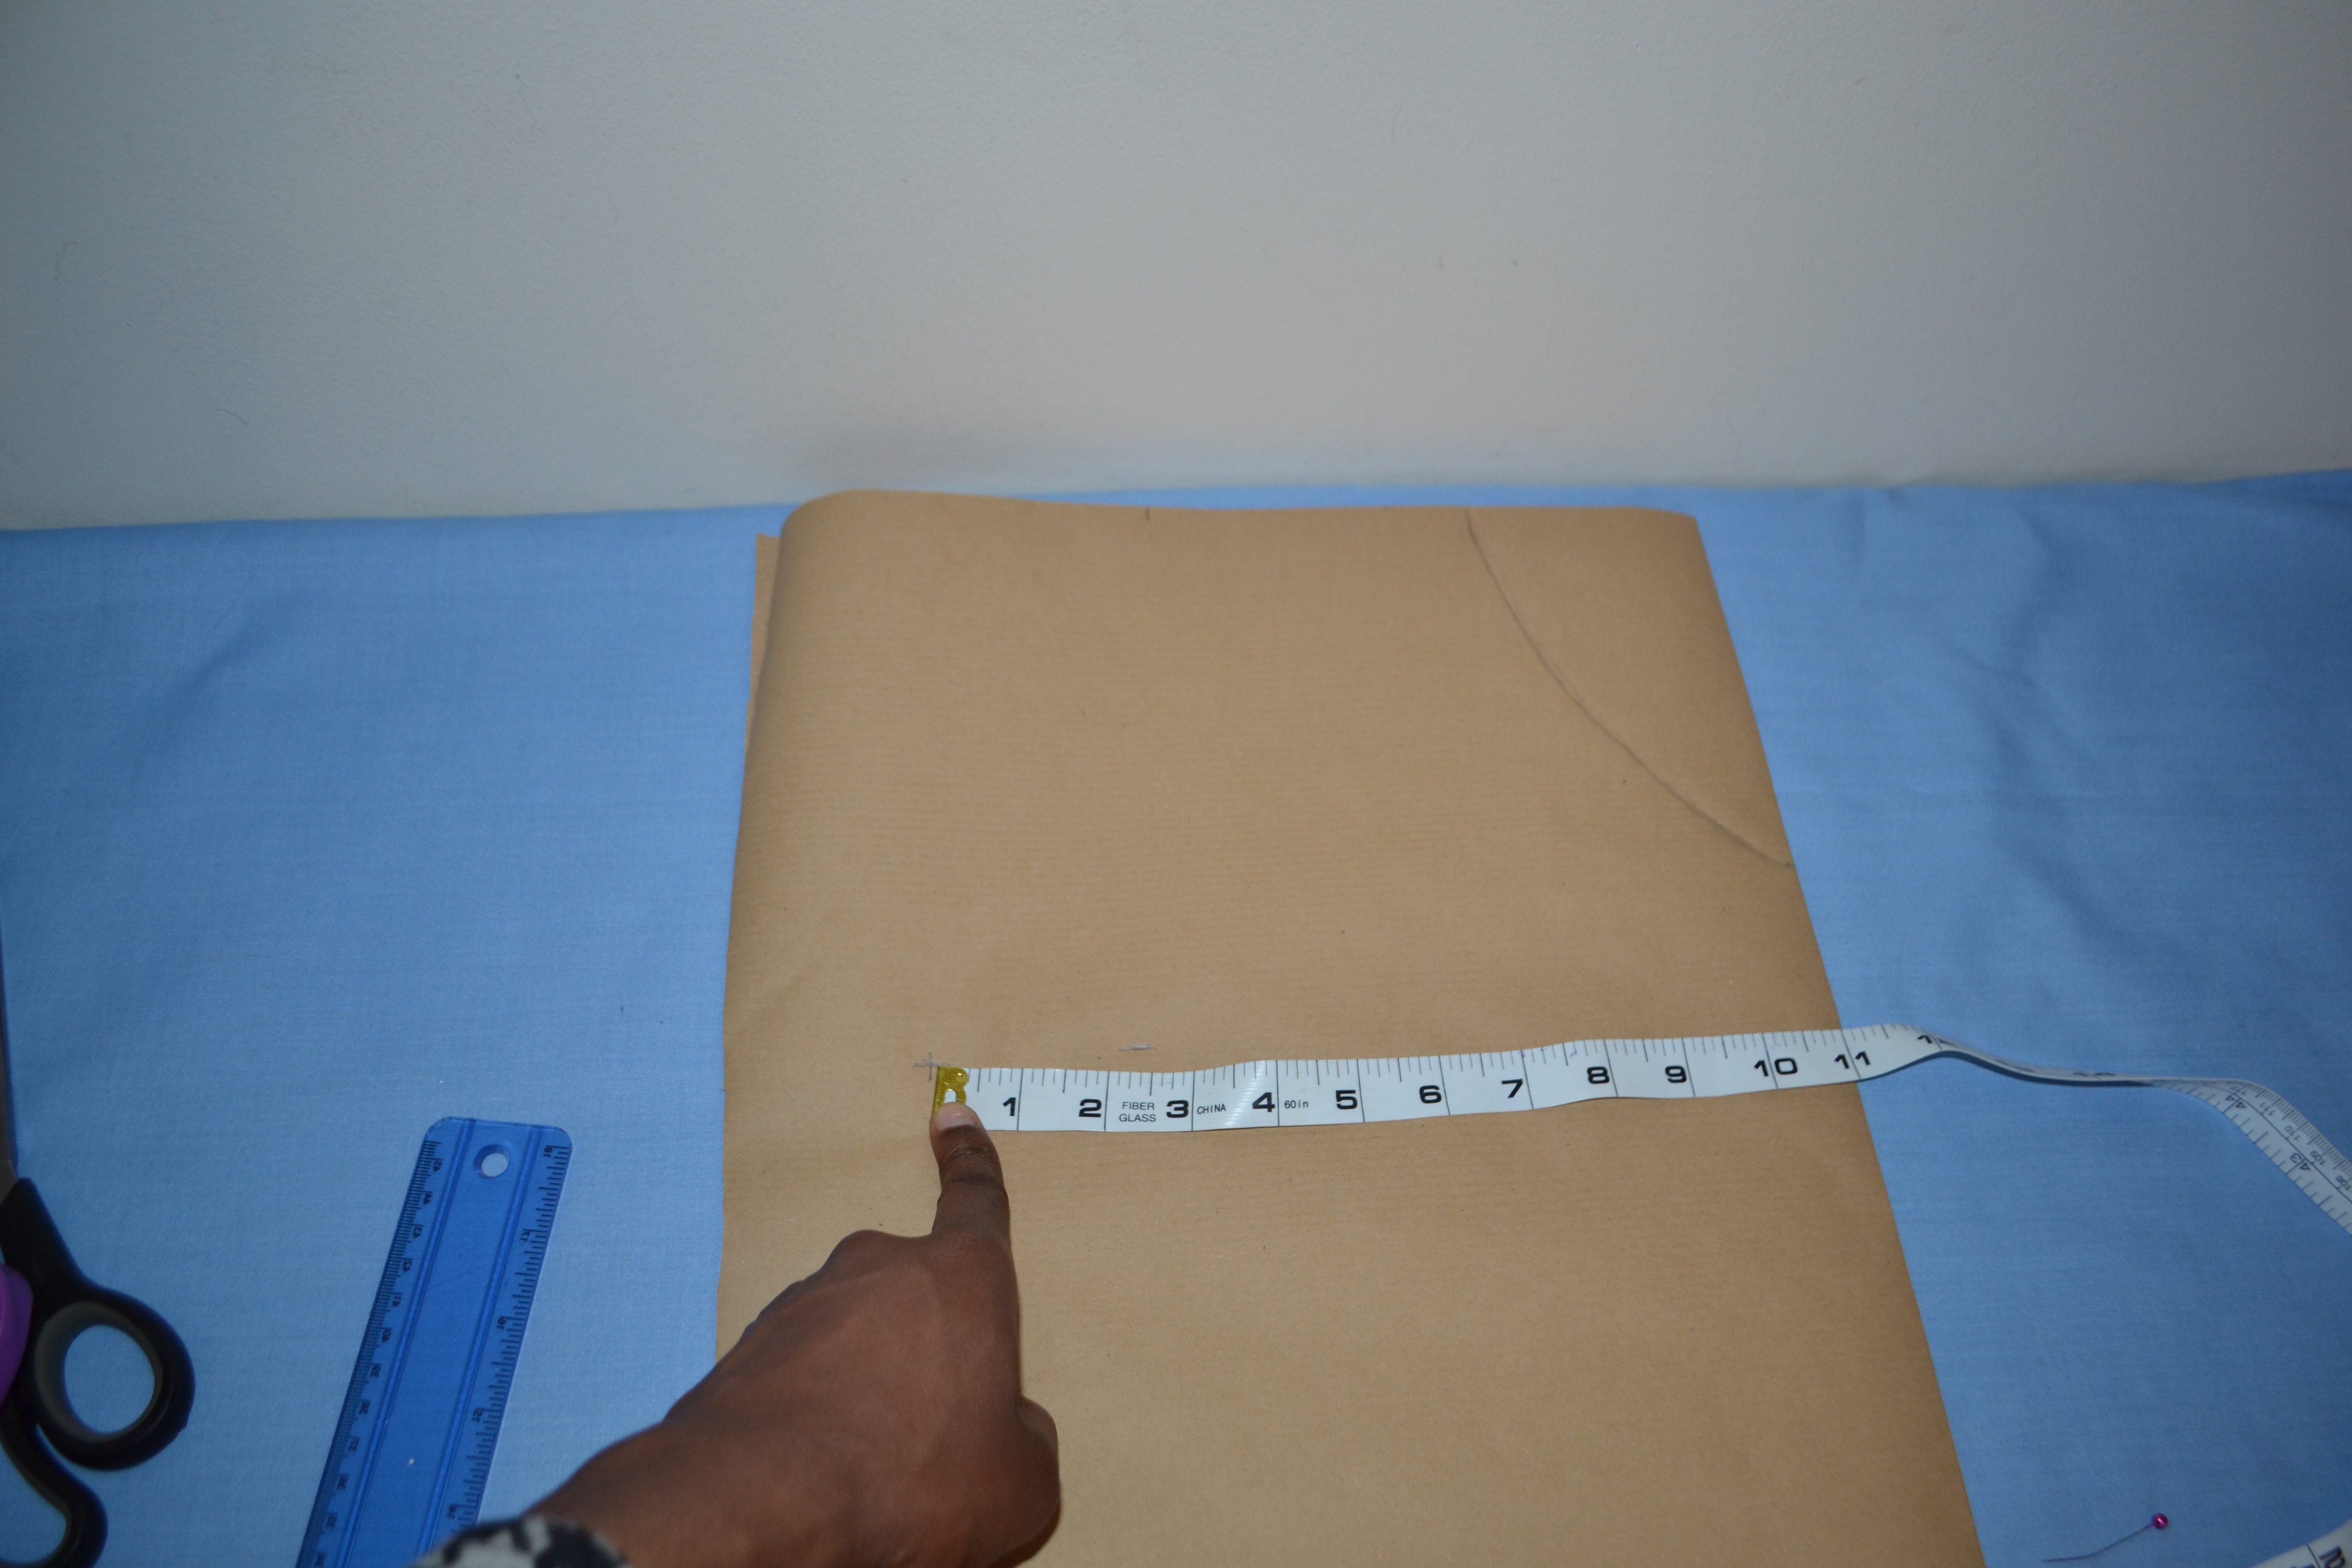
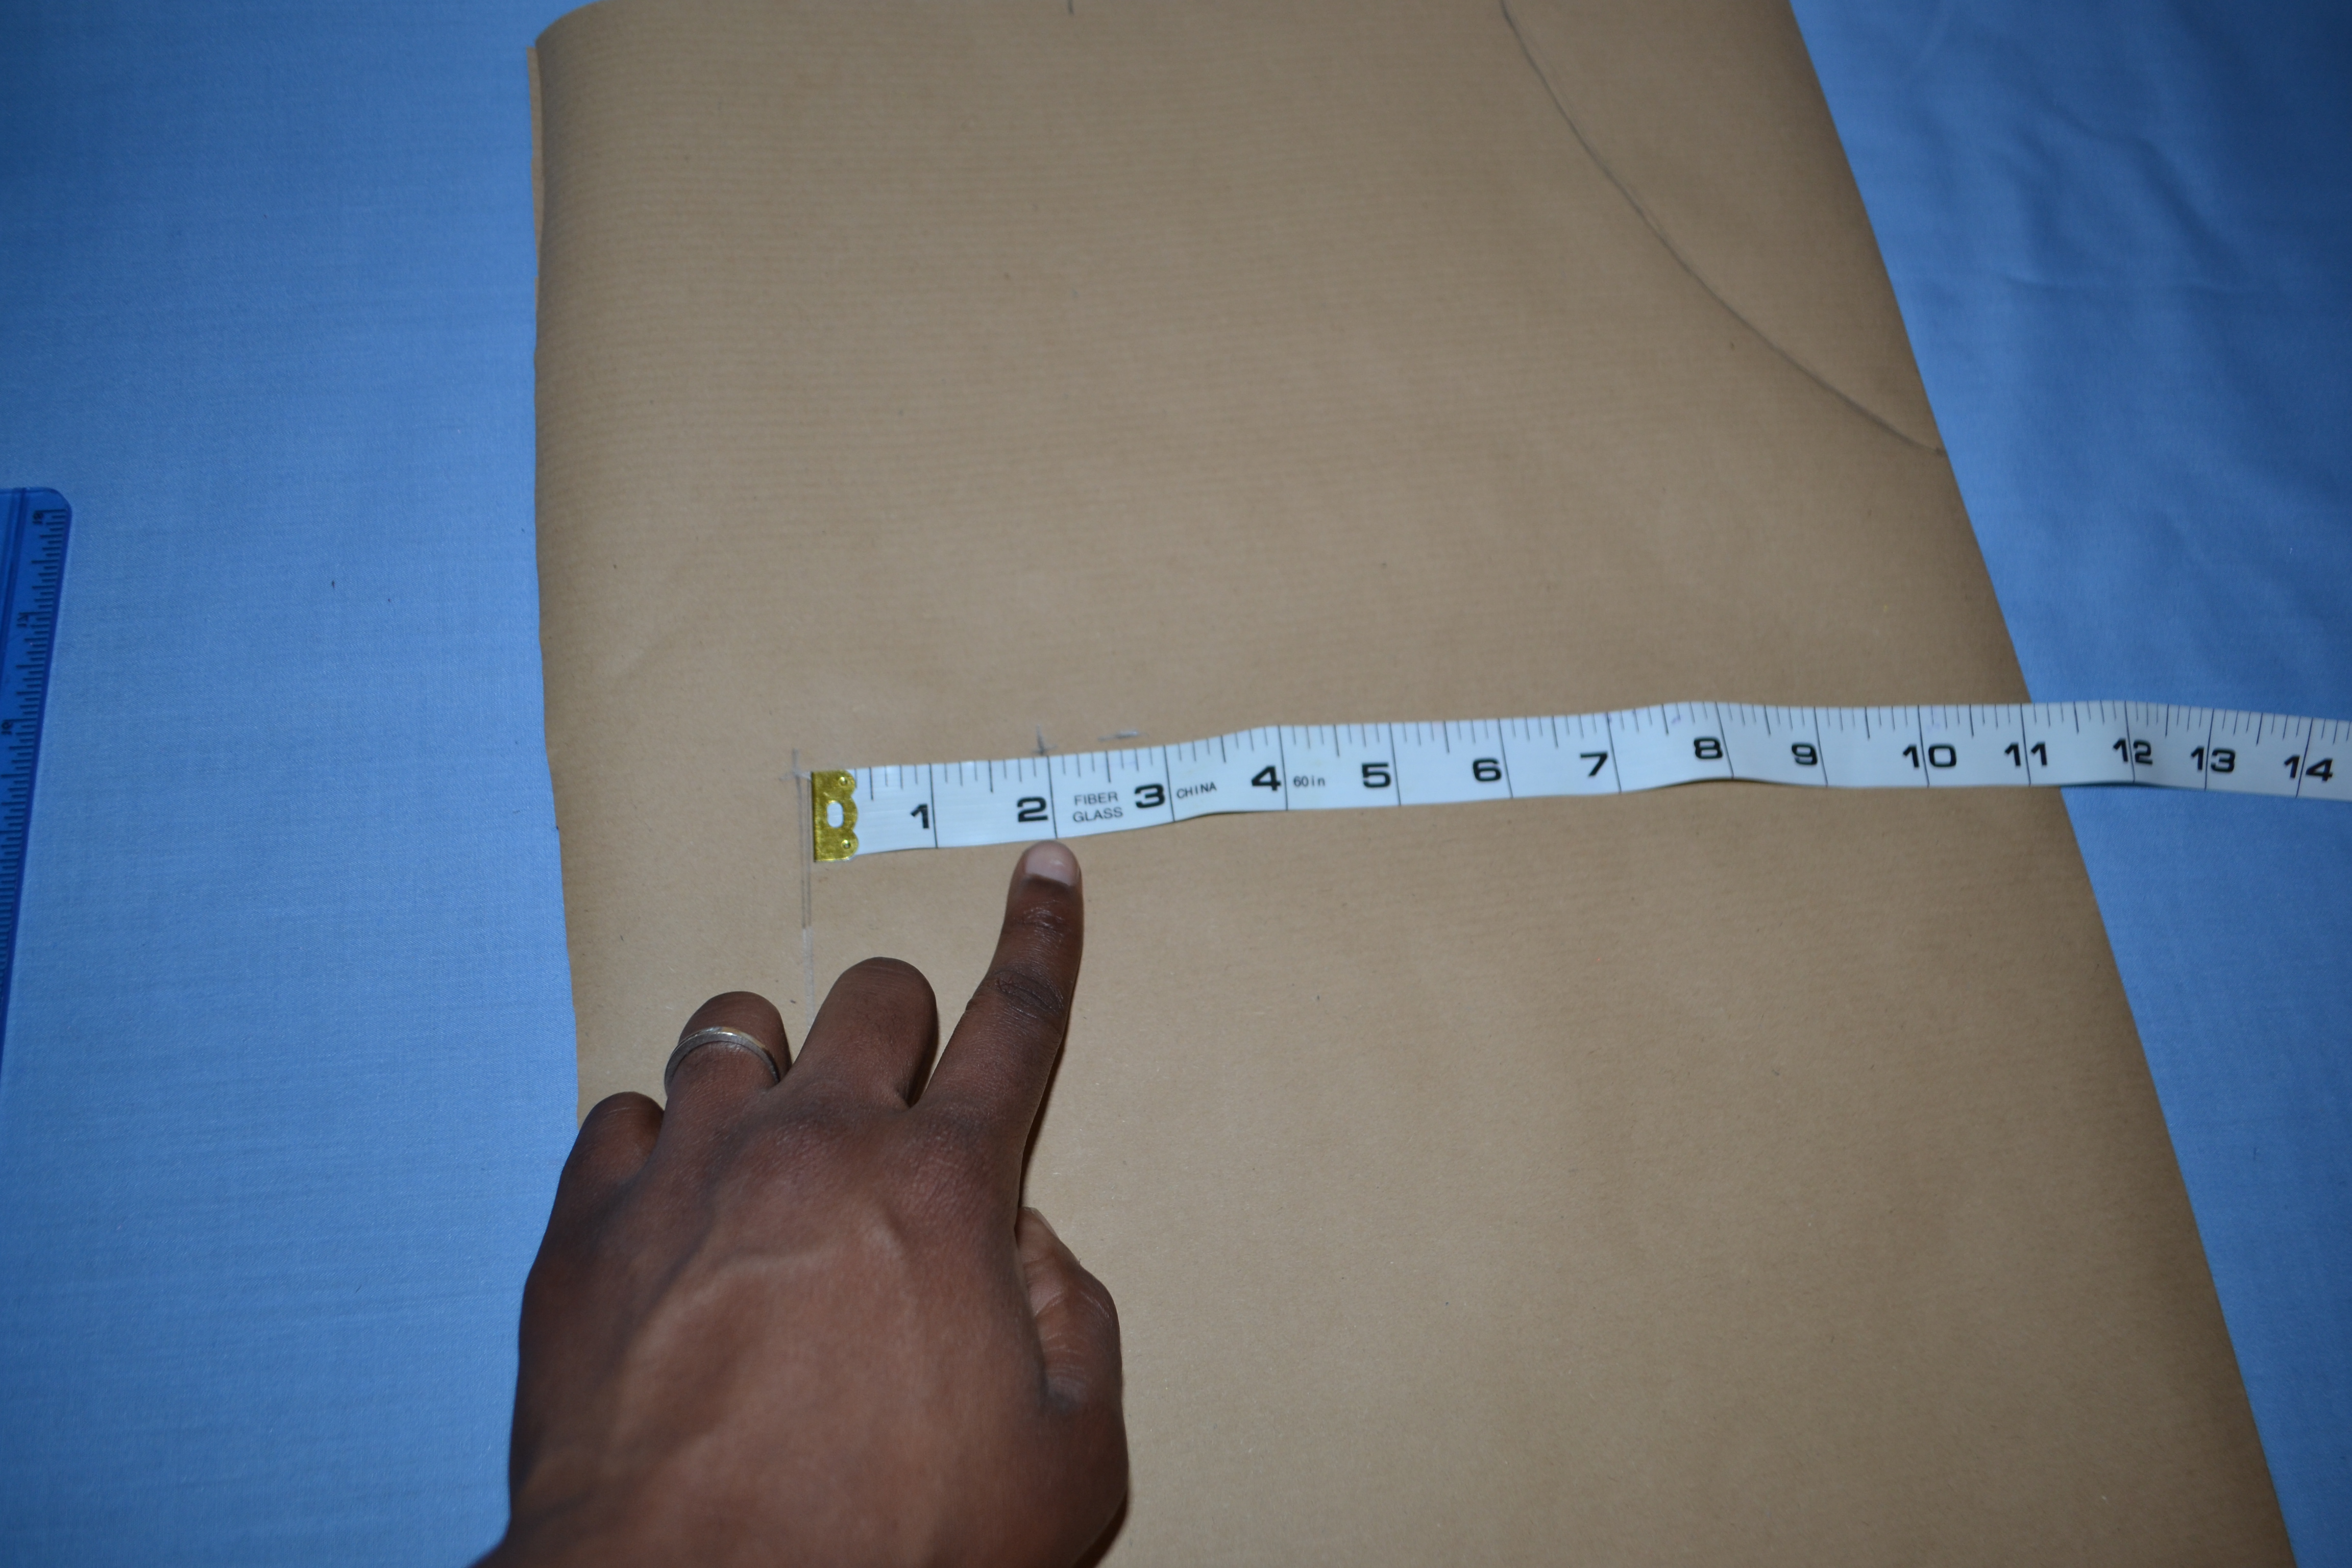
The piece of paper you are using needs to be shoulder to hip measurement long and half the bust measurement +6″ wide. Once you have cut this out, fold it in half and you are ready to start. Note: remember you always work from the centre out, unless otherwise stated.
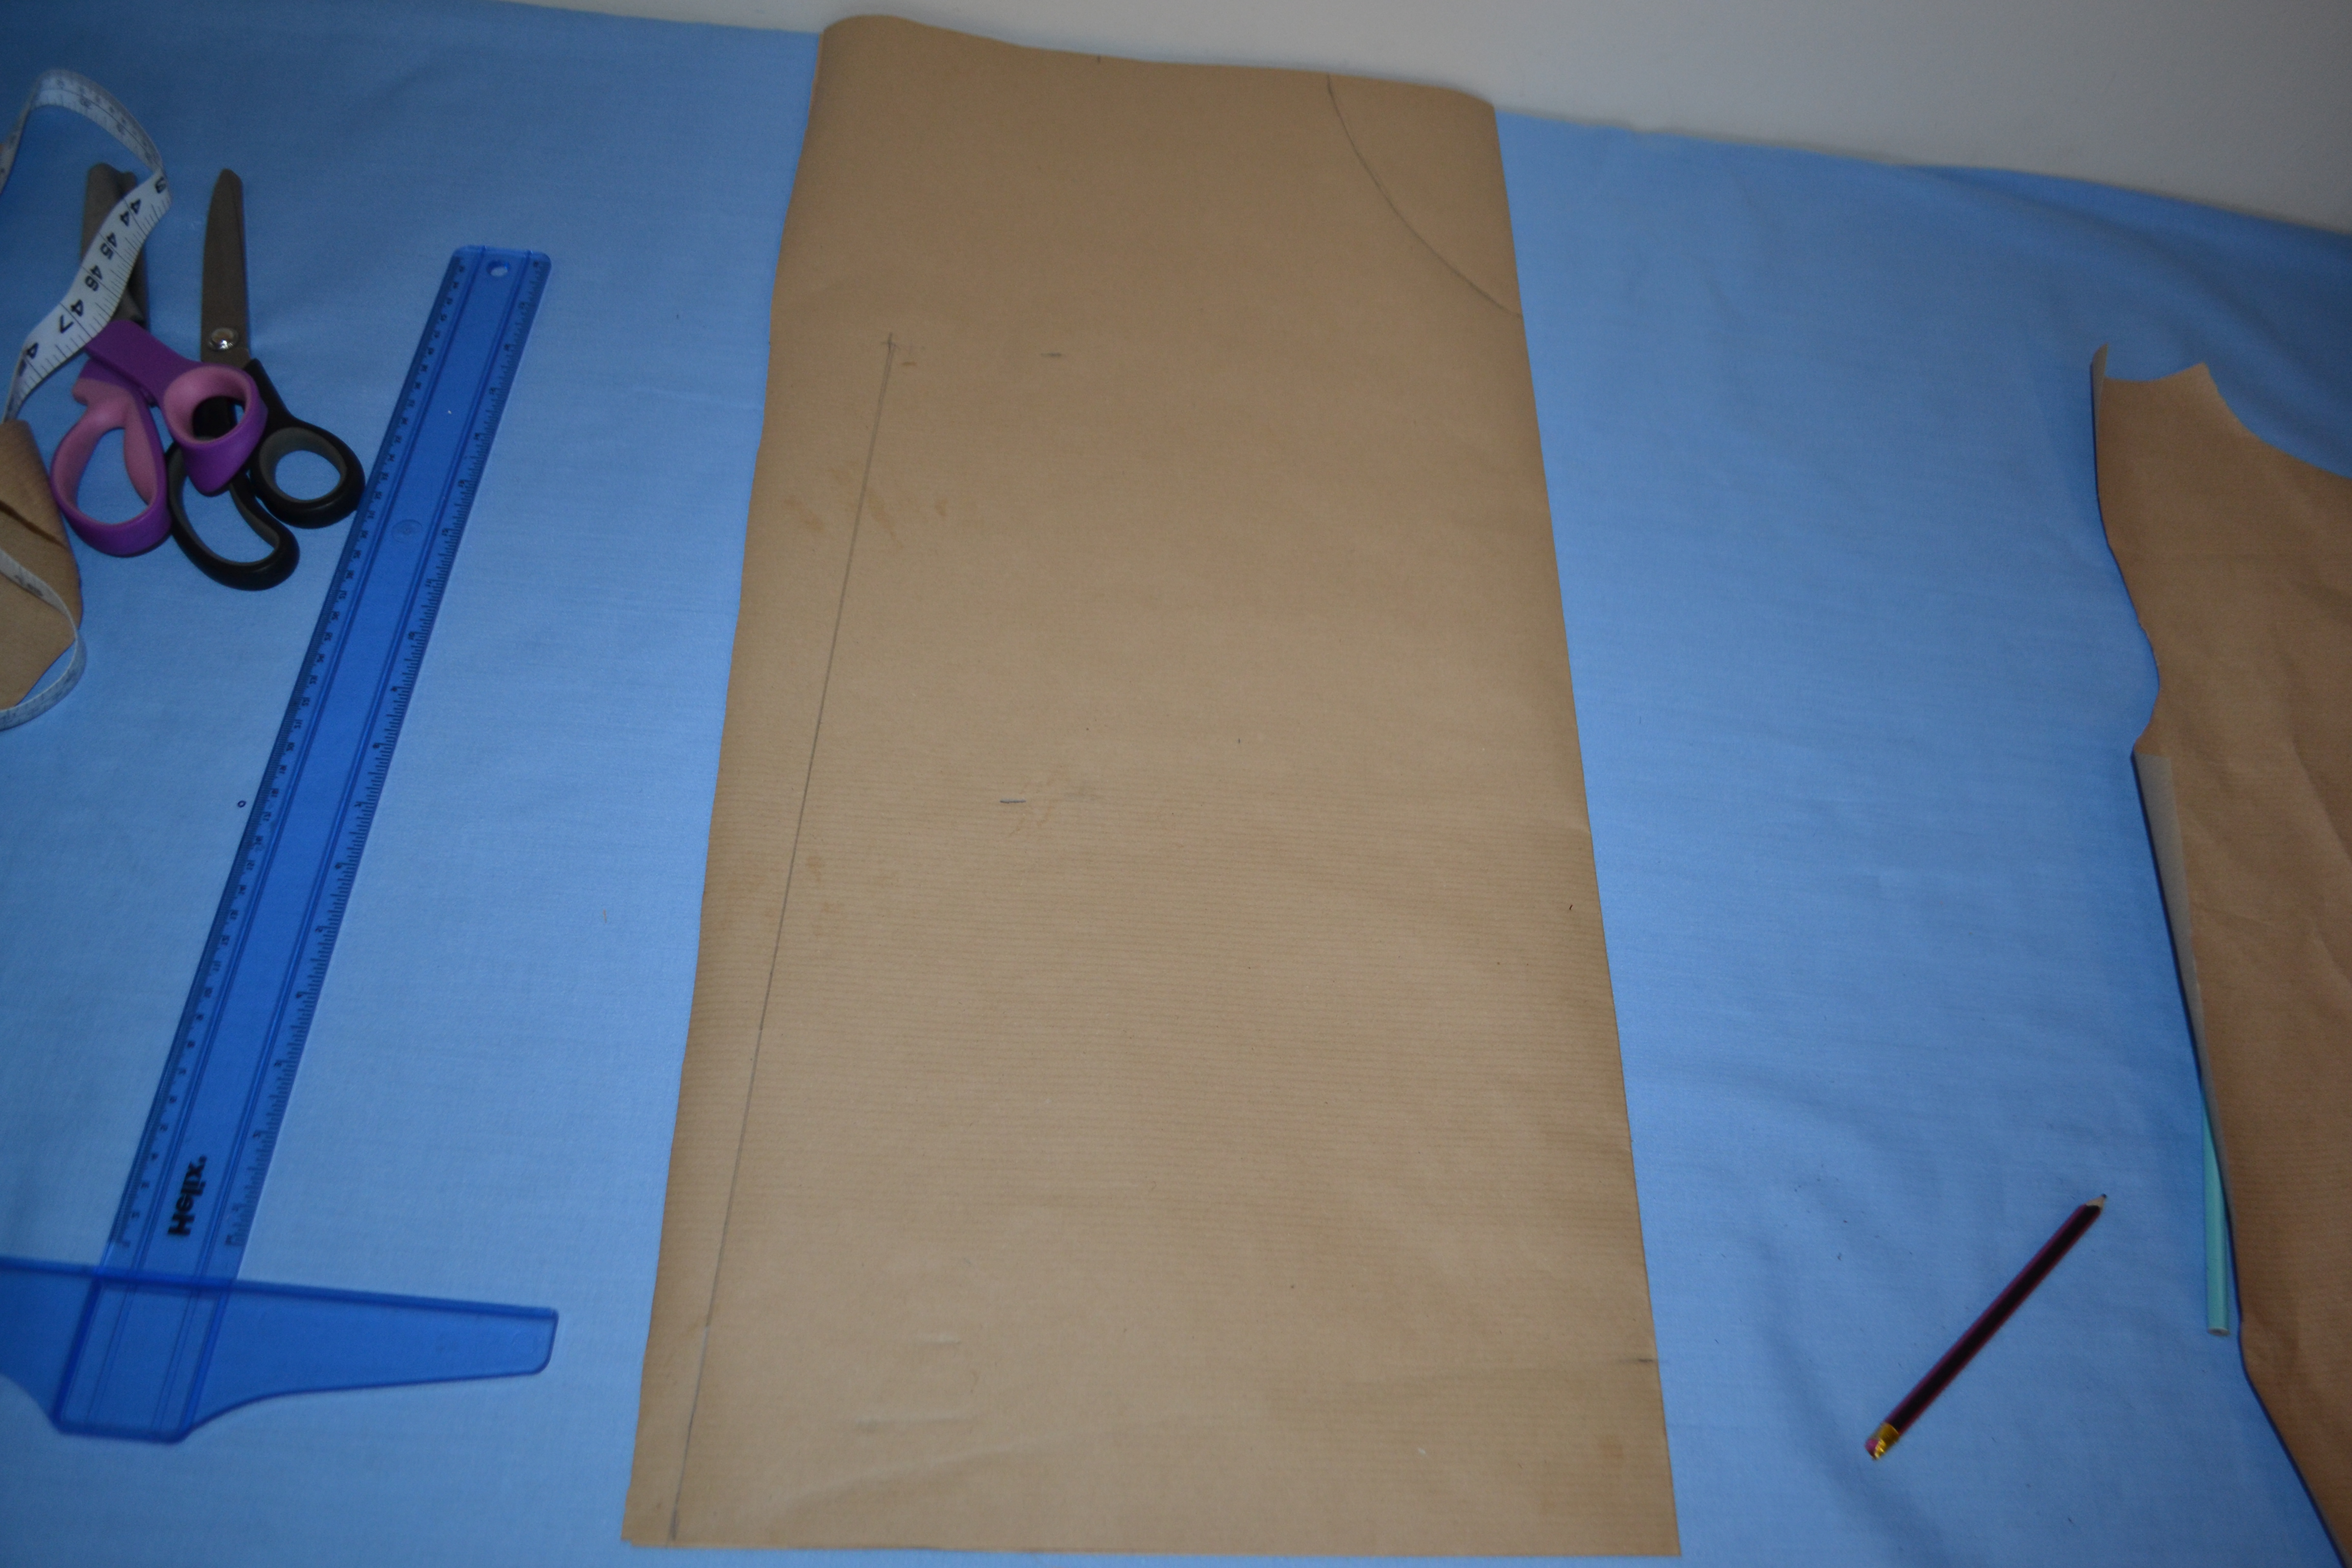
Step 1

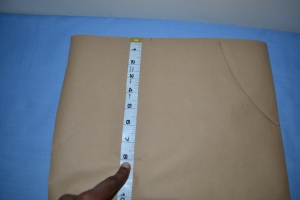
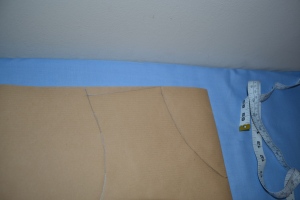
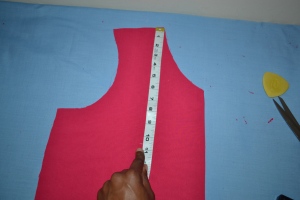
From the top corner, measure 3.5″ along the top edge, then along the folded edge measure down 5.5″ and join these two marks with a rounded semi “v”; this is your front neck hole. Working again at the top edge mark half your back measurement+ 3/8″

DSC_1019


Step 2; place the top of your tape on the top edge of the paper measure down 7″ and mark. then mark your vertical measurements+0.5″ (shoulder to waist and shoulder to hips)

DSC_1020 DSC_1021

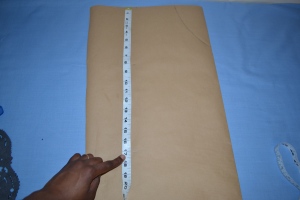
These marks will now serve as reference points, along which you will place your horizontal measurements.

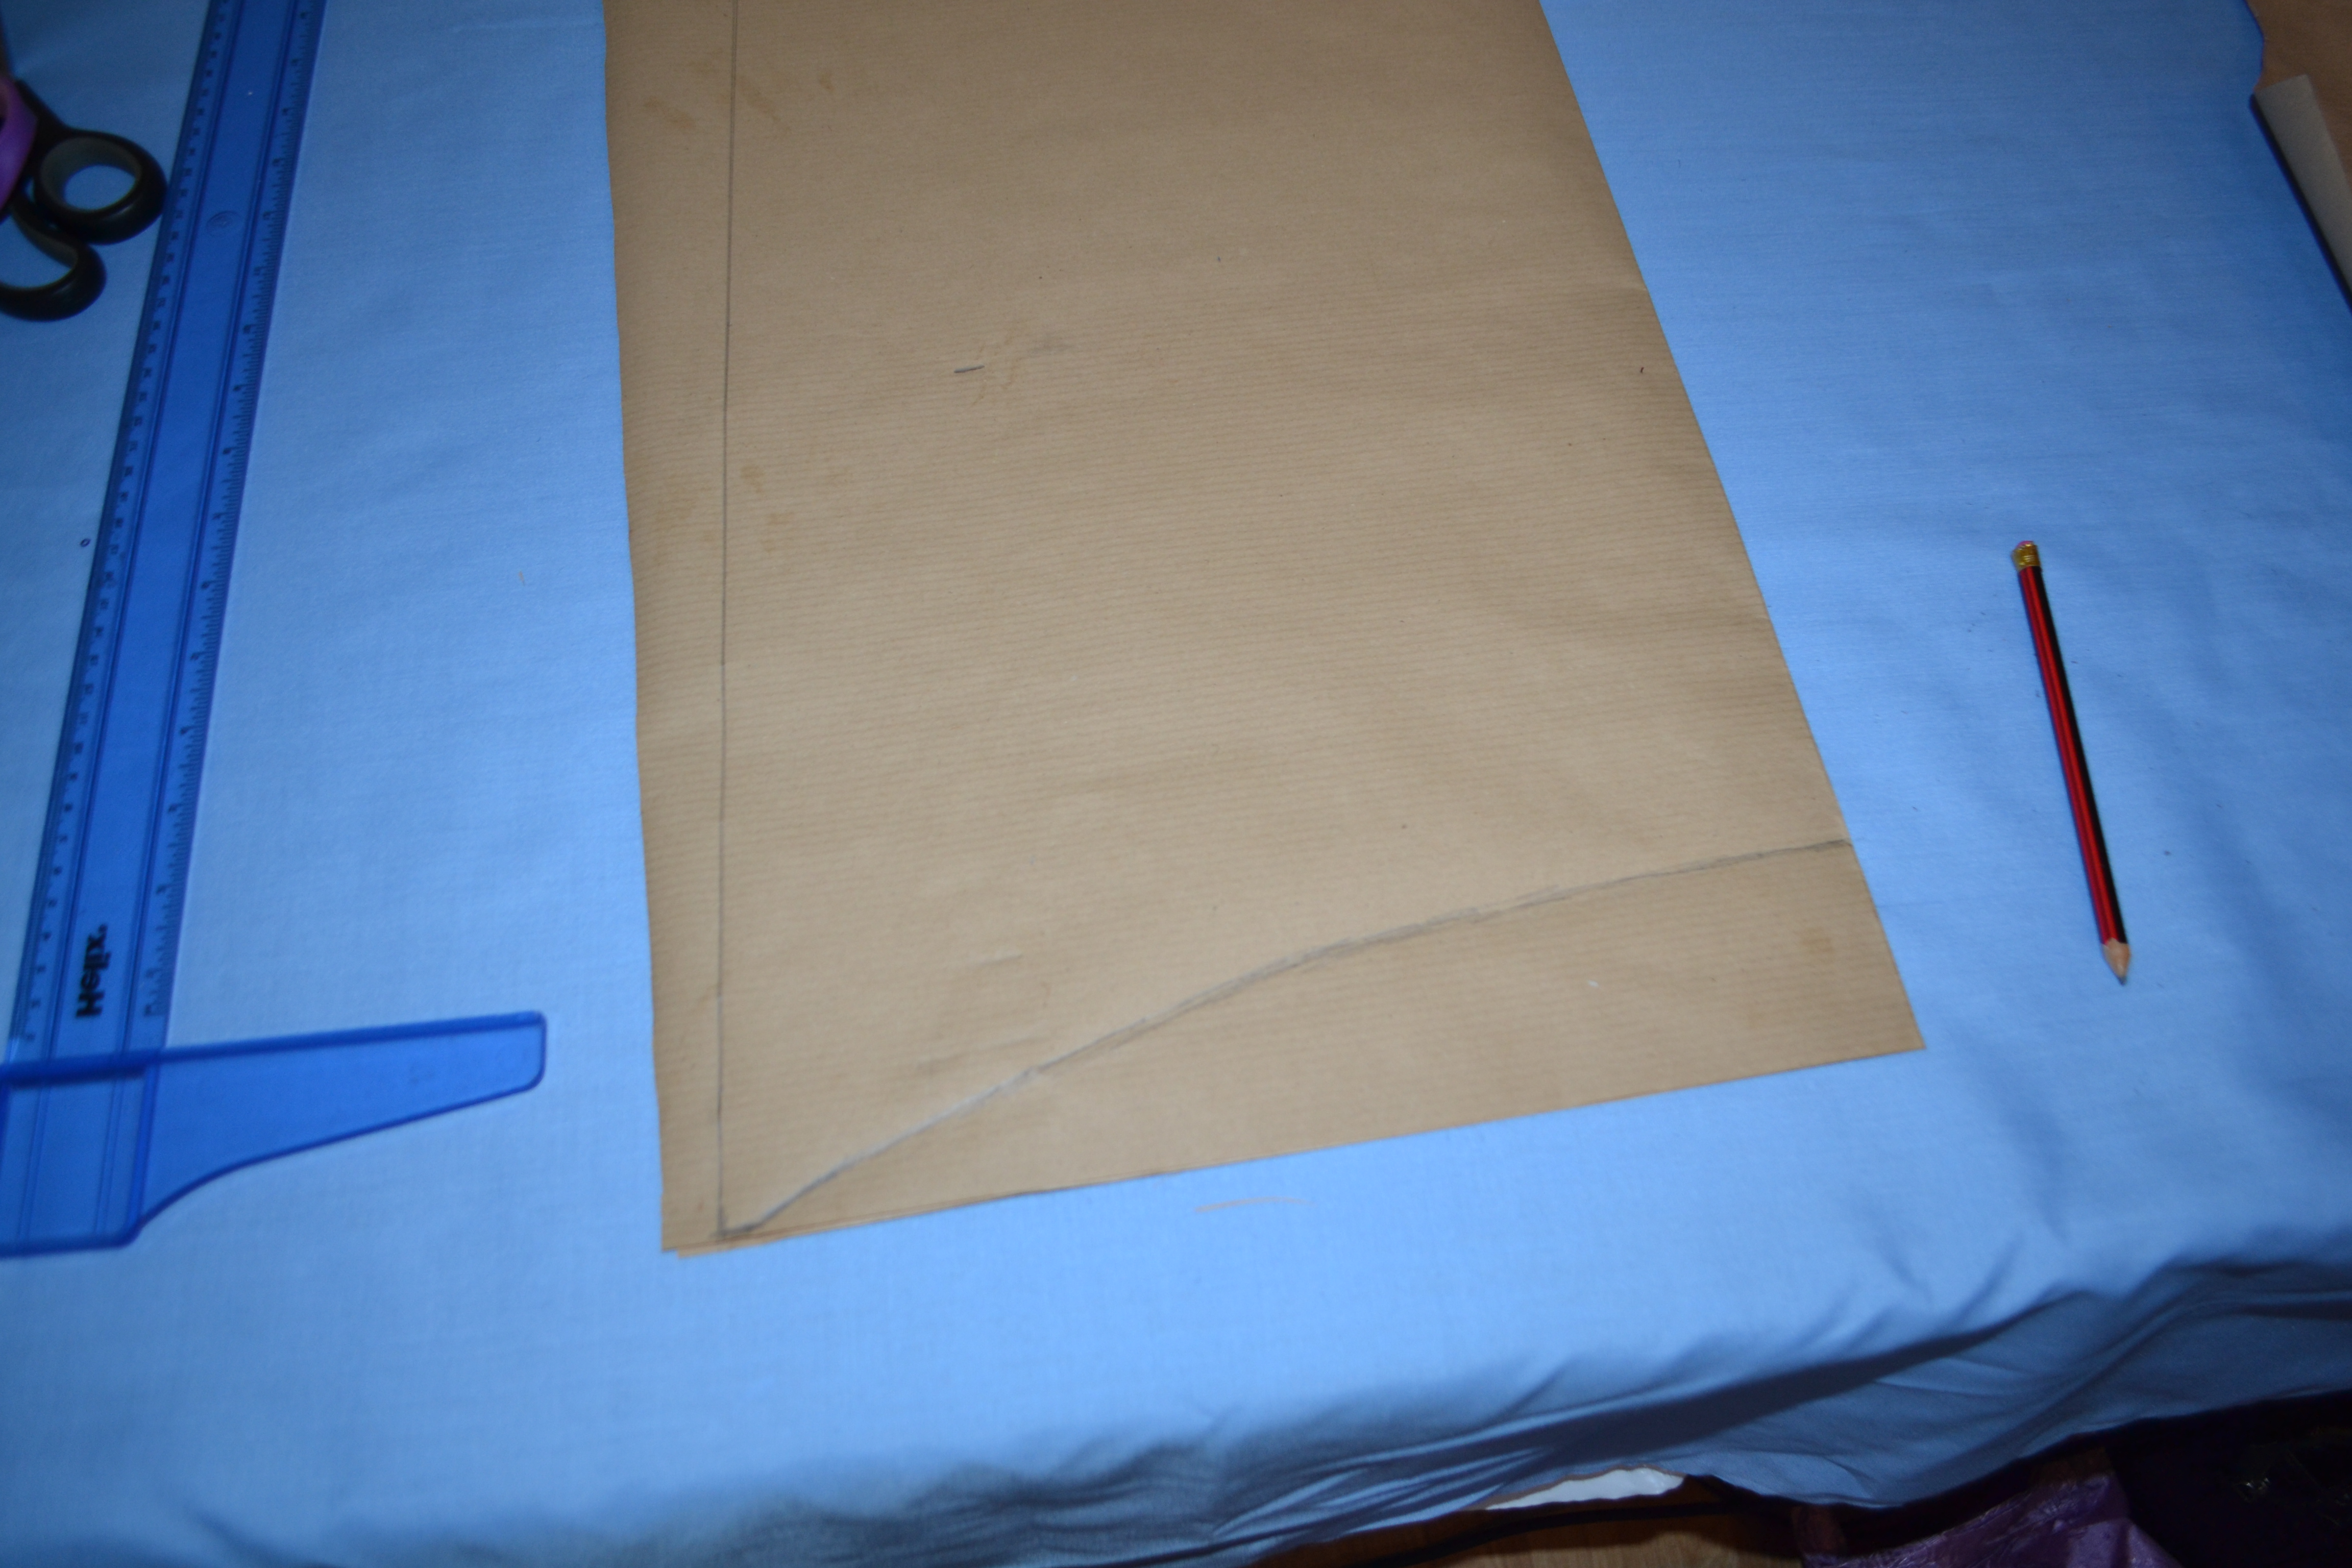
Step 3; along the line of your first reference point (the 7″ down mark) mark a quarter of your bust measurement+2″. Along the last reference point (shoulder to hips, this should actually be the bottom edge of the paper), mark a quarter of your bust measurement+3.5″.

DSC_1025DSC_1026


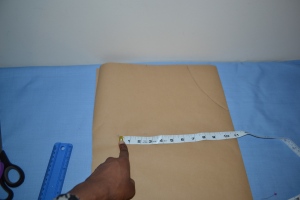
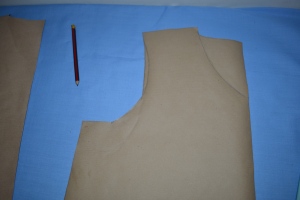
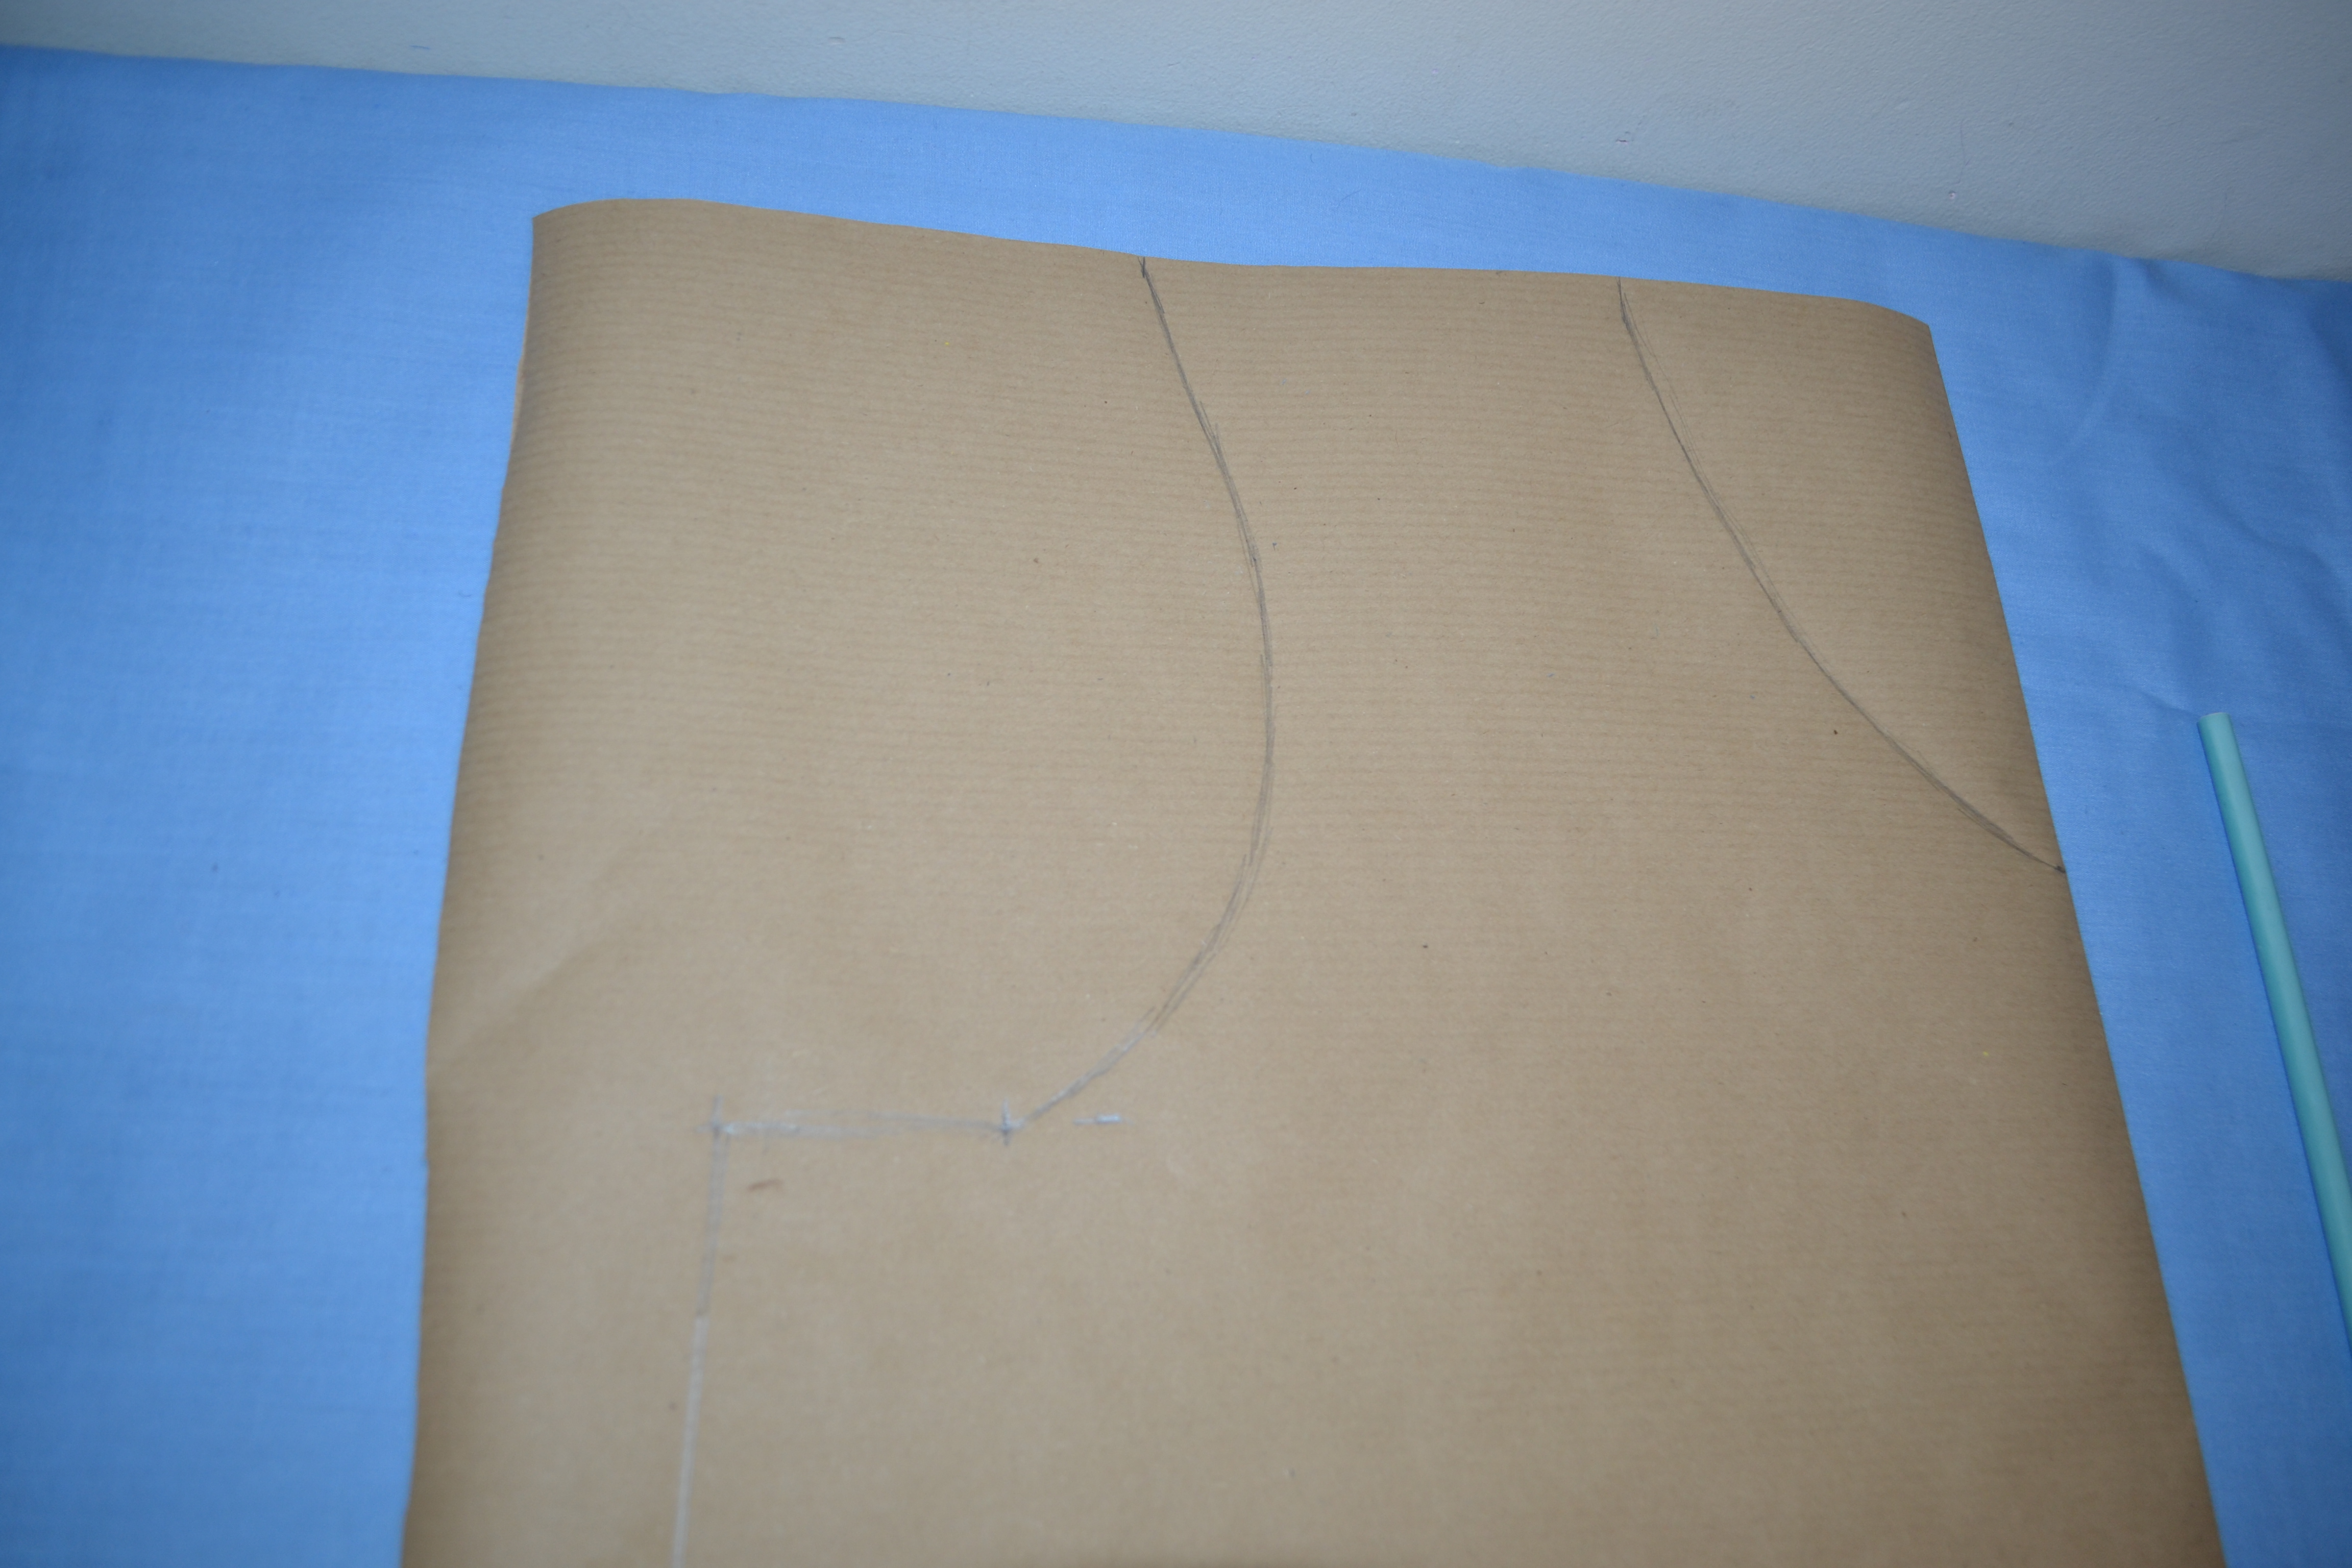
Step 4; From the bottom centre corner, measure up 2.5″ , from here curve a line down that meets with the mark along the bottom edge. Now join the horizontal measurement marks with a straight line; it should look like this.

DSC_1028 DSC_1029

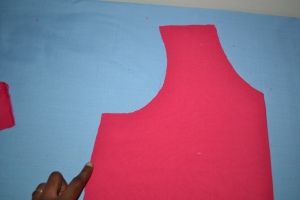
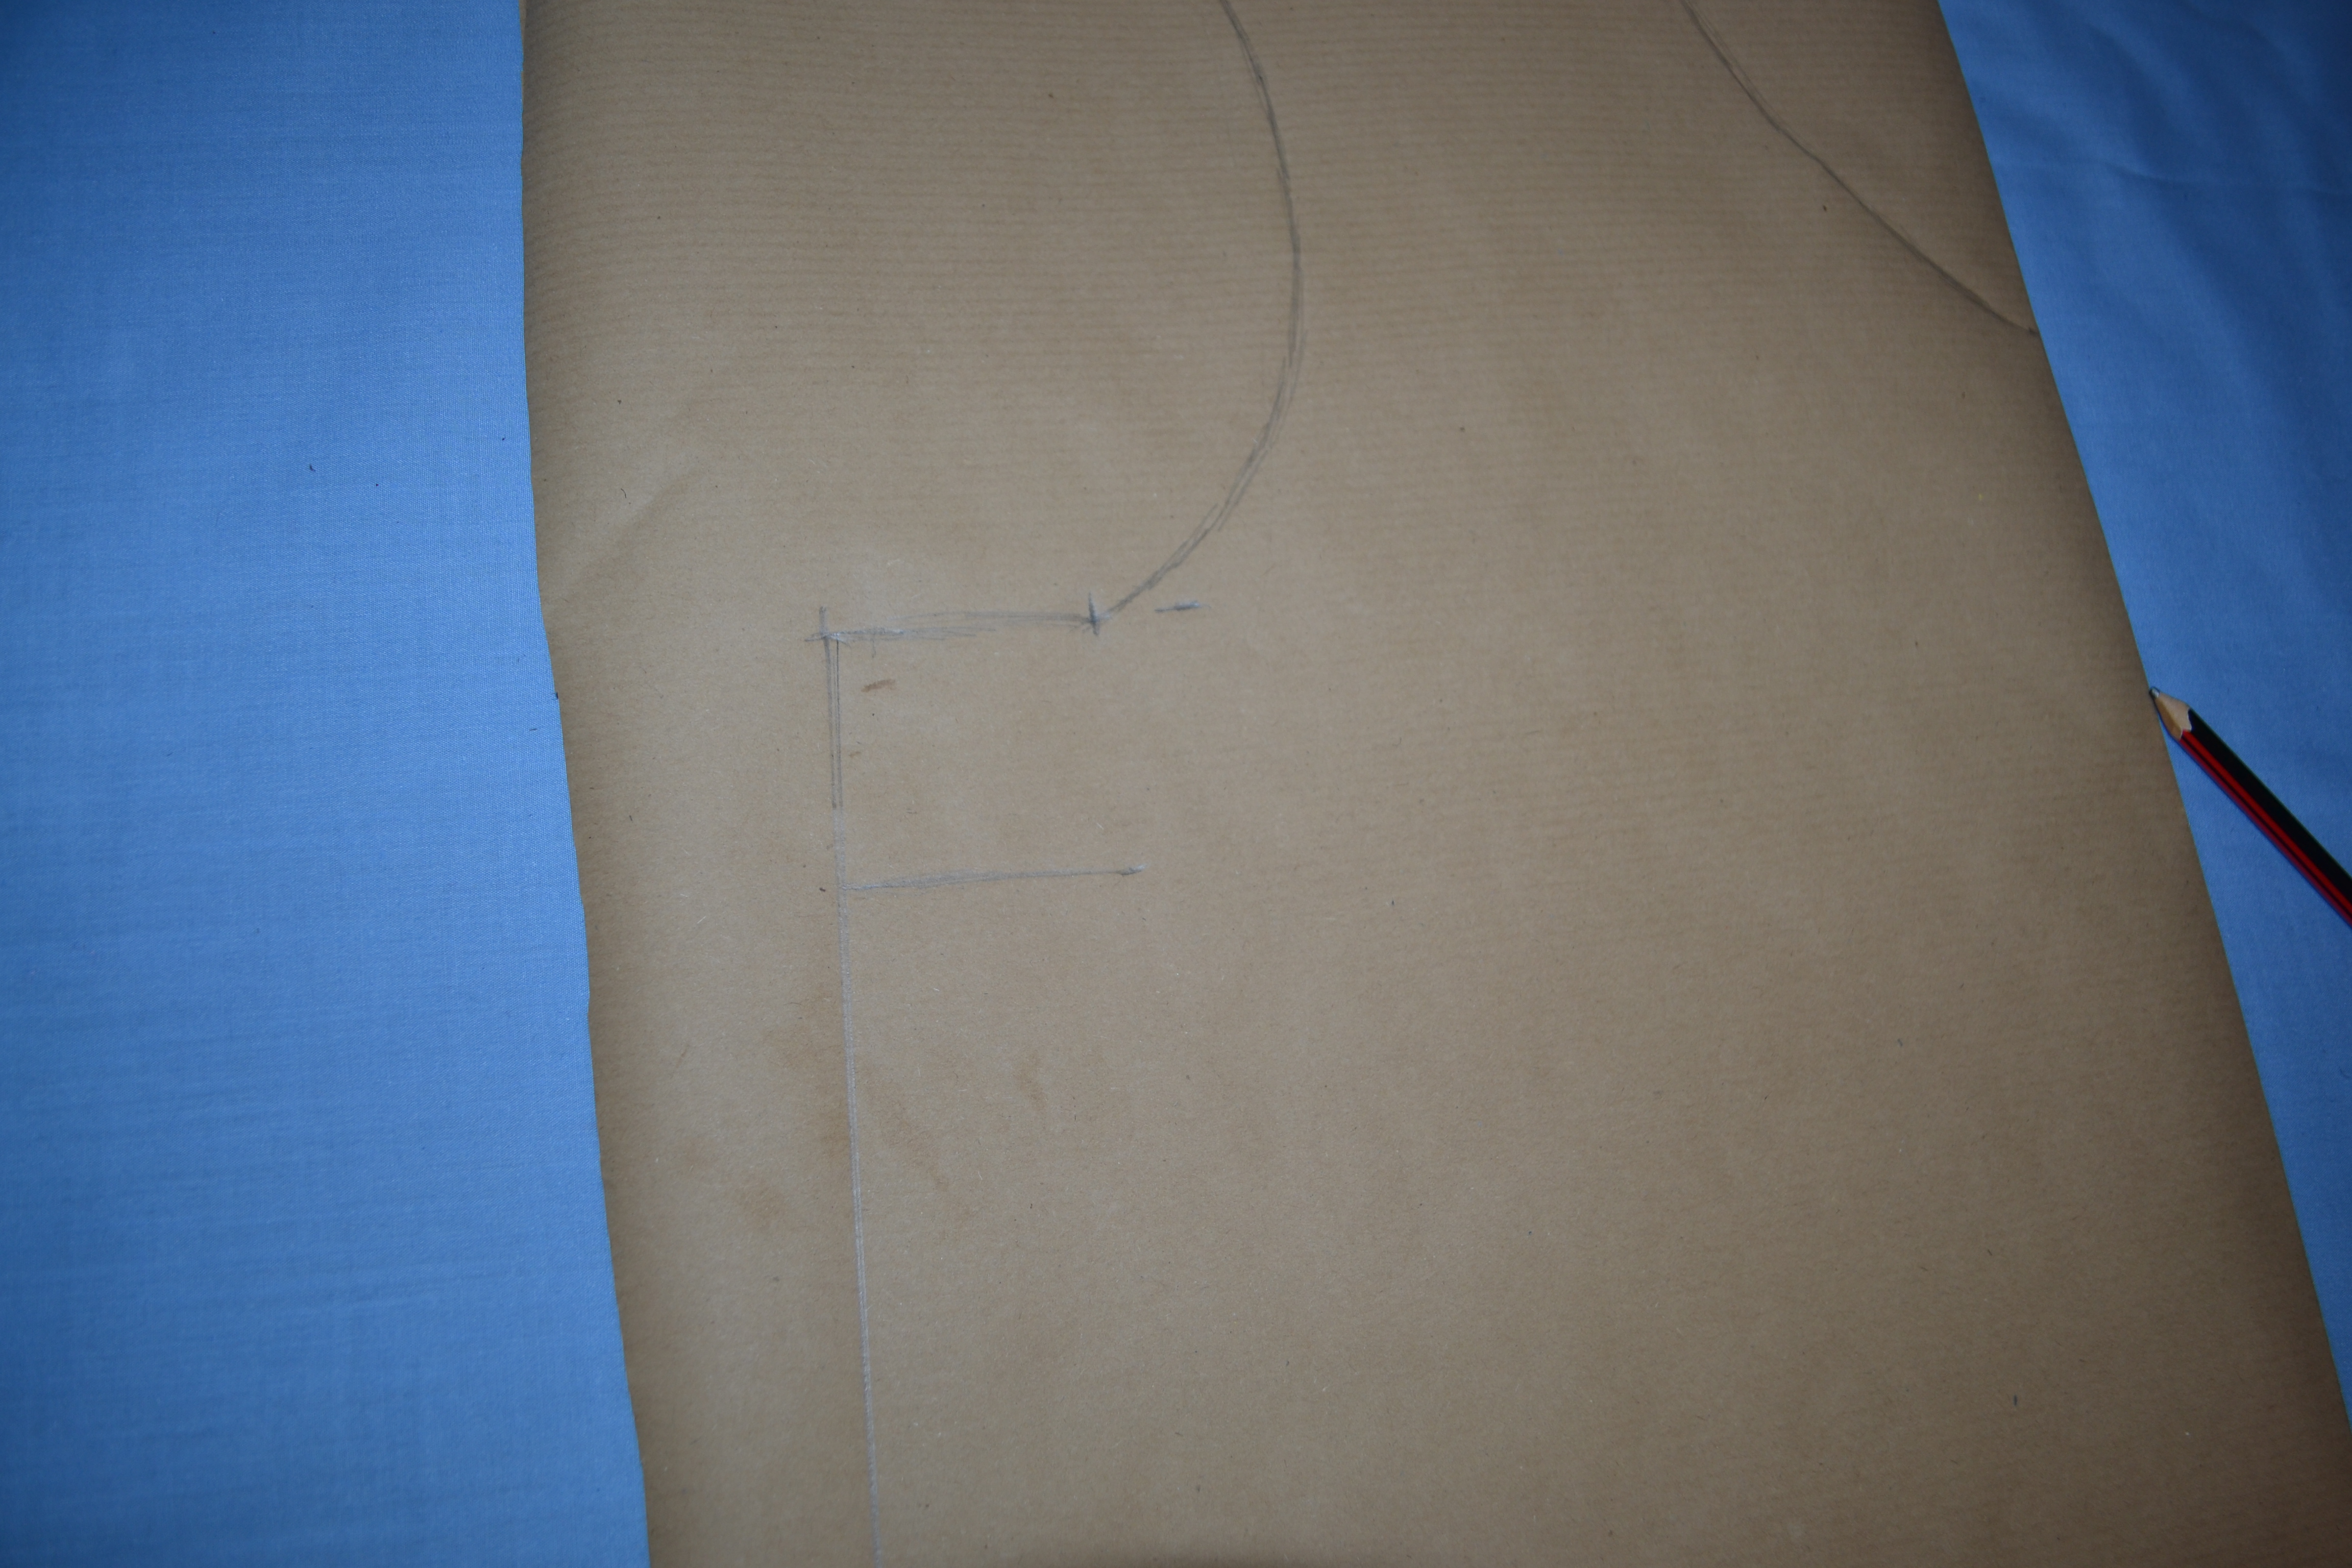
Step 5; At the top of the straight line draw a straight line 2″ in towards the centre, then from the furthest marking from the centre, along the top edge, draw a deep curve the joins the 2″ line you just made. It should now resemble the second picture.

DSC_1030 DSC_1031


mark 0.5″ along the top of the curve and slant a straight line that meets the corner of the neck hole; this will form your shoulder slope, like so

DSC_1033

Step 6; return to the 2″ line you drew and repeat the same, exactly 2″ below it

DSC_1035

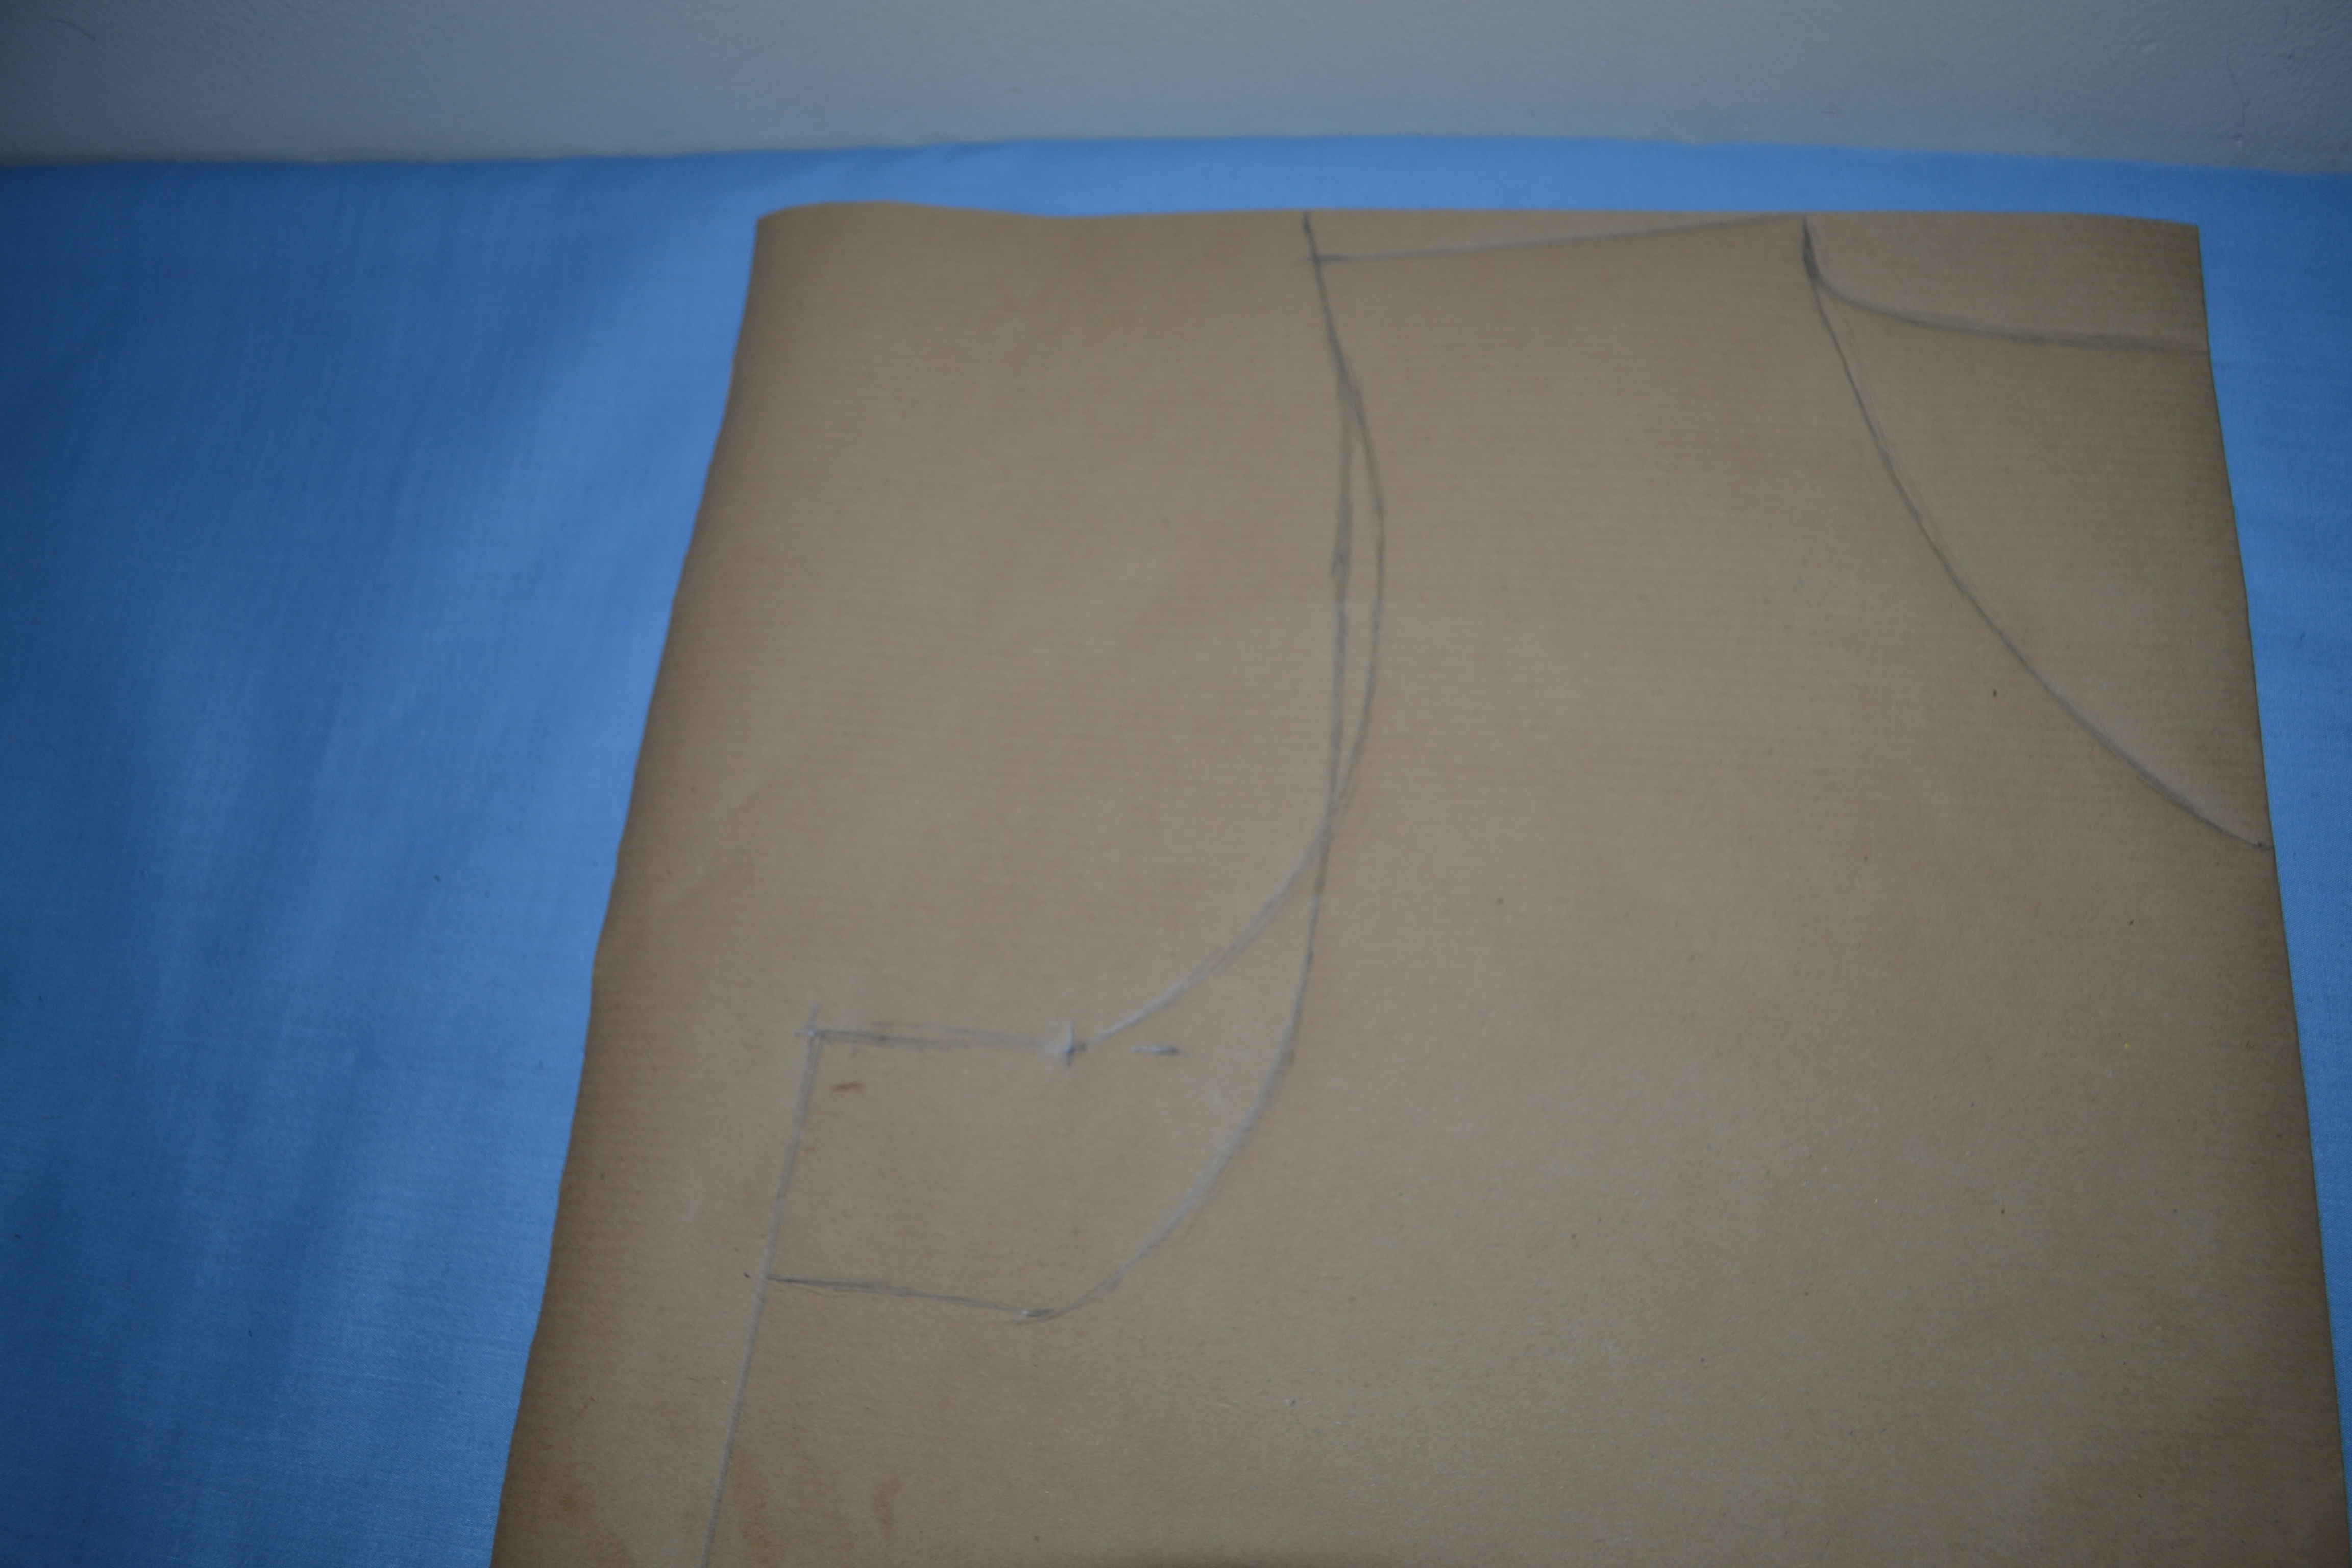
Step 7; back at the shoulder slope (outer edge) draw a shallower curve that meets the second 2″ line.  Inside the neck hole, draw a shallower curve that will form the back neck hole, this really shouldn’t be more than 2″ deep. return to the

DSC_1038DSC_1037


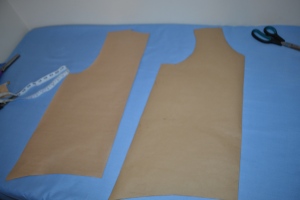
Step 8; You are now ready to cut! please pay close attention to this statement; only cut around all outer lines. This is because you are cutting front and back pieces together and not all lines are the same, as you can see.

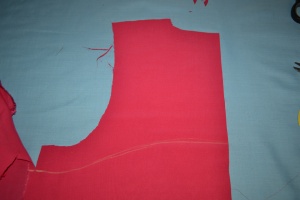
when you have cut out your pieces it should look like this;

DSC_1040


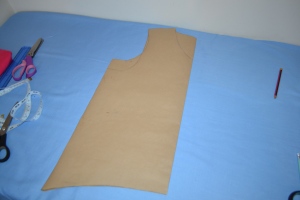
cut along the fold, and separate the pieces. Transfer the armhole markings unto the back piece, from the front piece, cut this out, then cut the front neck hole, erase the bottom half of the back armhole curve and cut the deeper front armhole curve.

DSC_1042 DSC_1043 DSC_1044

Templates done and ready to be used. The back piece has the higher neck line and lower armhole, mark them accordingly so you don’t get confused. Believe me, this is a very easy and annoying mistake to make.

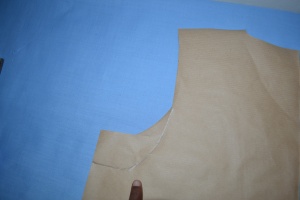
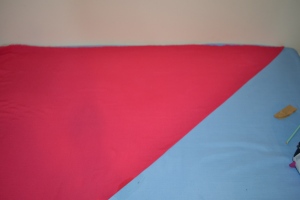
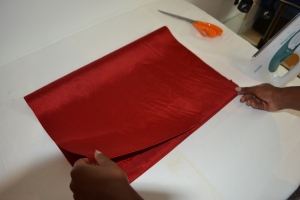
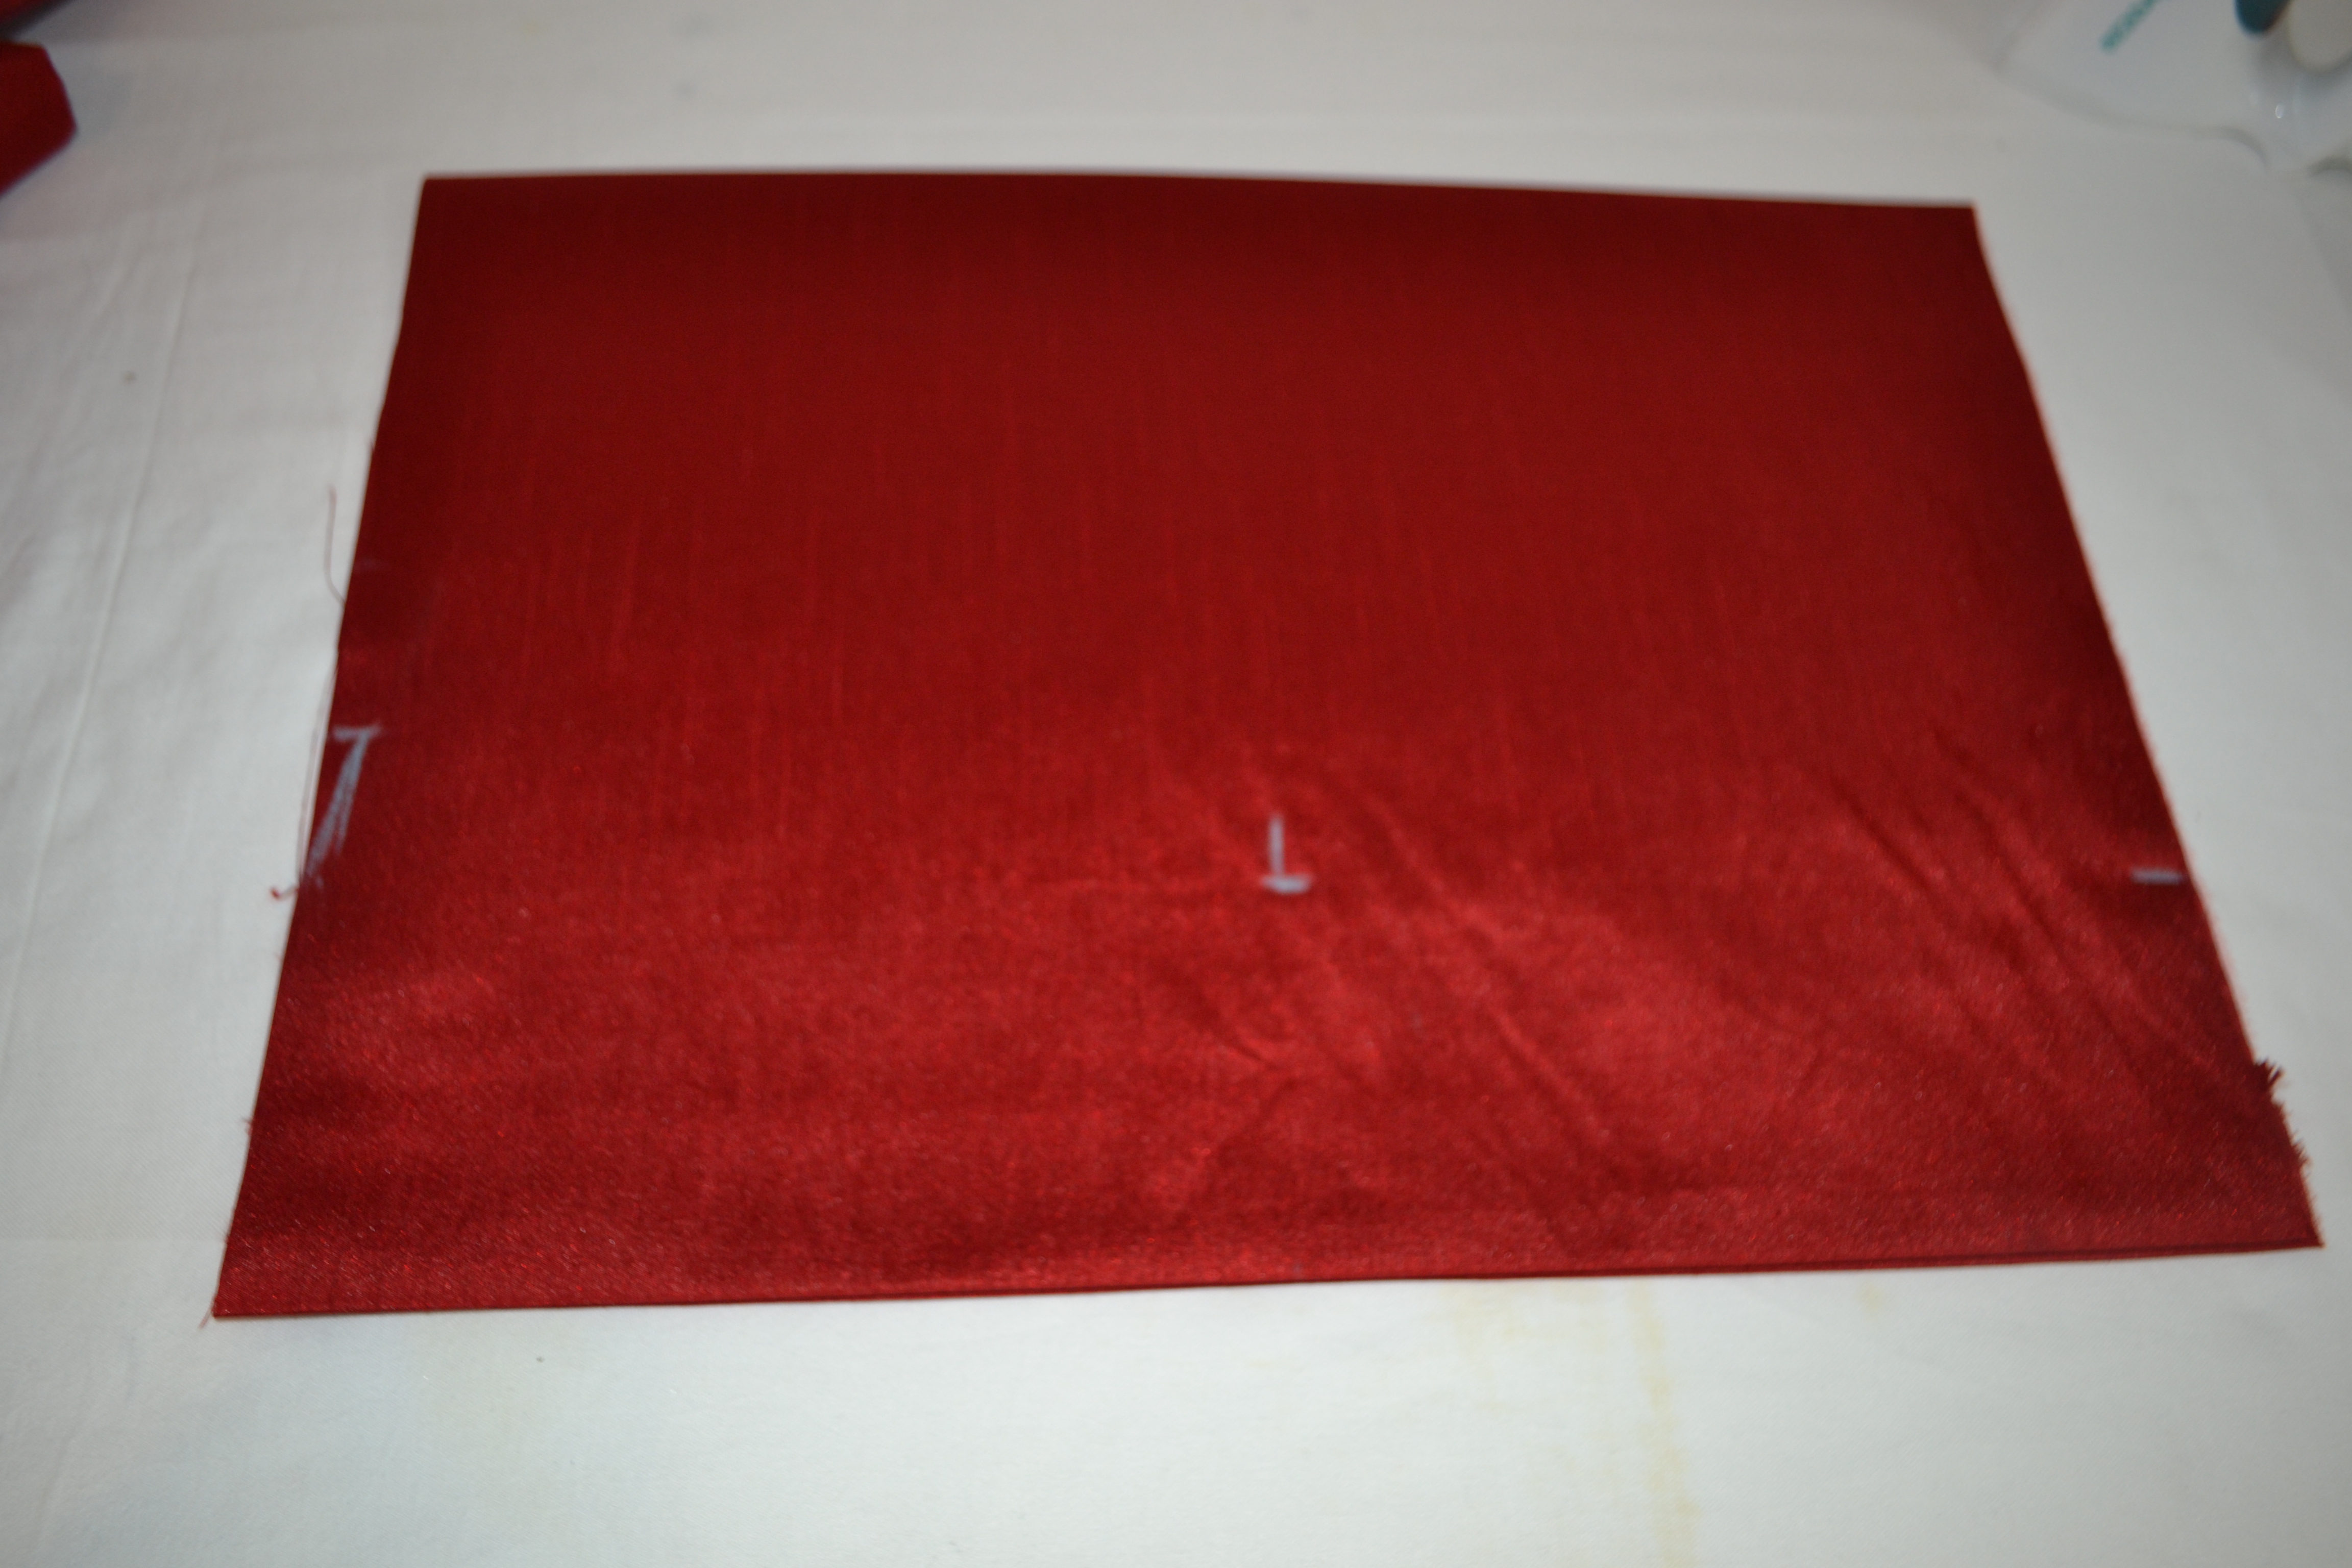
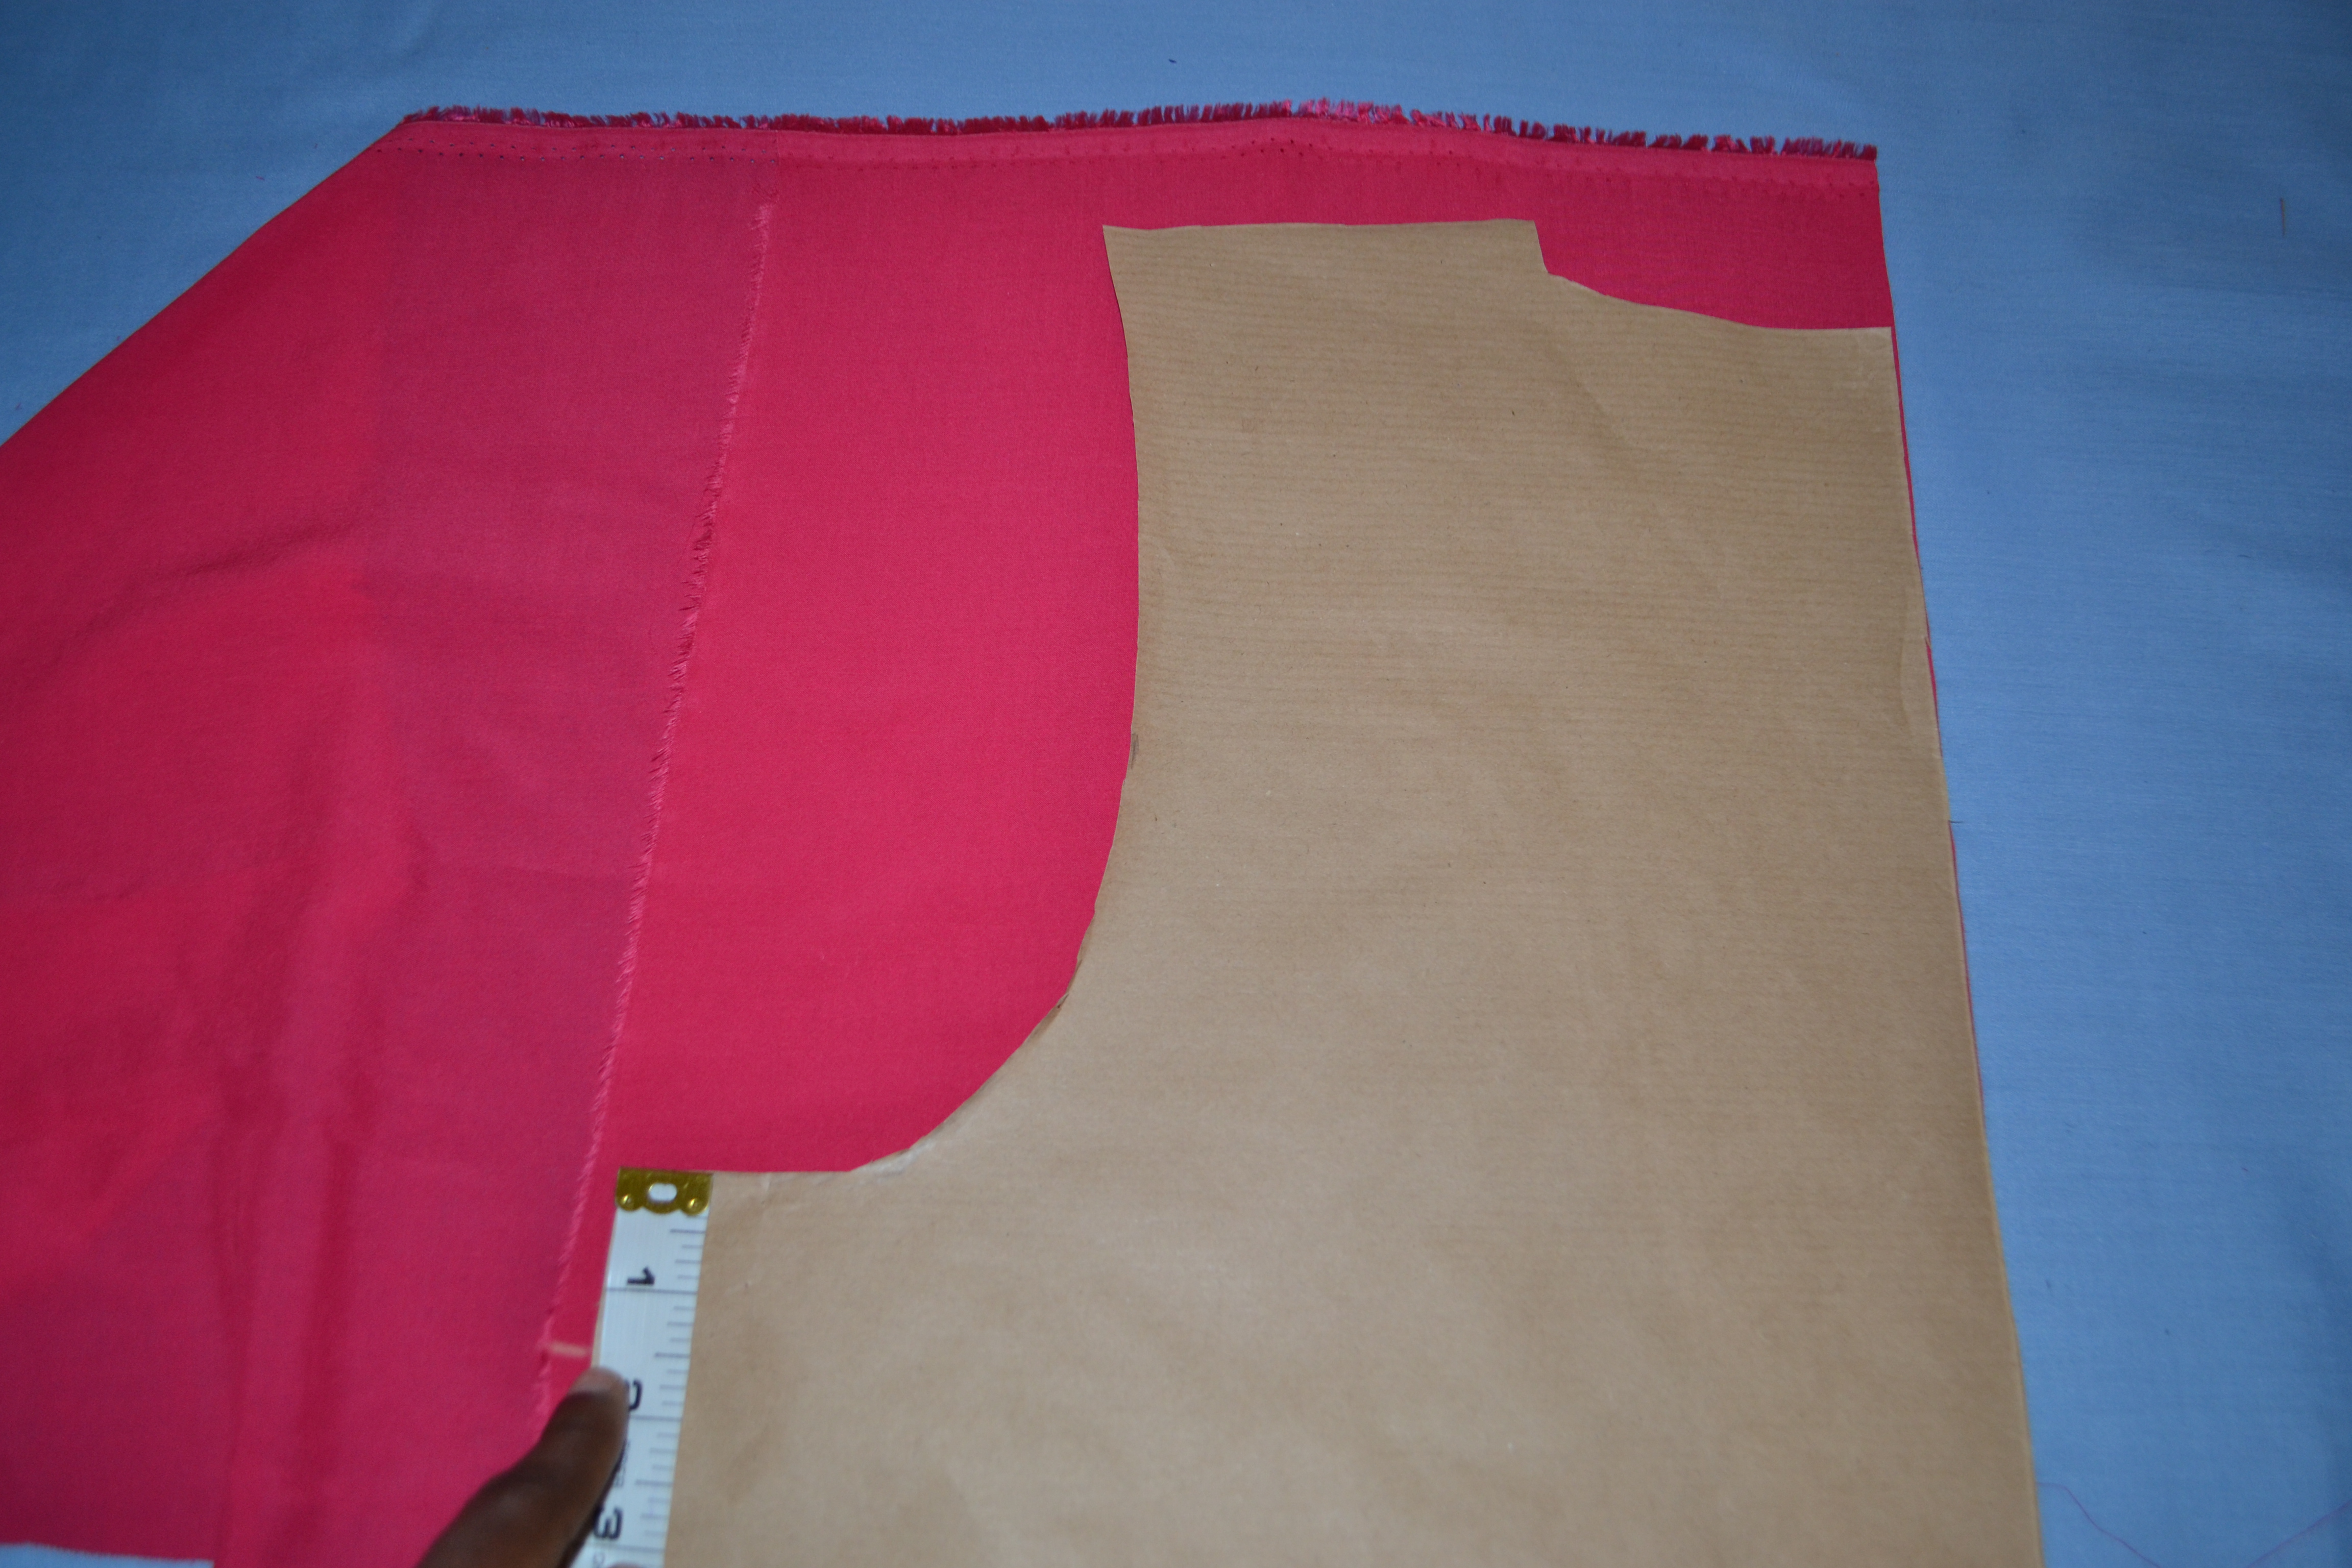
Step 9; for the back piece, fold the fabric at a 45 degree angle (raw edge folder over to line up with selvage edge)

DSC_1046


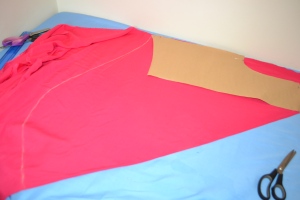
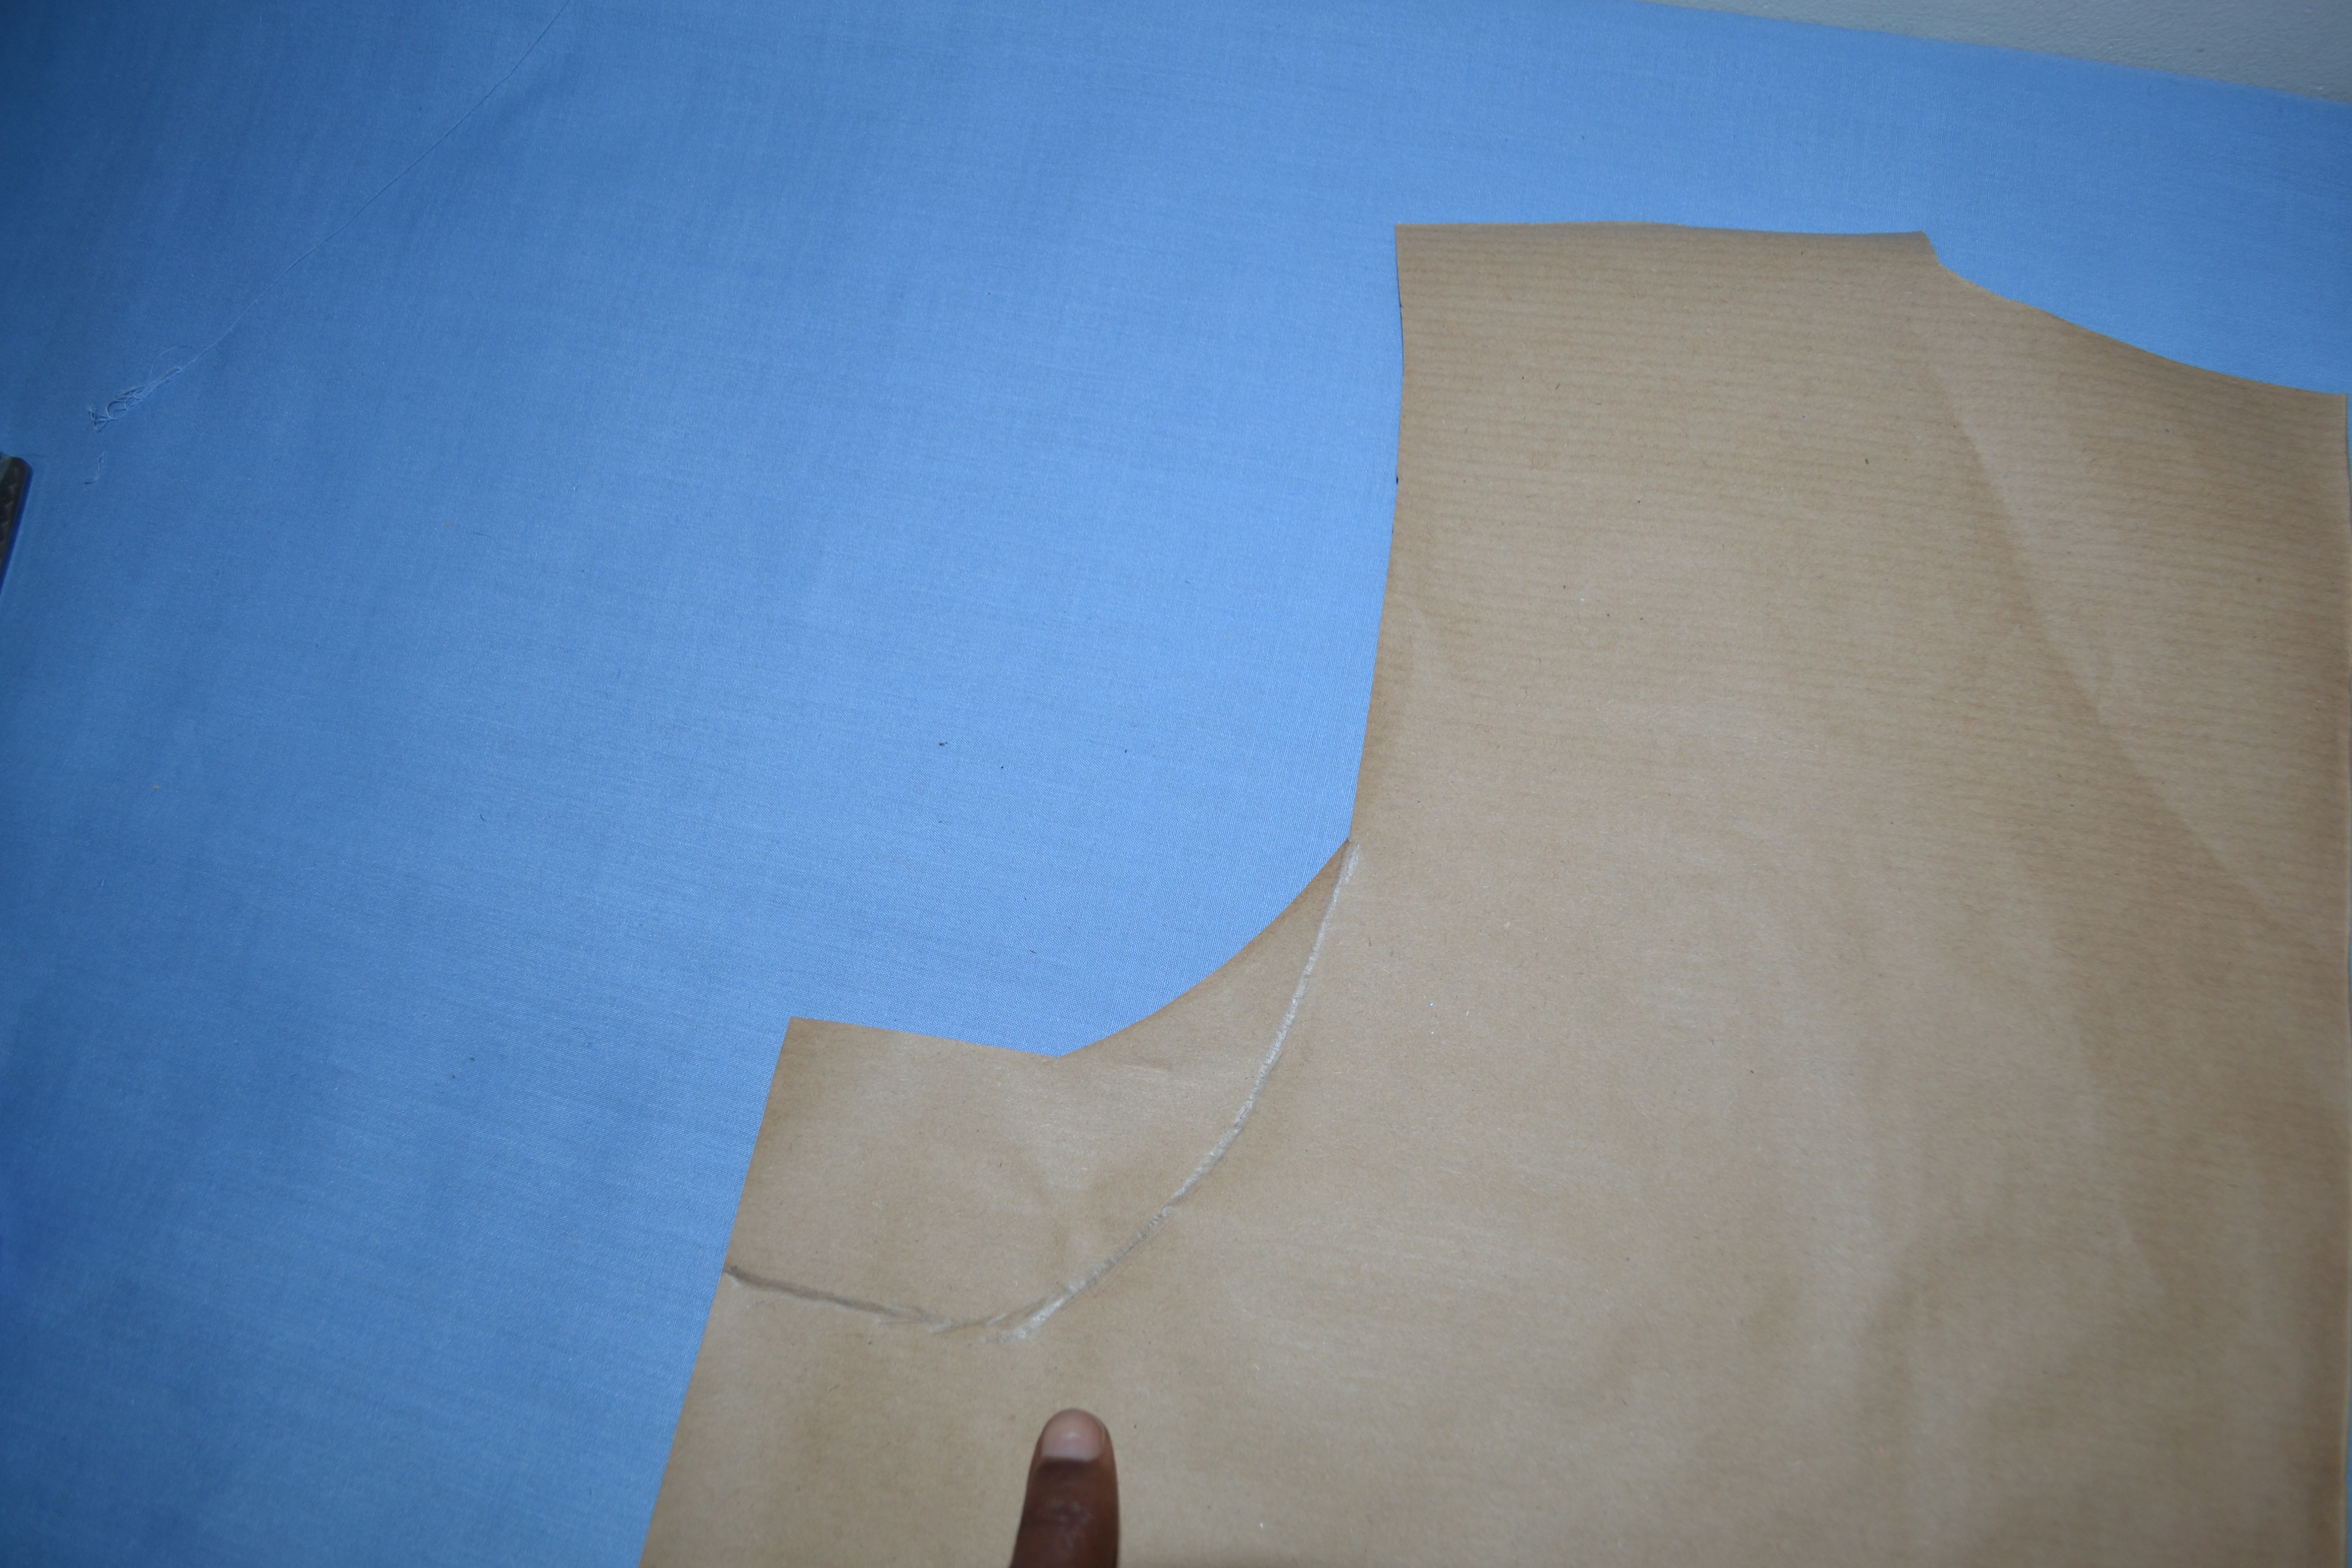
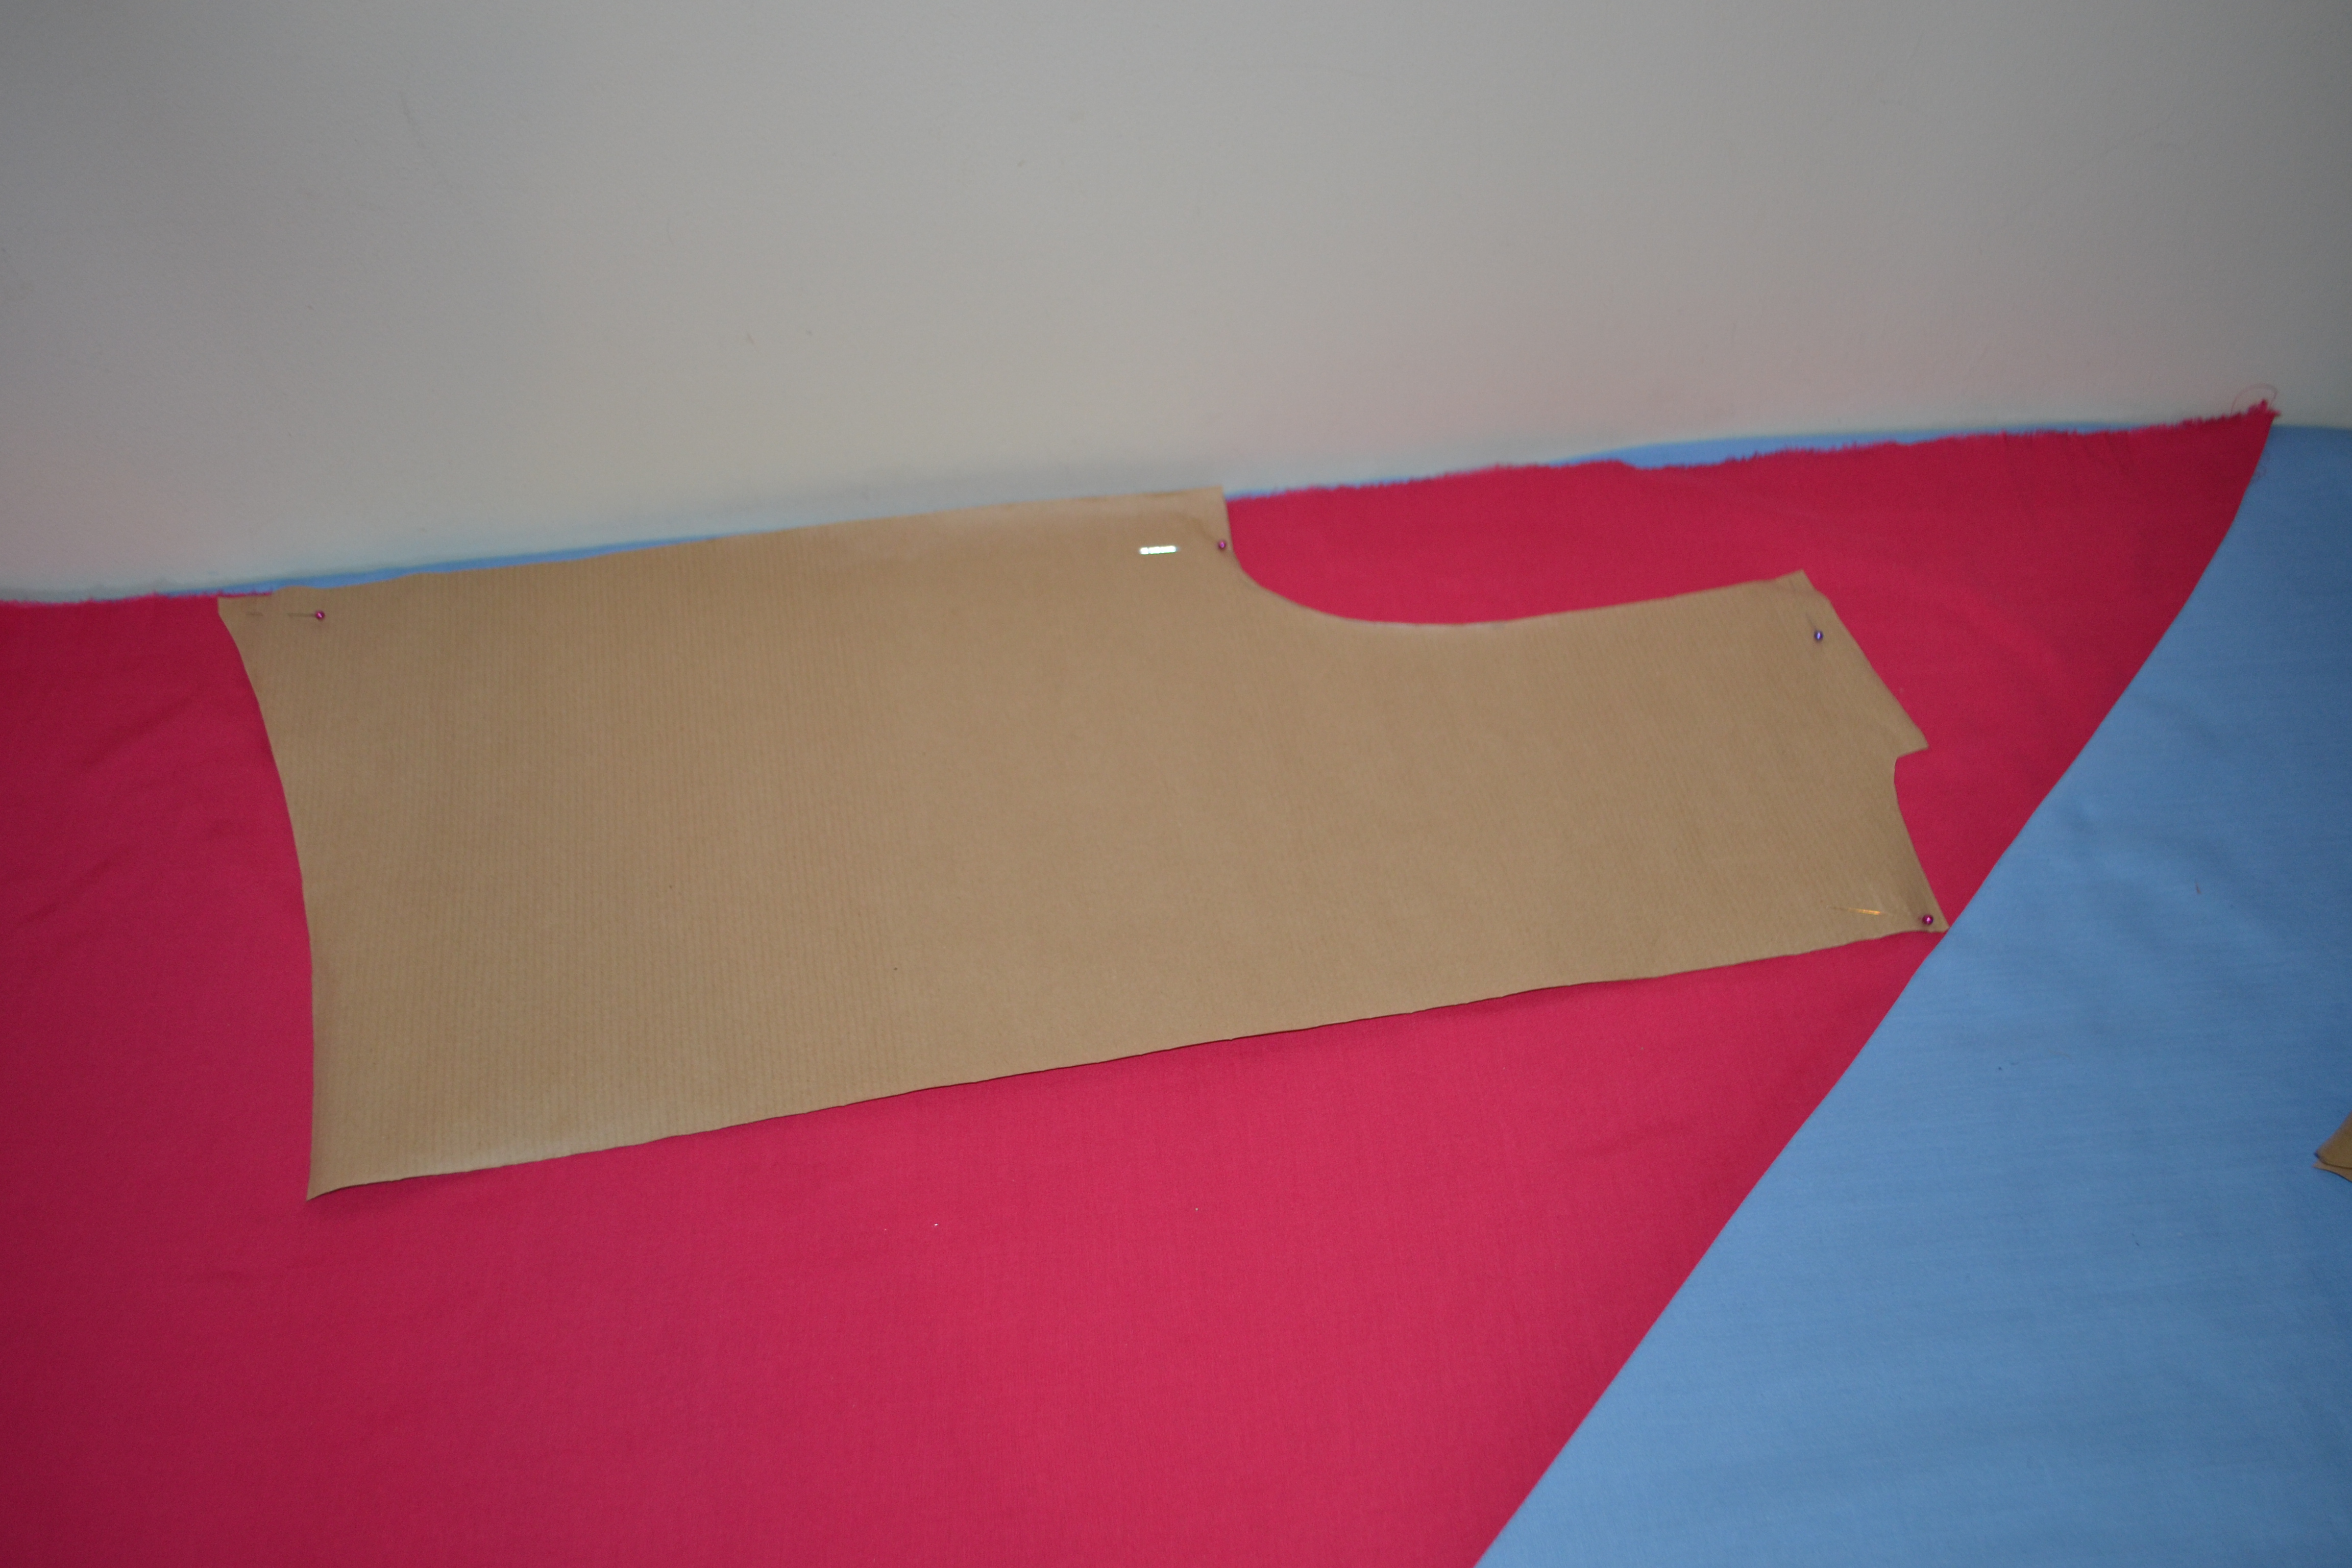
Lay your back template piece on the fabric as shown in the picture (note; the centre of the template is facing the folded edge),

DSC_1047

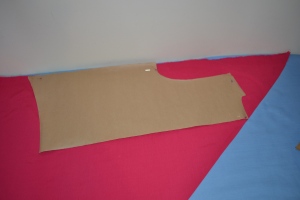
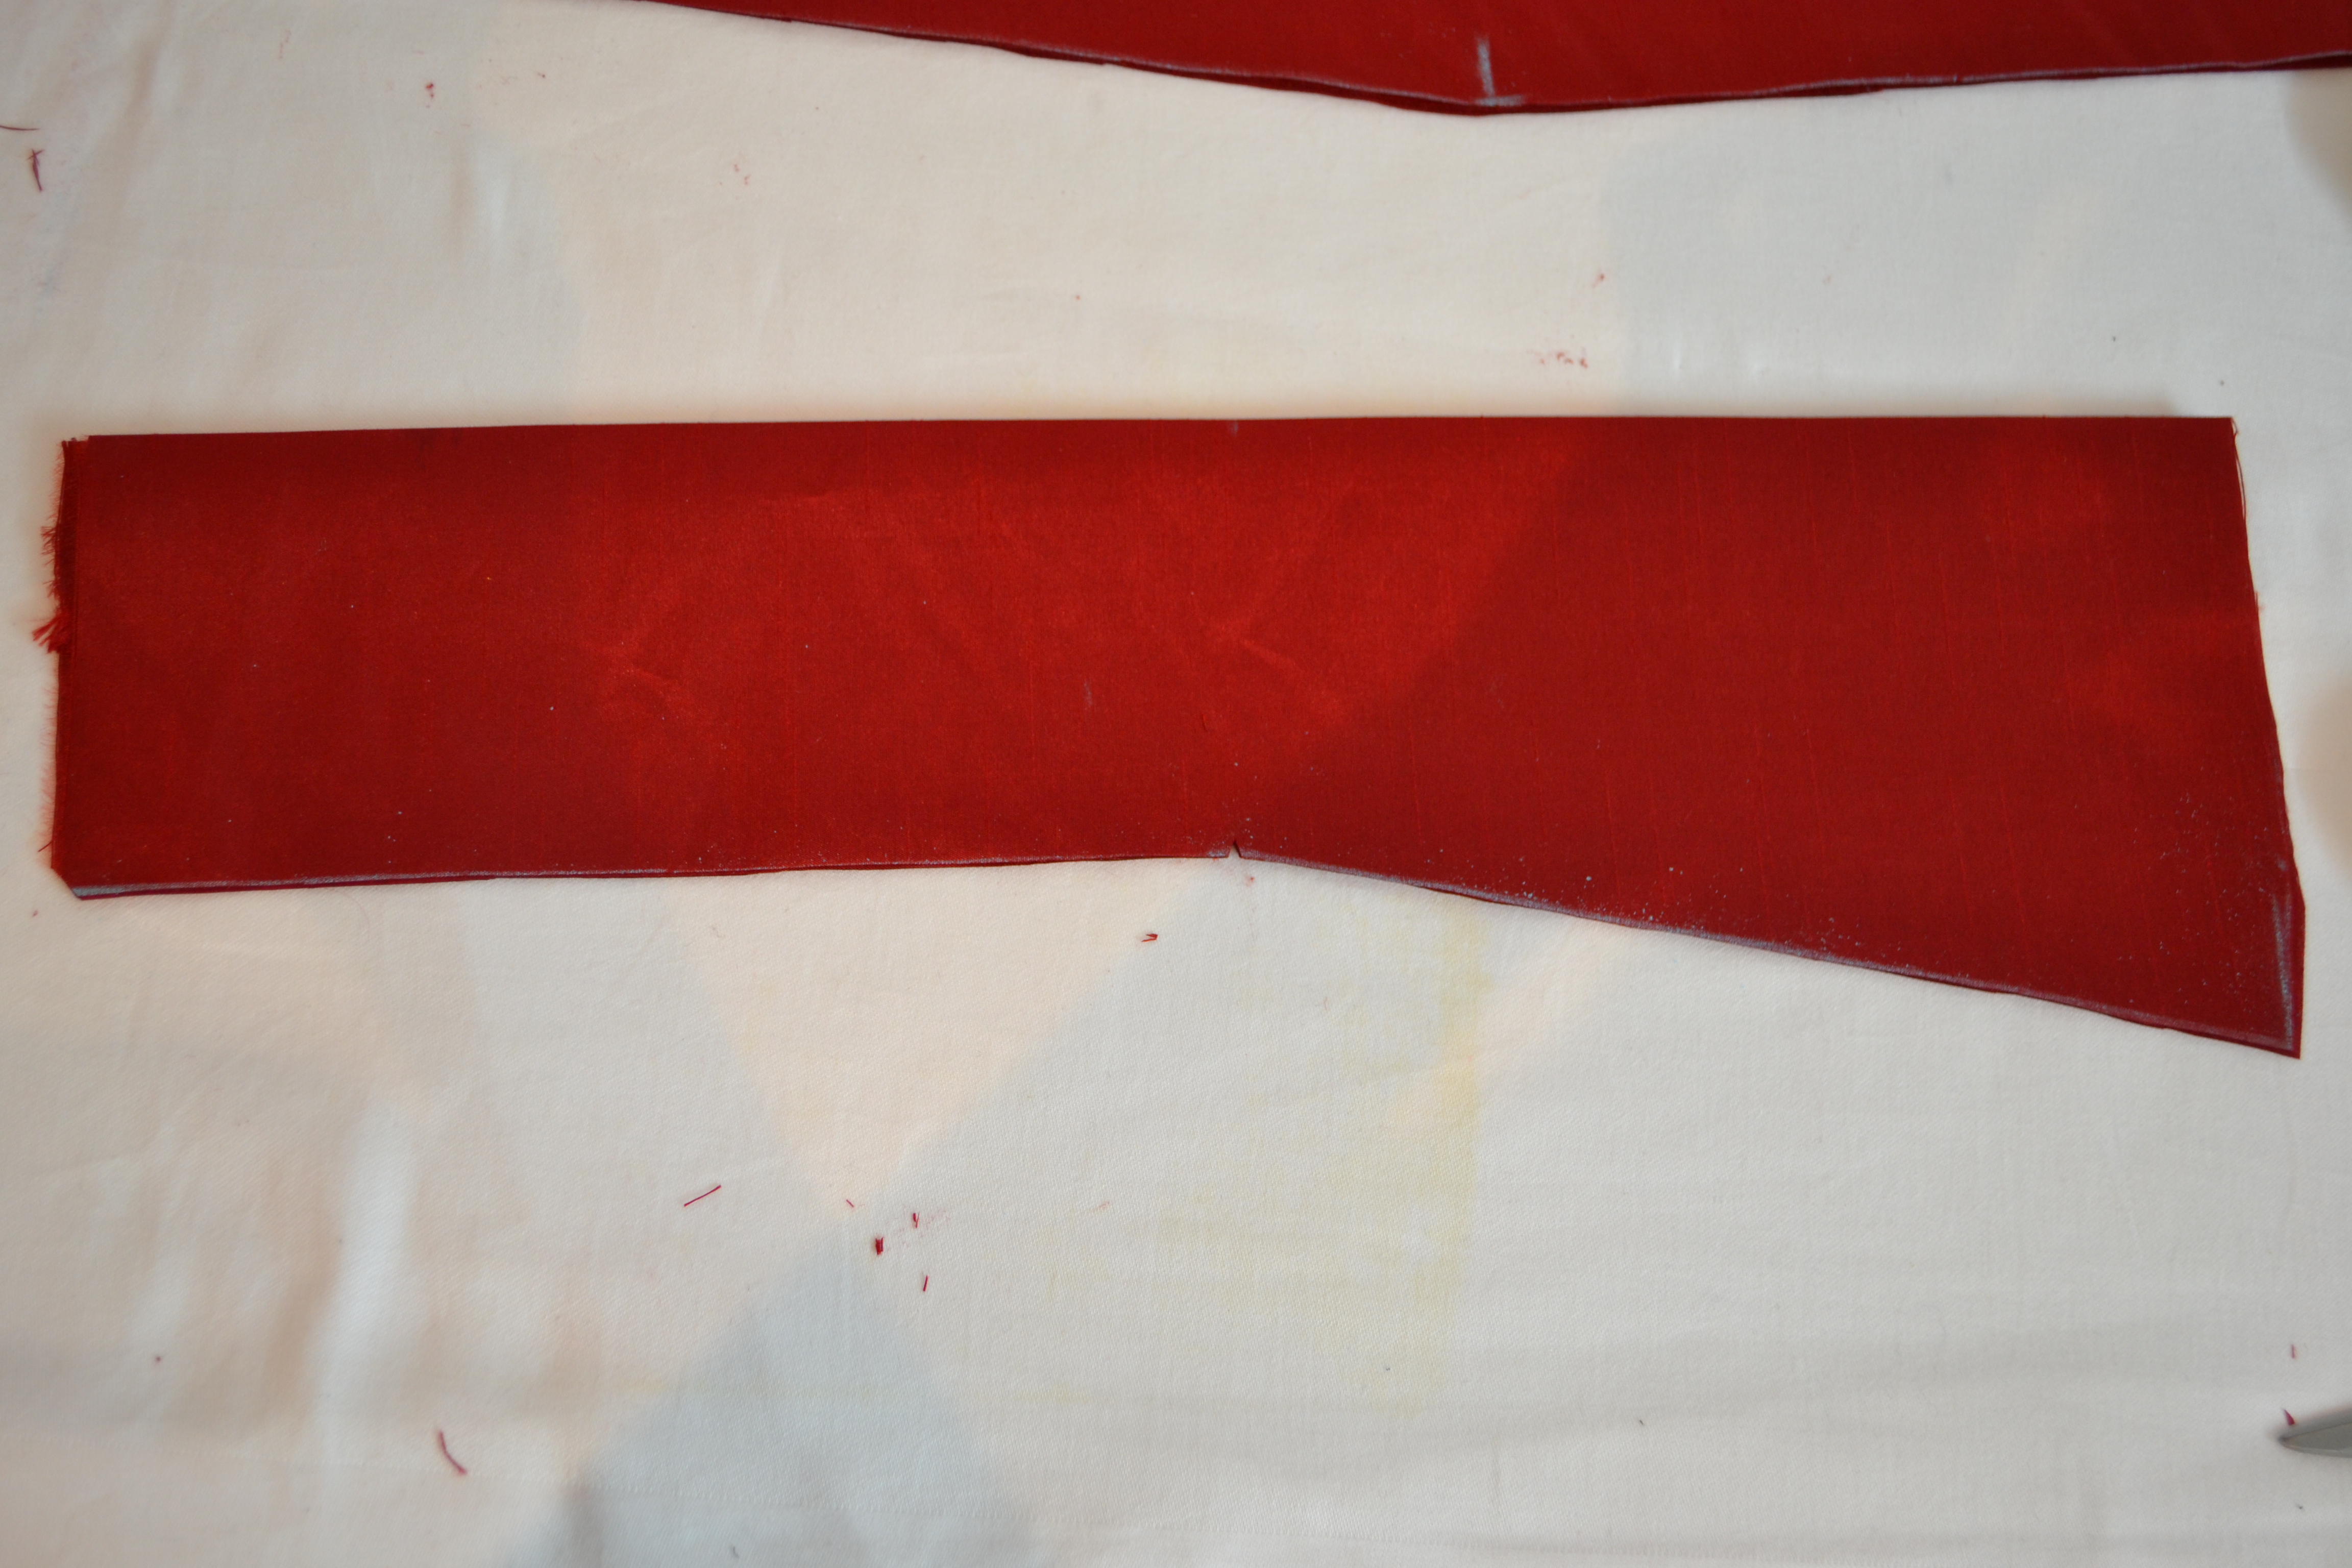
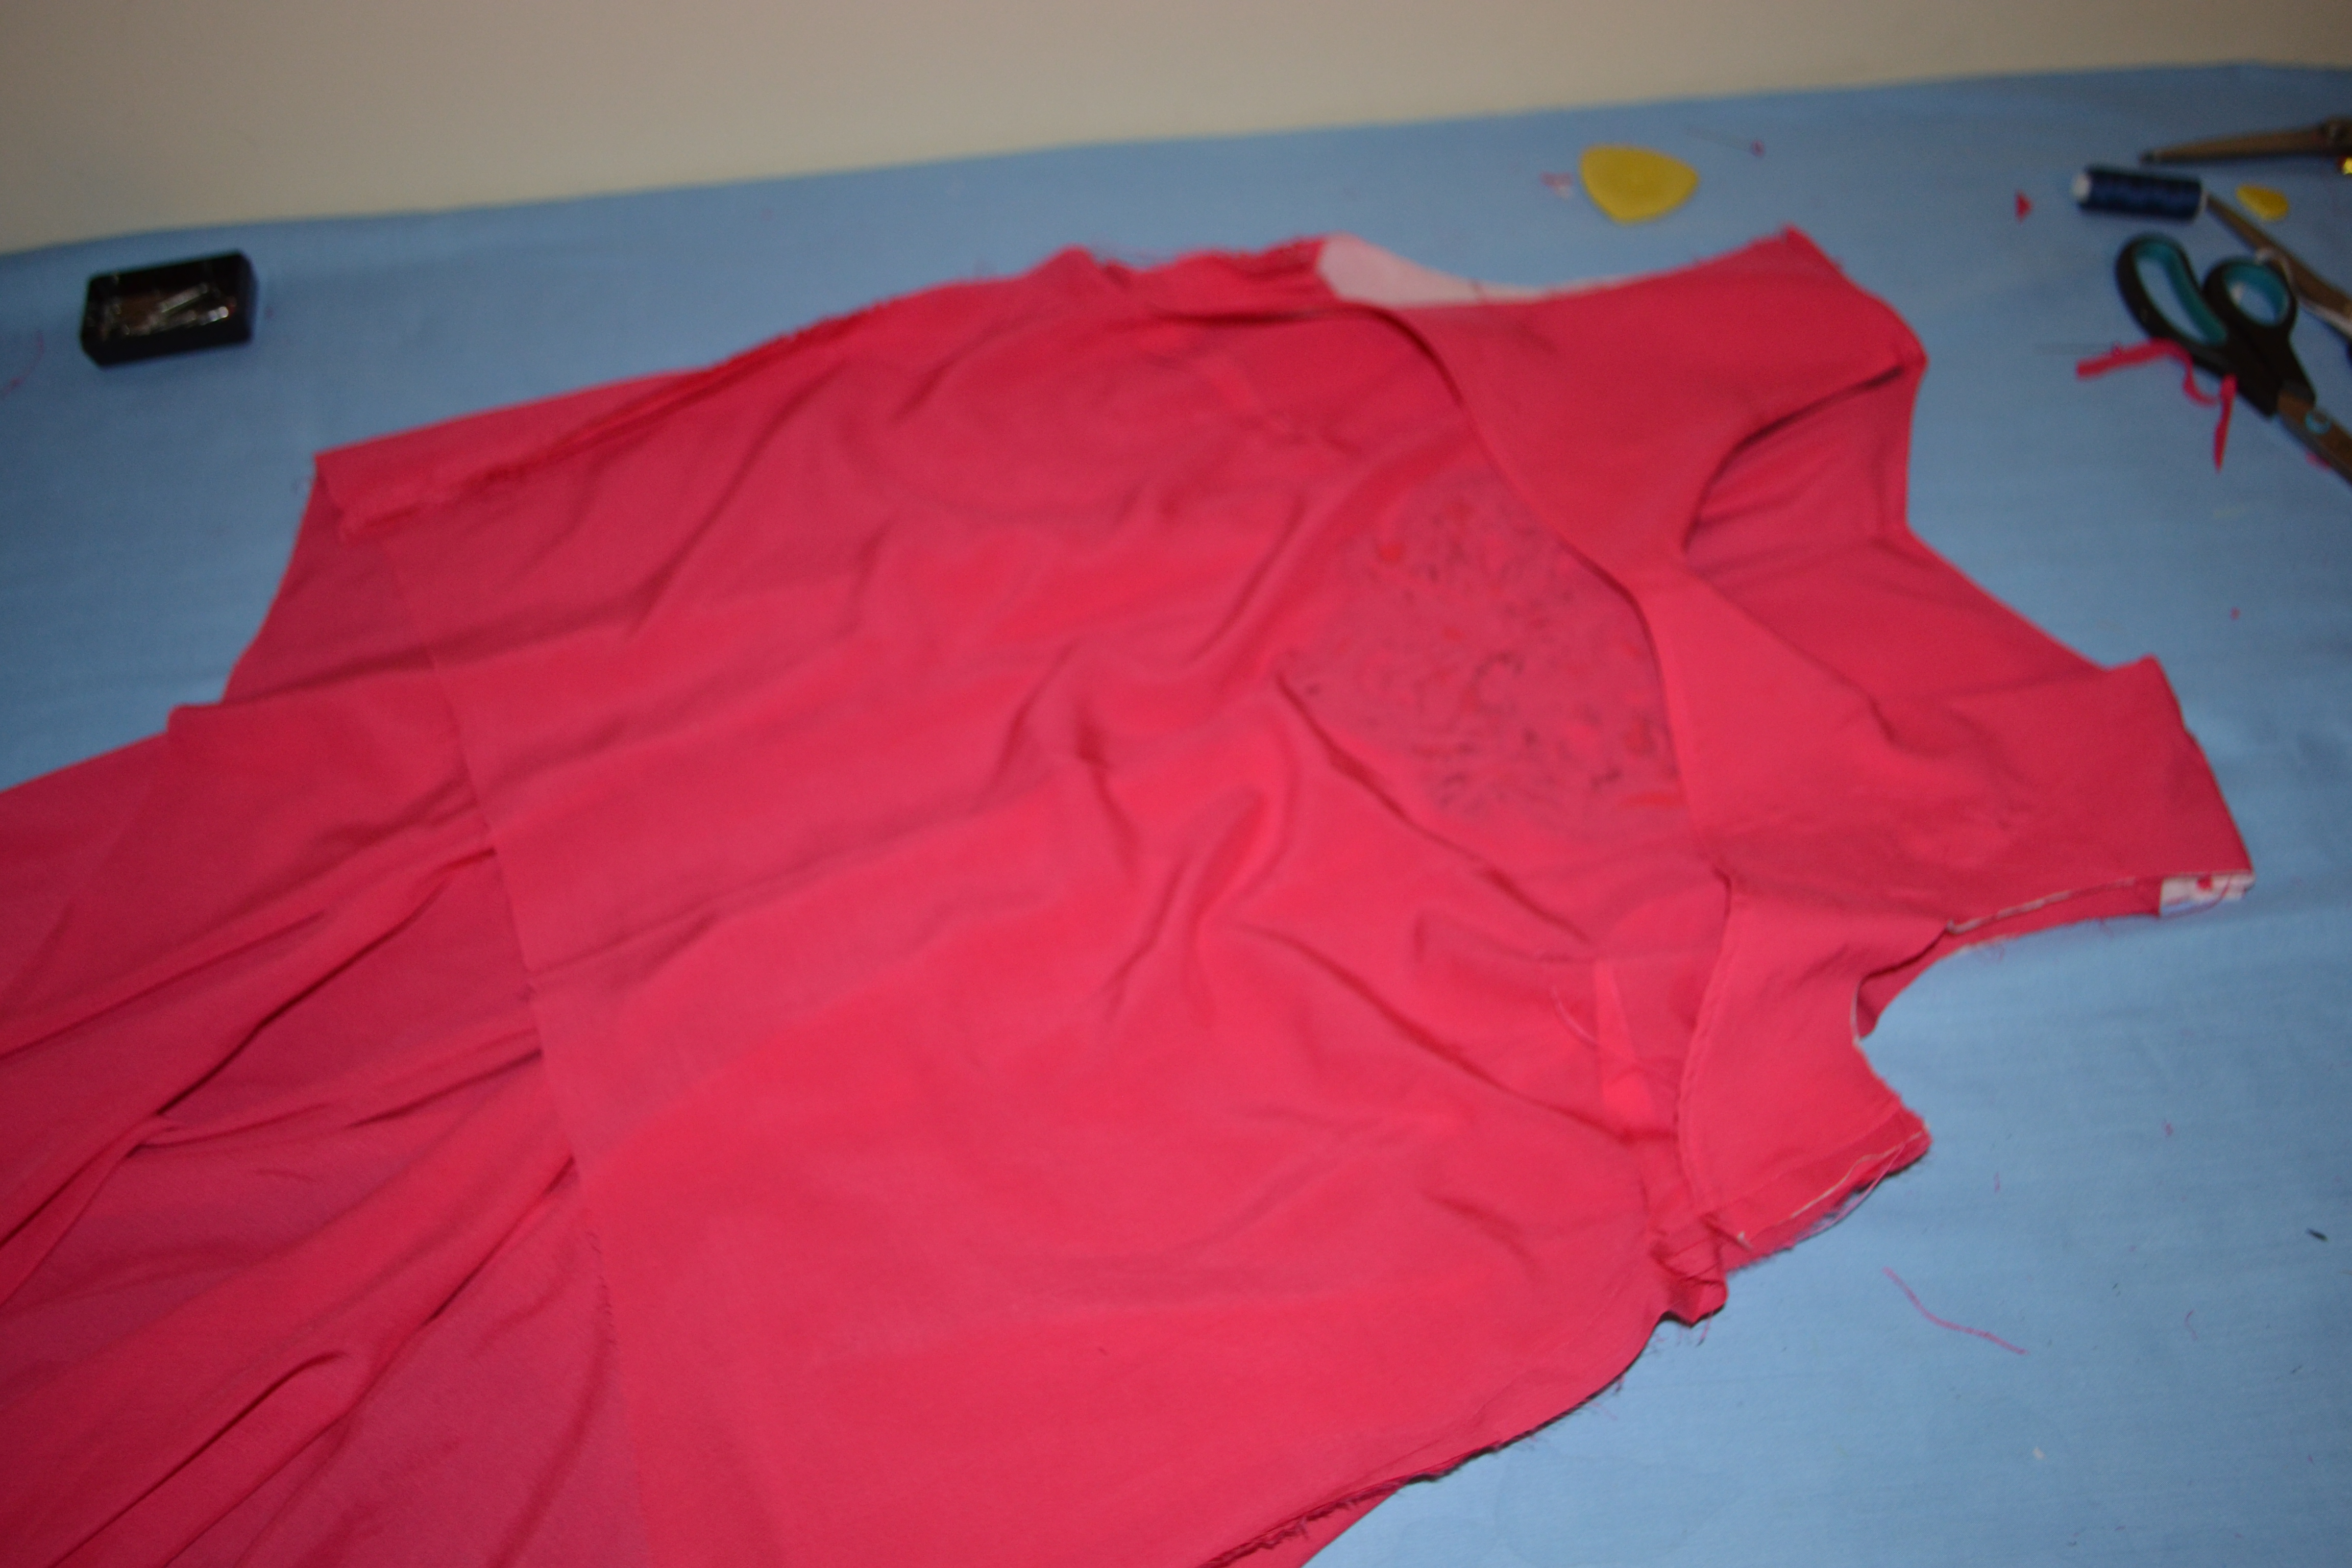
along the bottom draw a curve that is lower at the folded edge, and slopes upwards to meet the bottom outer edge of the template. It should resemble this:

DSC_0001

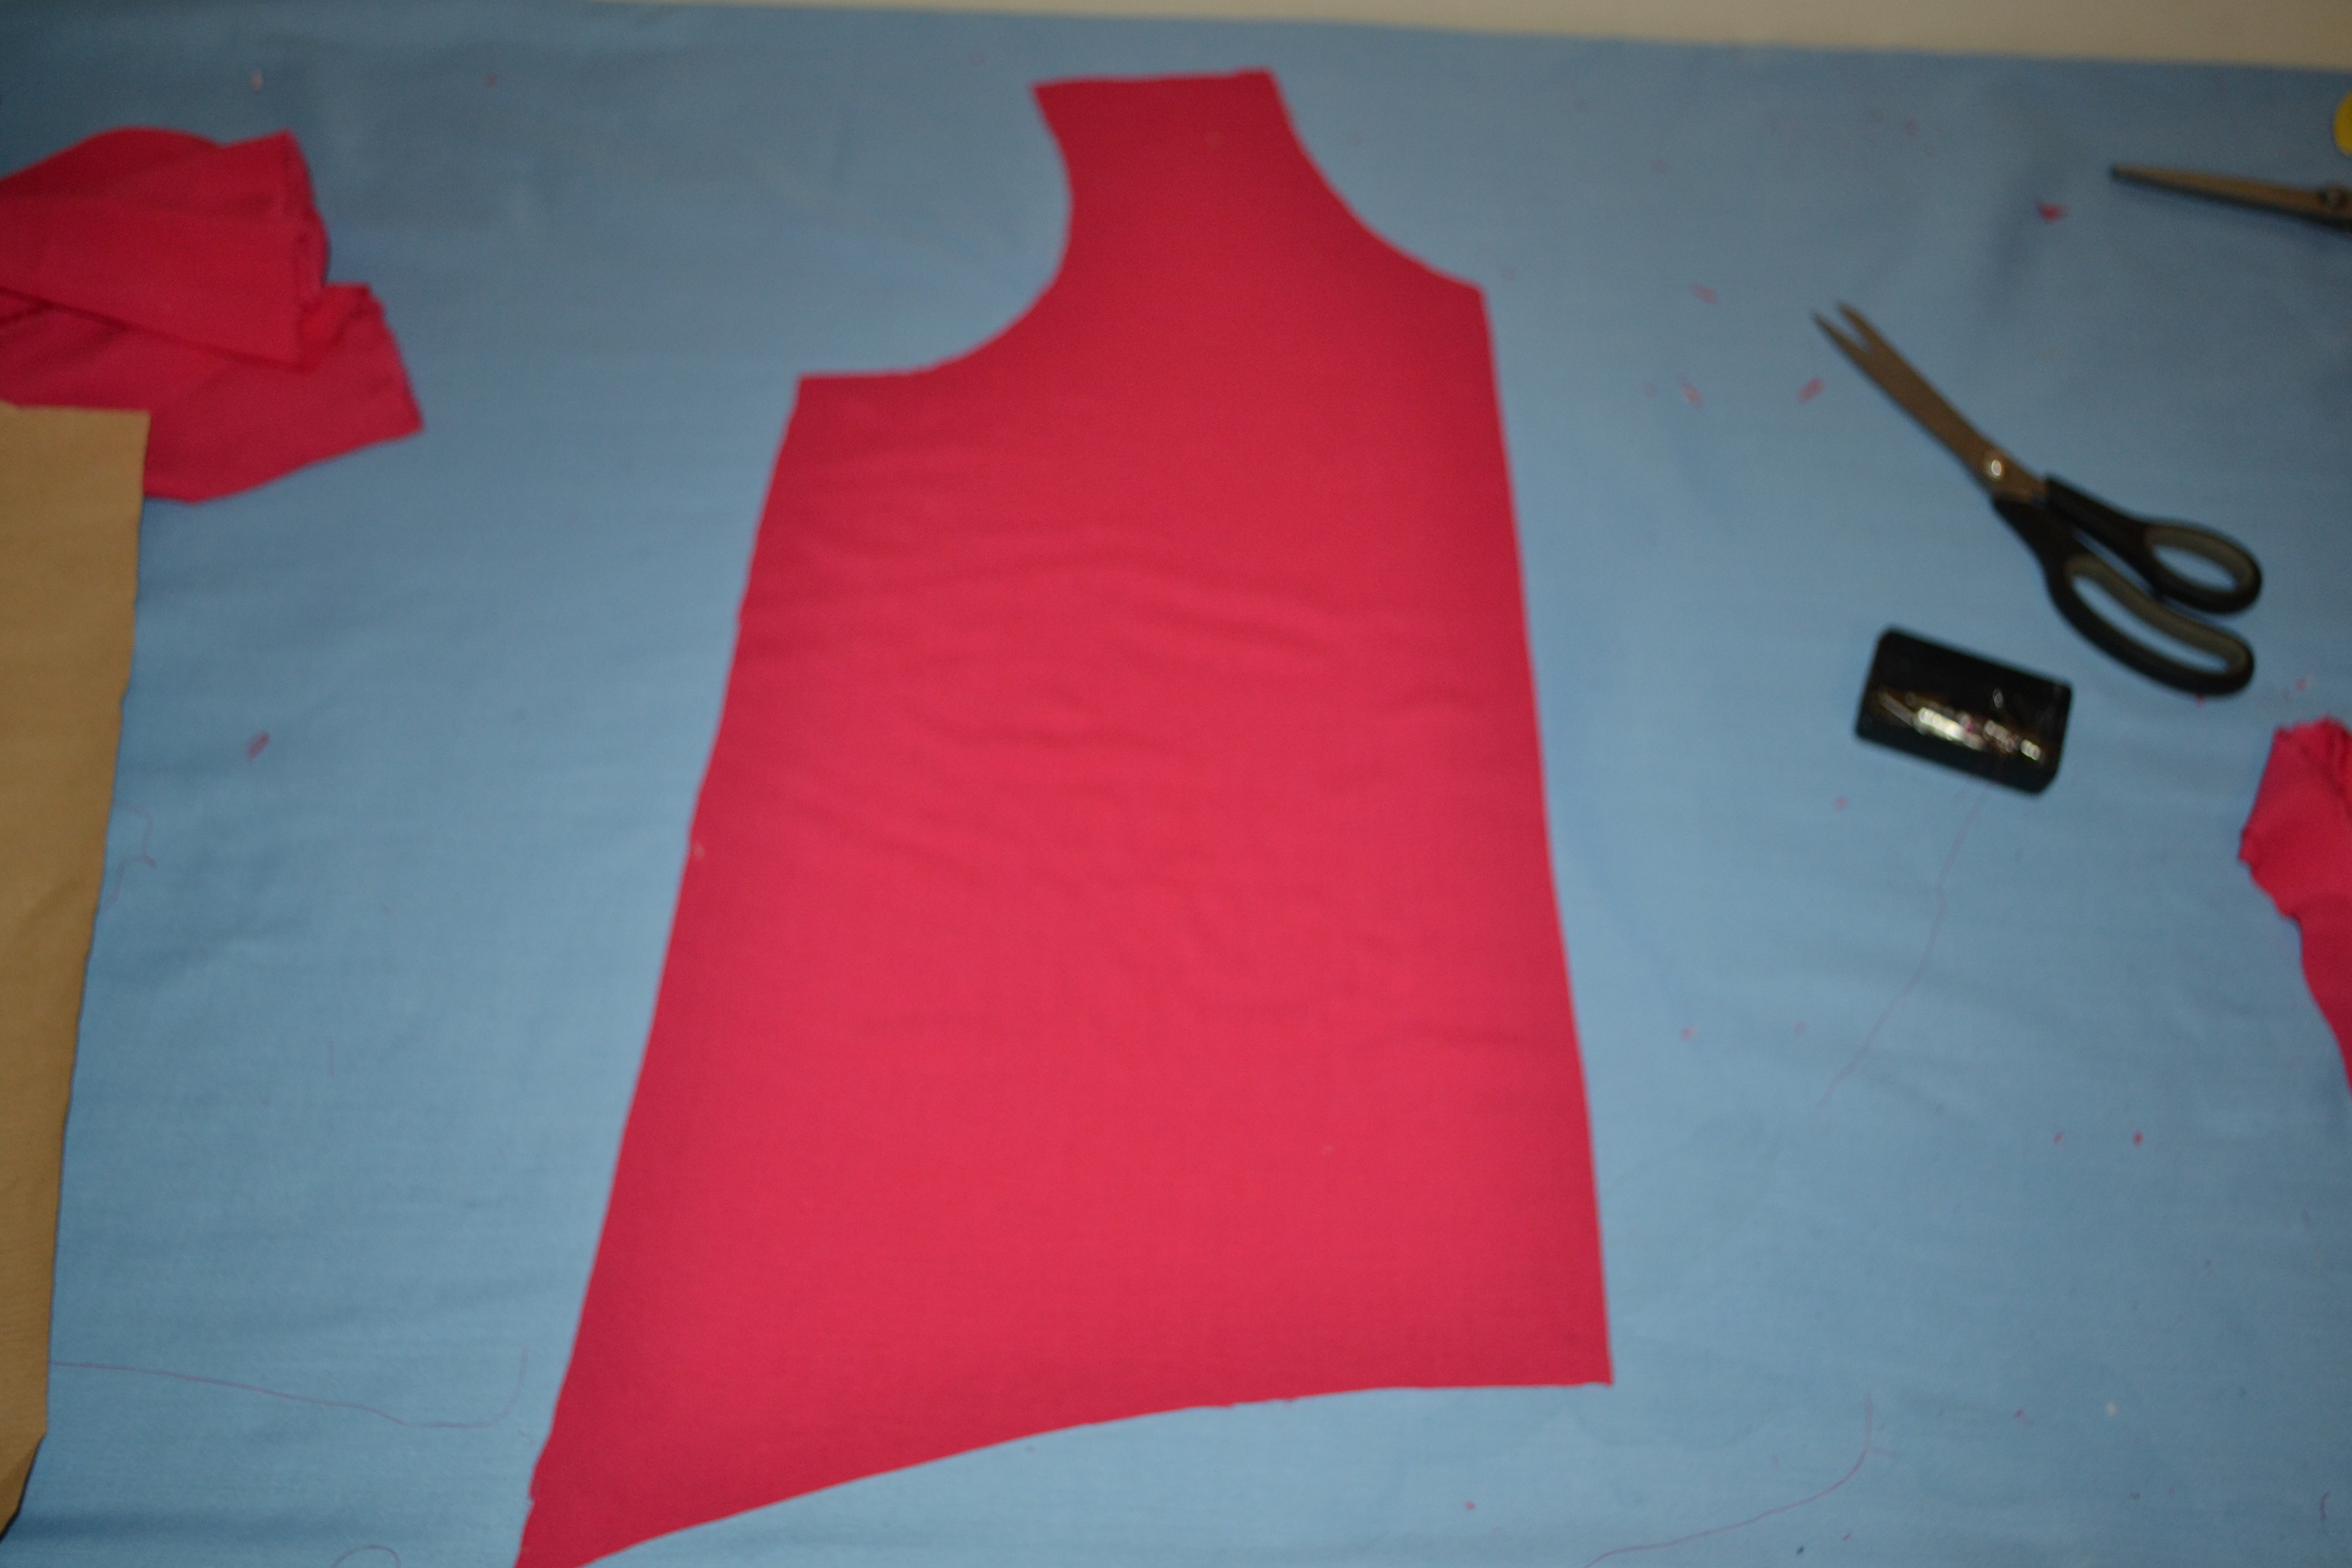
cut this out and set aside.

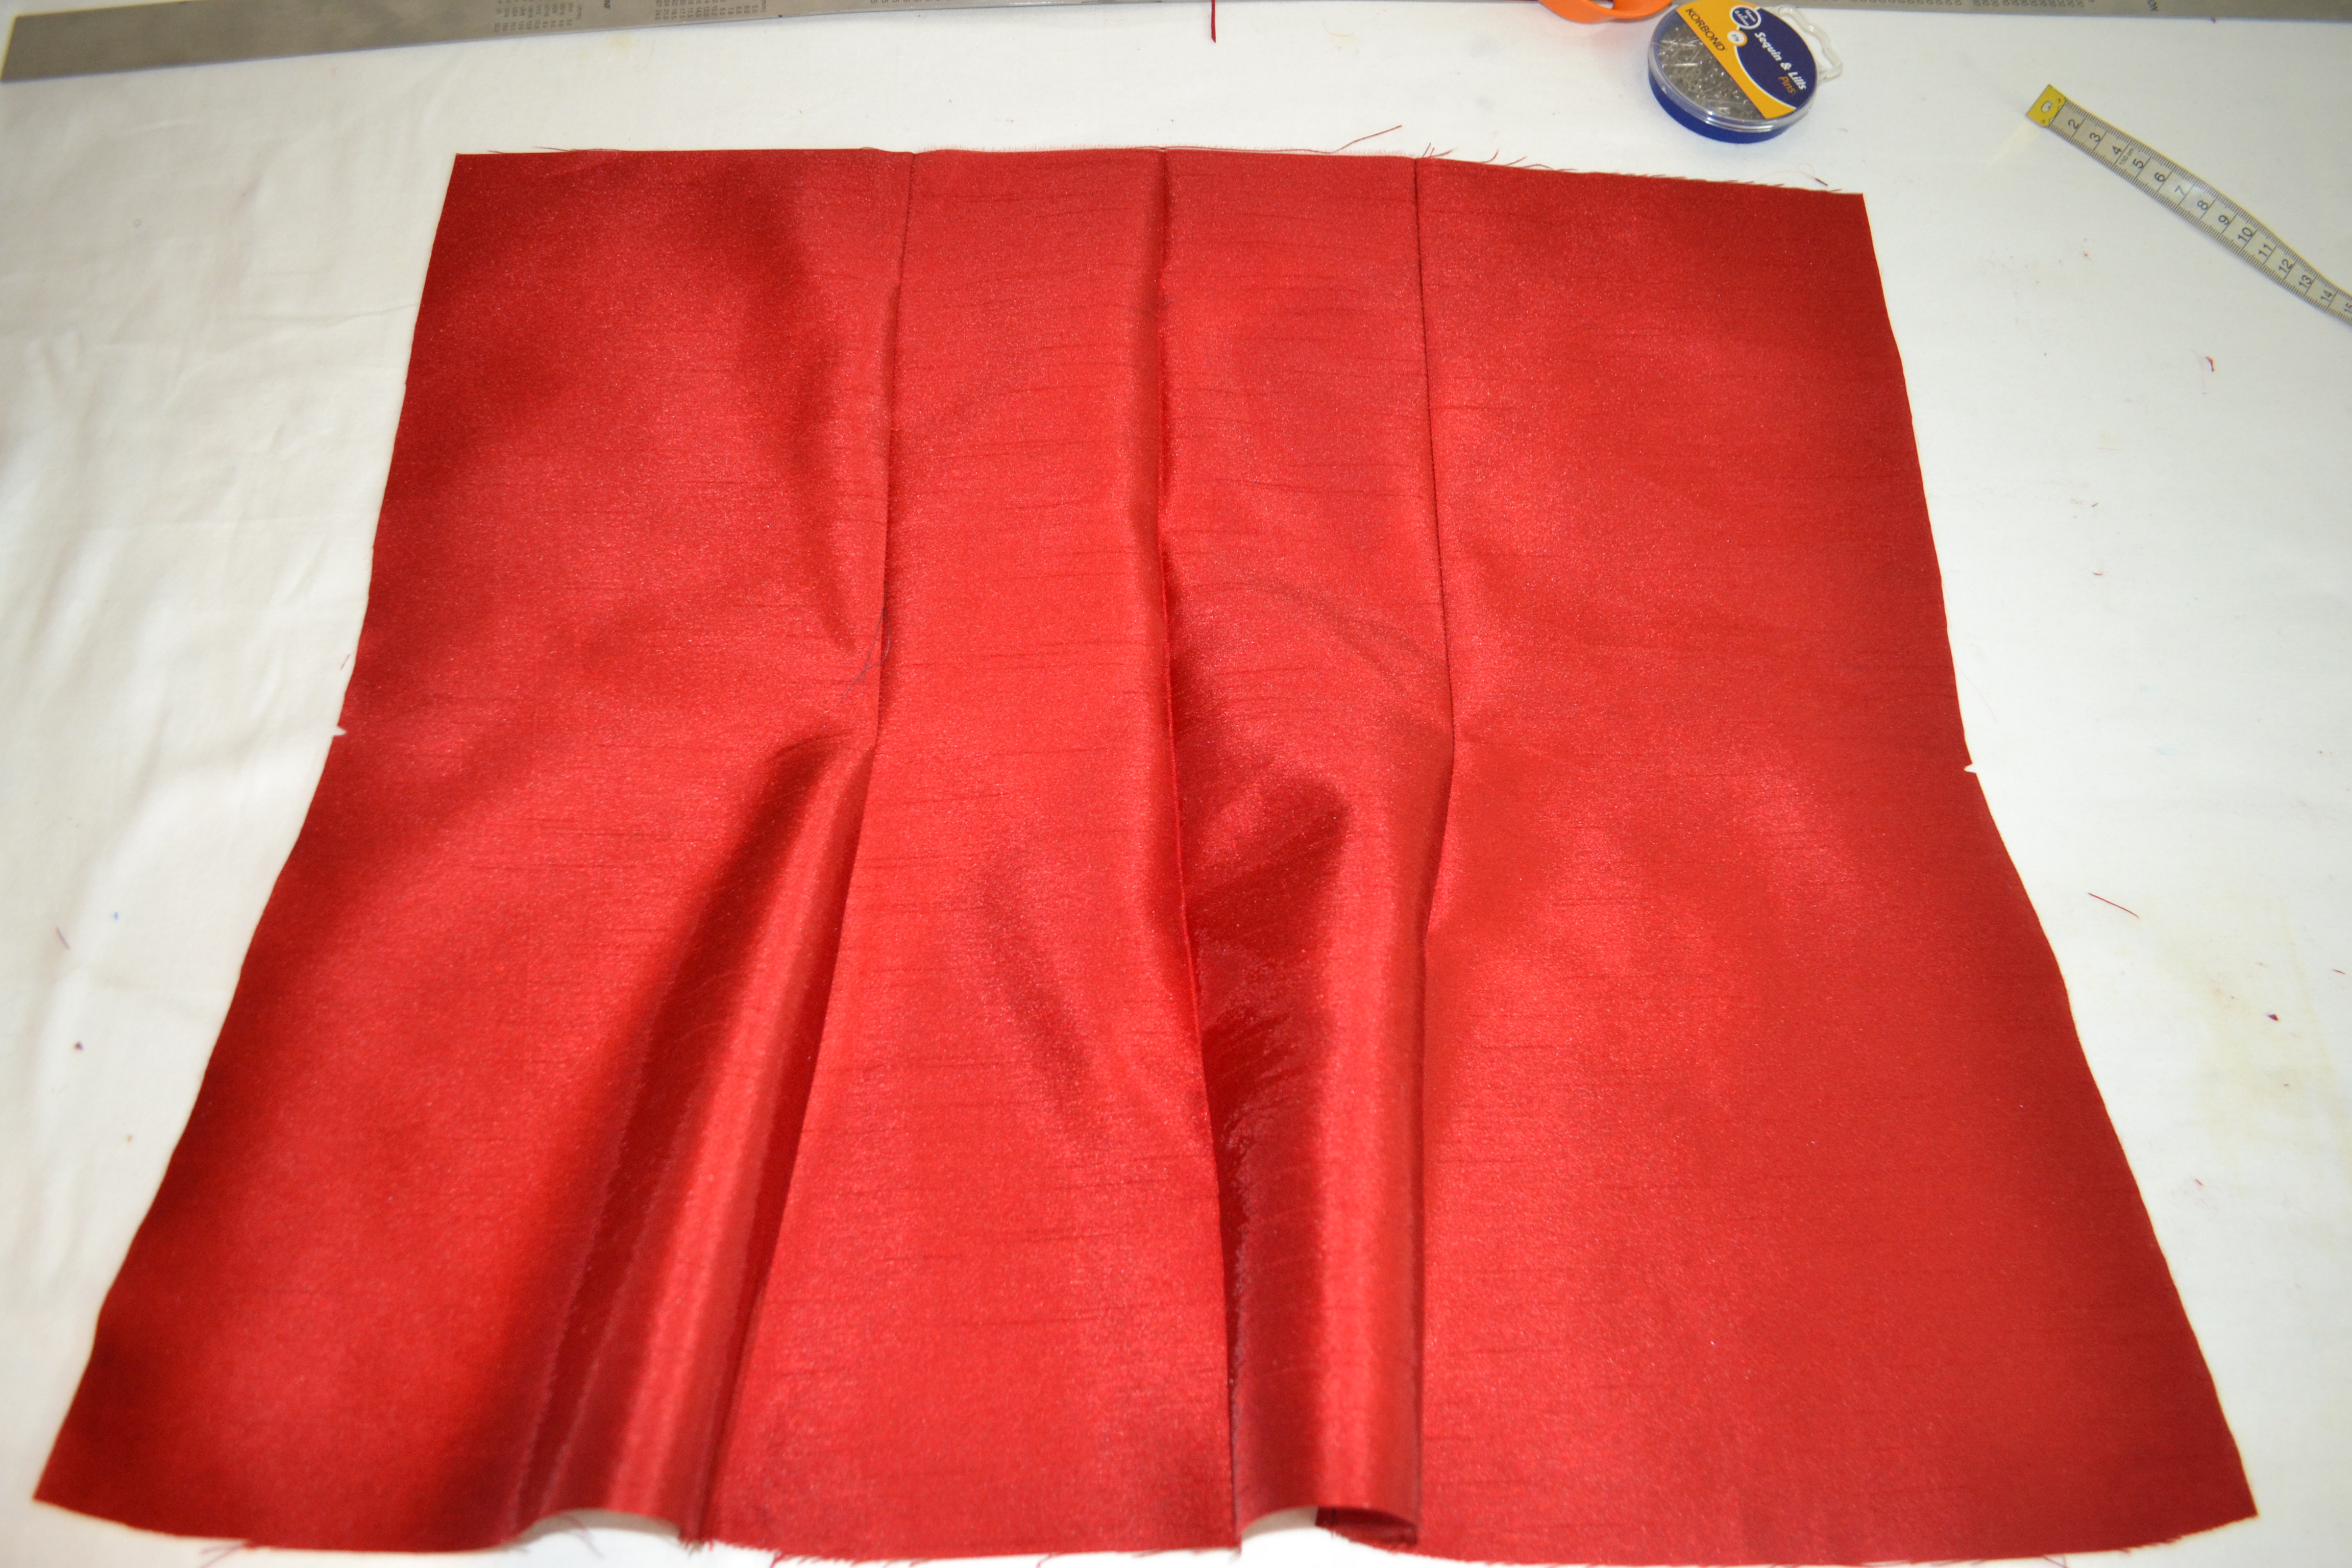
Step 10; Fold another piece of fabric as you normally would if you were cutting out a pattern piece, line the centre of  your front template with the fold and cut out.

DSC_0008

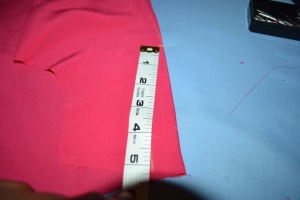
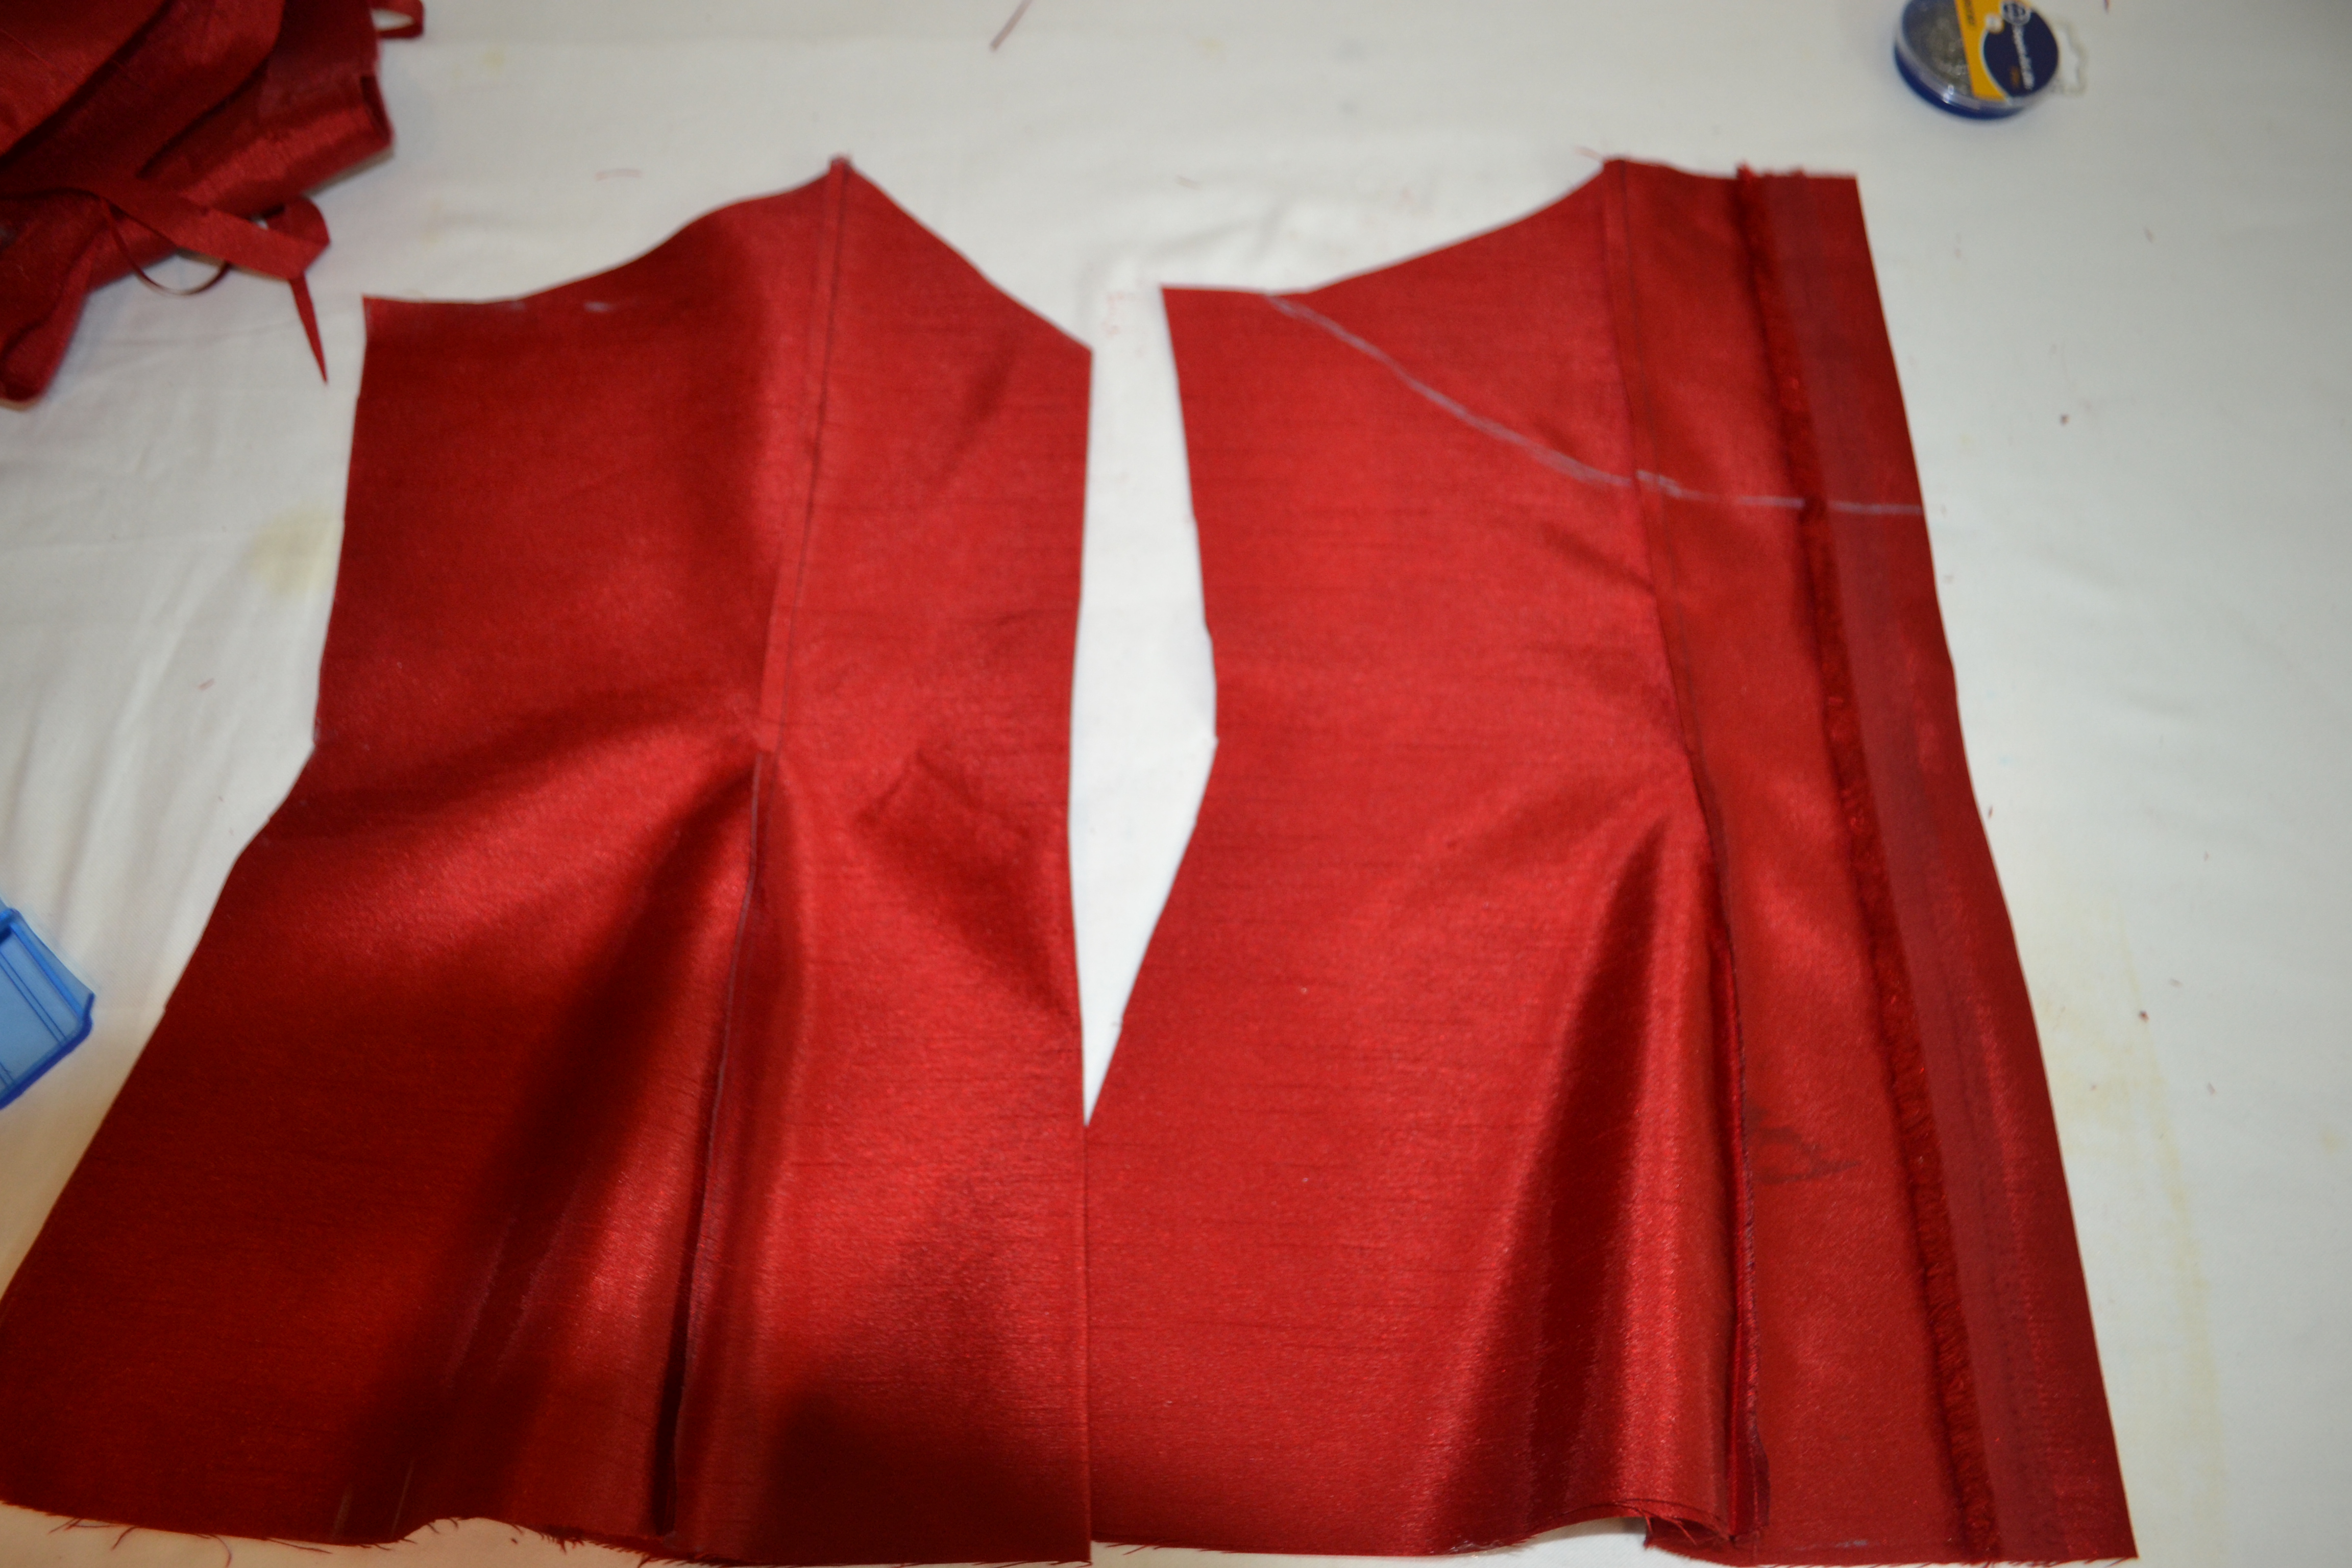
This top will need some side bust darts, although the top is not fitted, darts will help it hang better on the body. To create the darts, place the top of your tape measure at the highest point of your shoulder seam, measure down your shoulder to bust measurement and mark. along the side seam place a mark about 1″ lower than the mark you just made;

DSC_0009 DSC_0010

draw a straight line that connects these two marks, then press along this line:

DSC_0011 DSC_0013


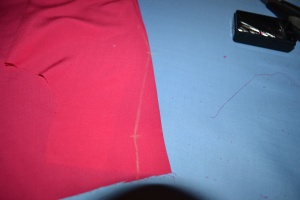
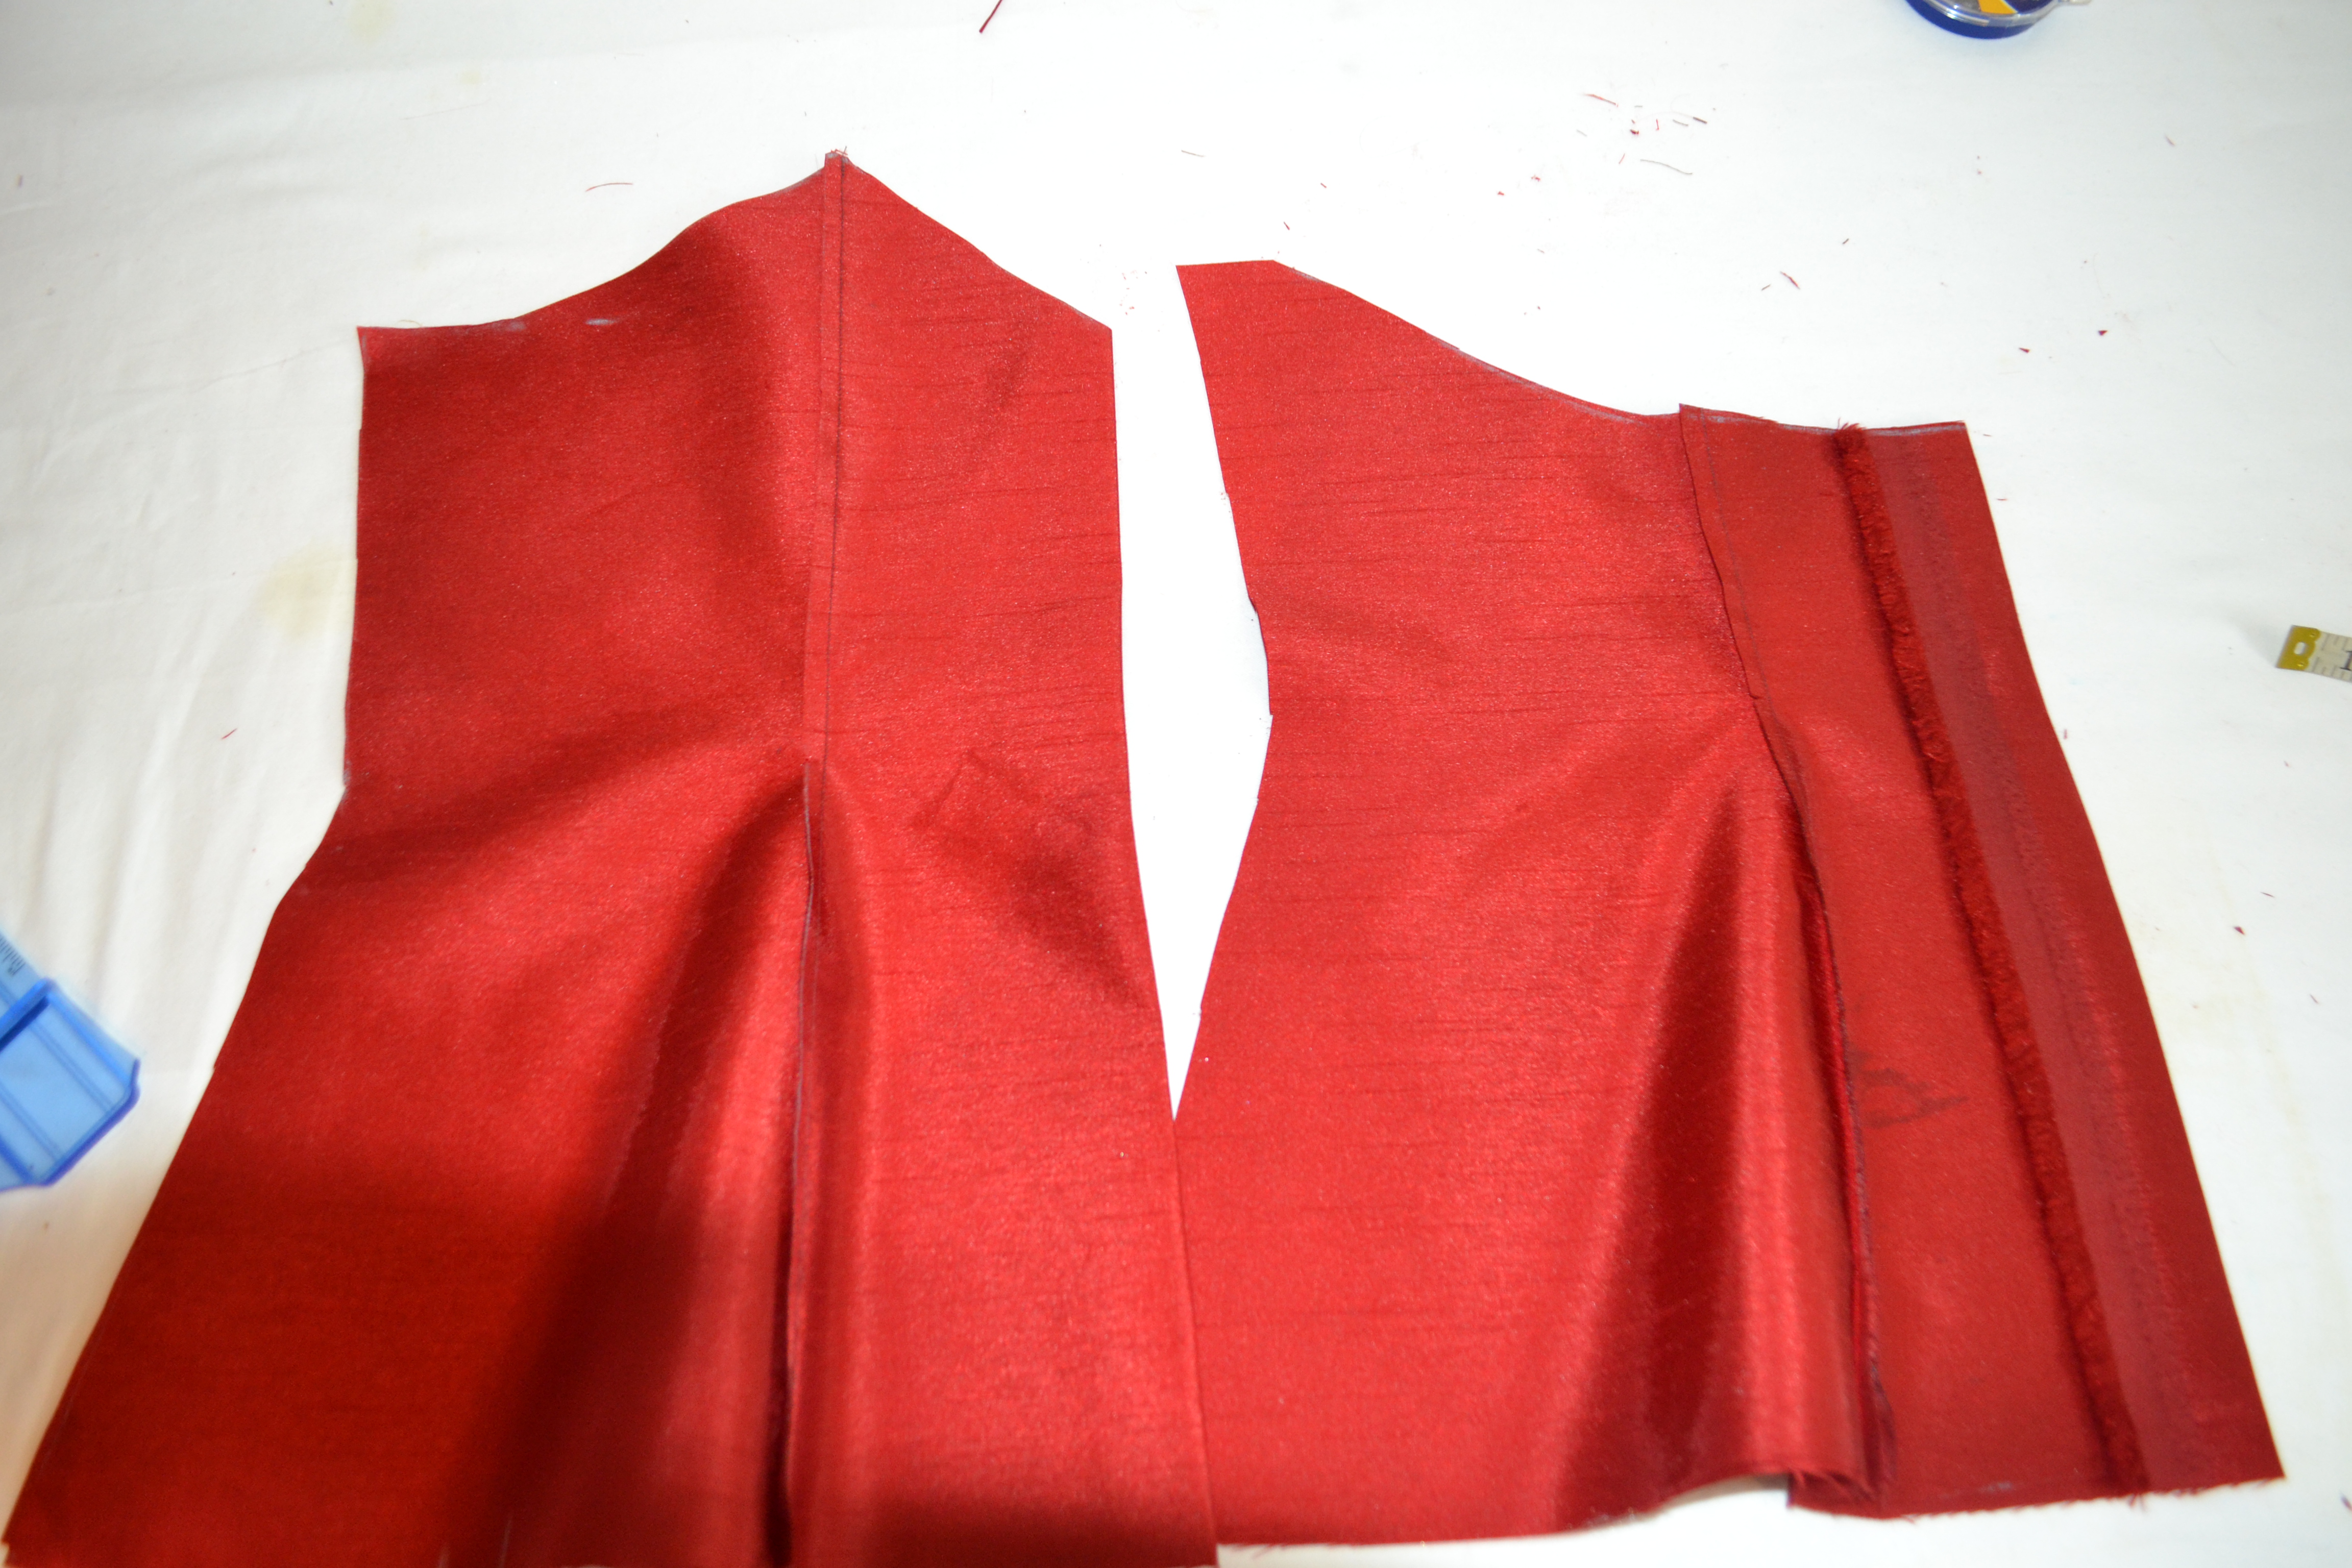
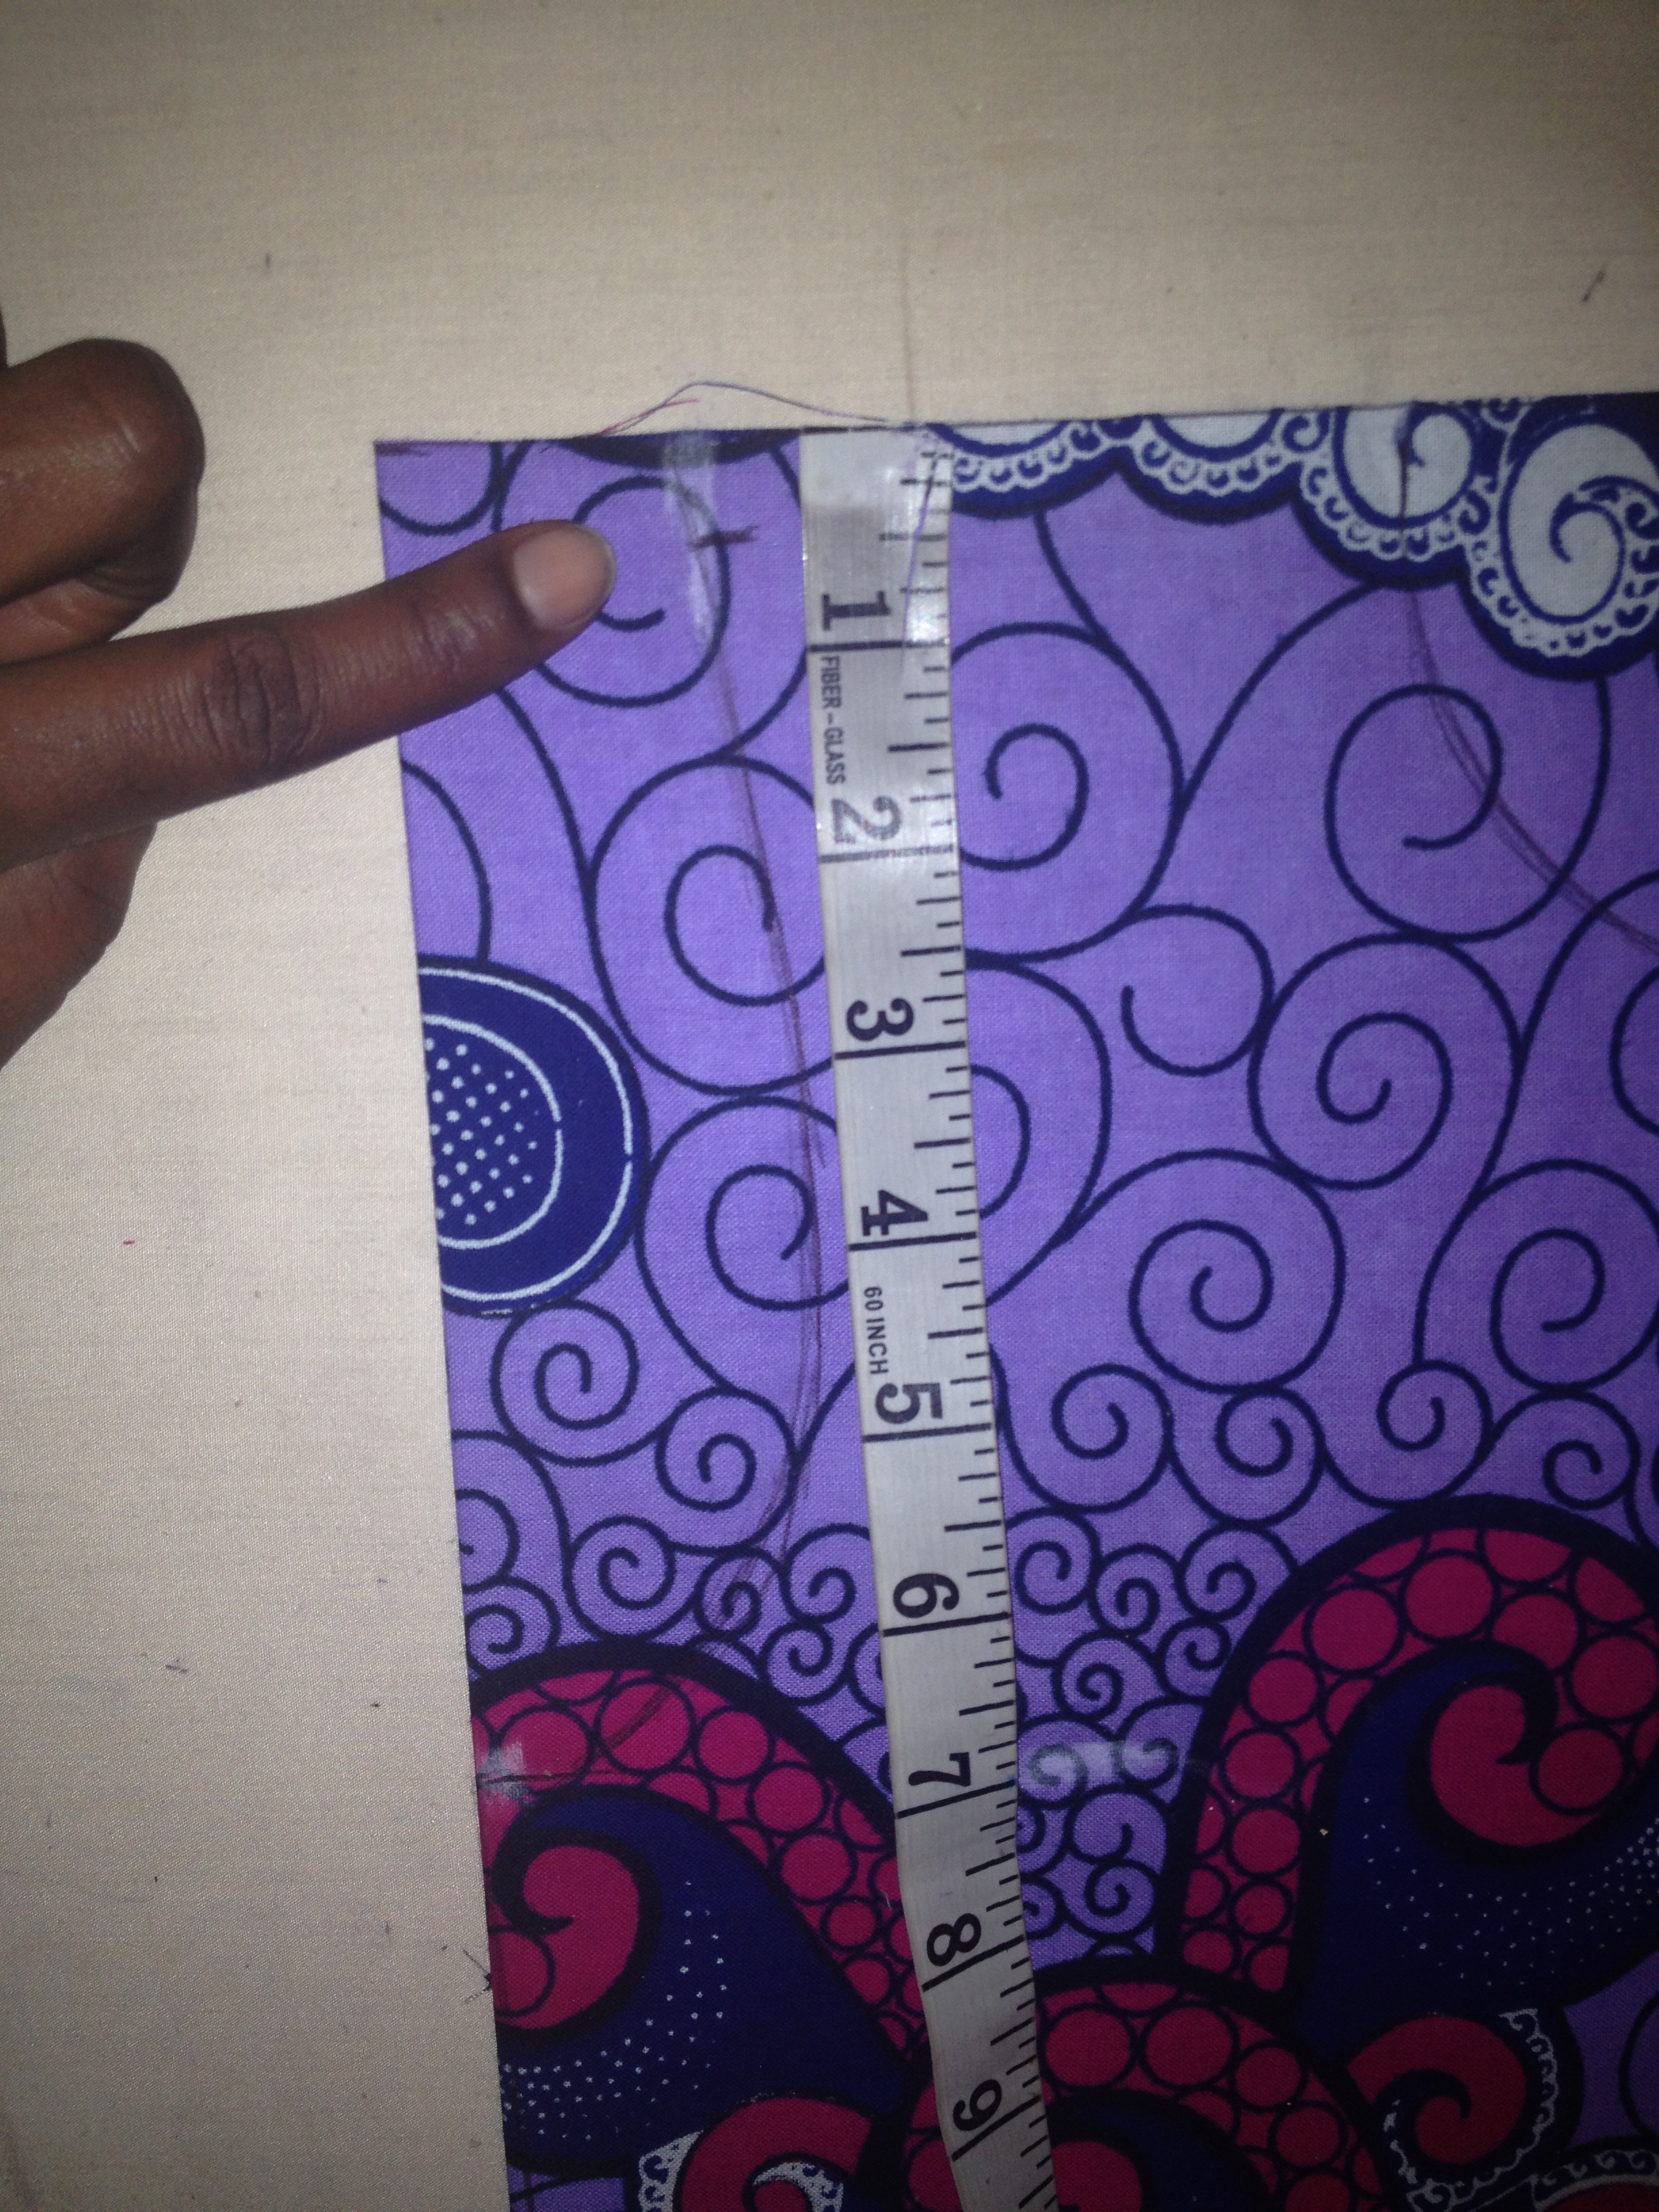
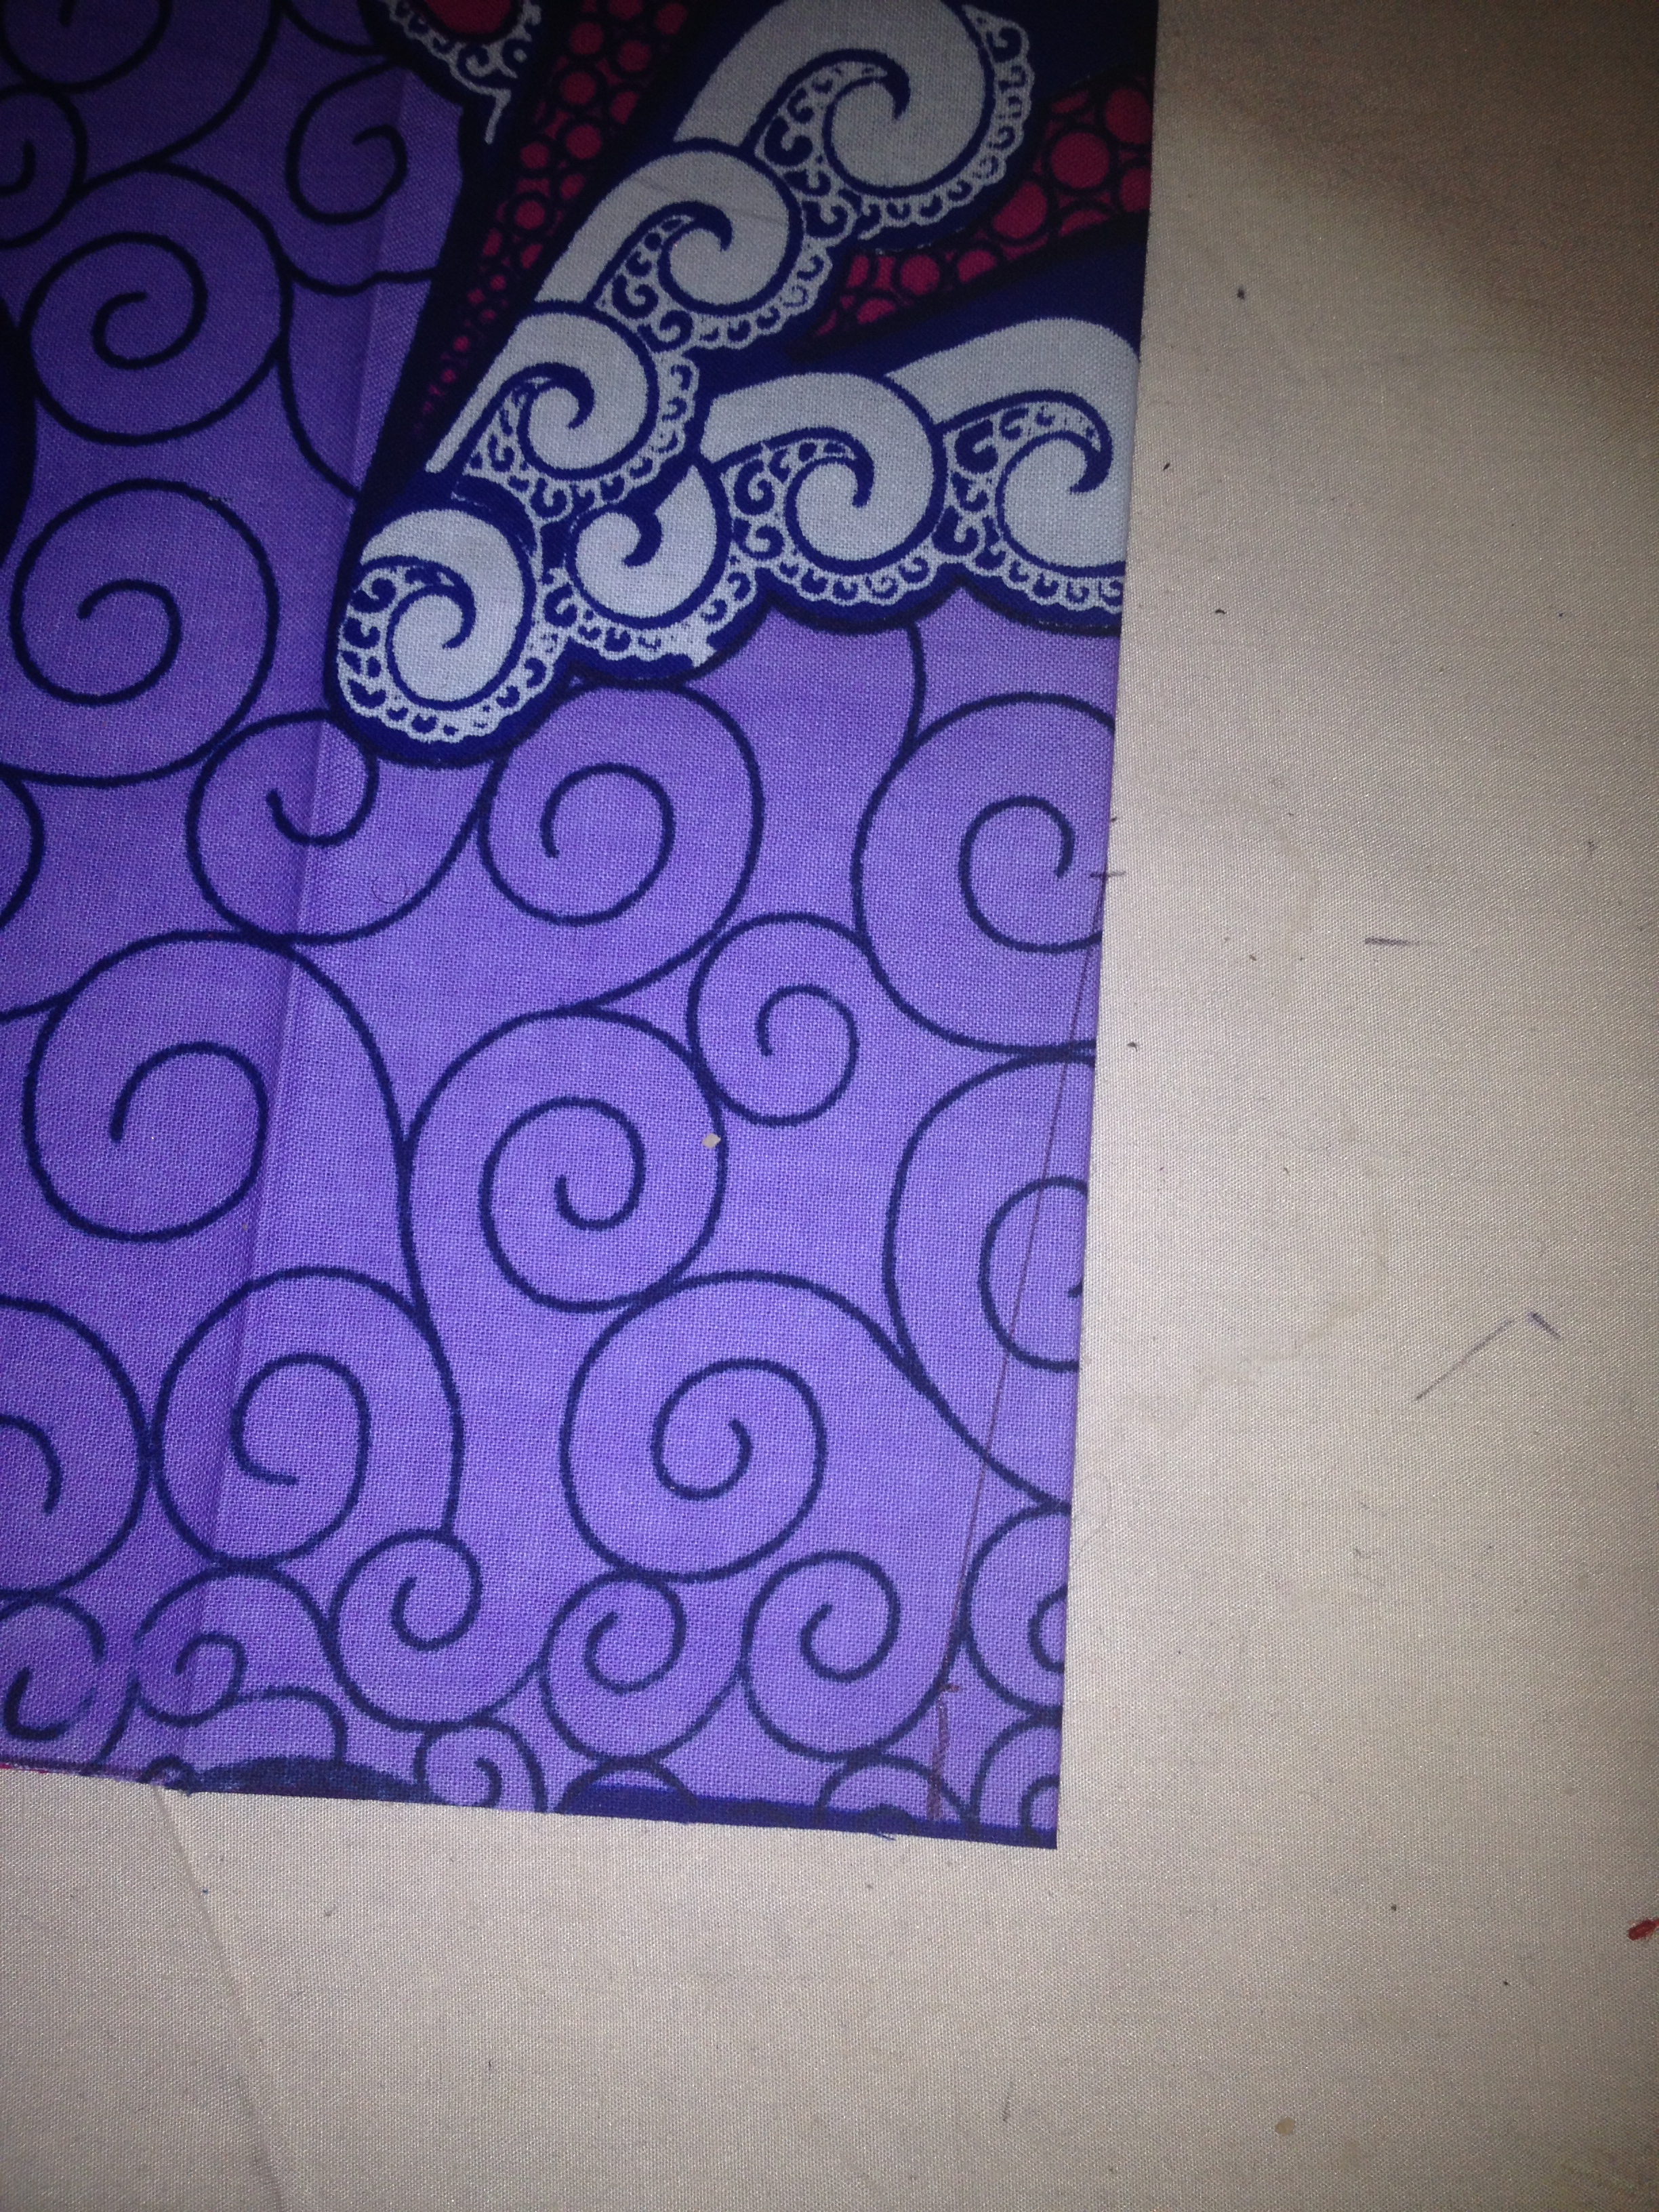
Unfold the piece and use your iron to invert the right side facing crease. these are your dart lines (the centre of your darts), use your tape to measure a dart that is 1″ deep and 5.5″ long, draw this with chalk:

DSC_0016DSC_0017

set this aside.

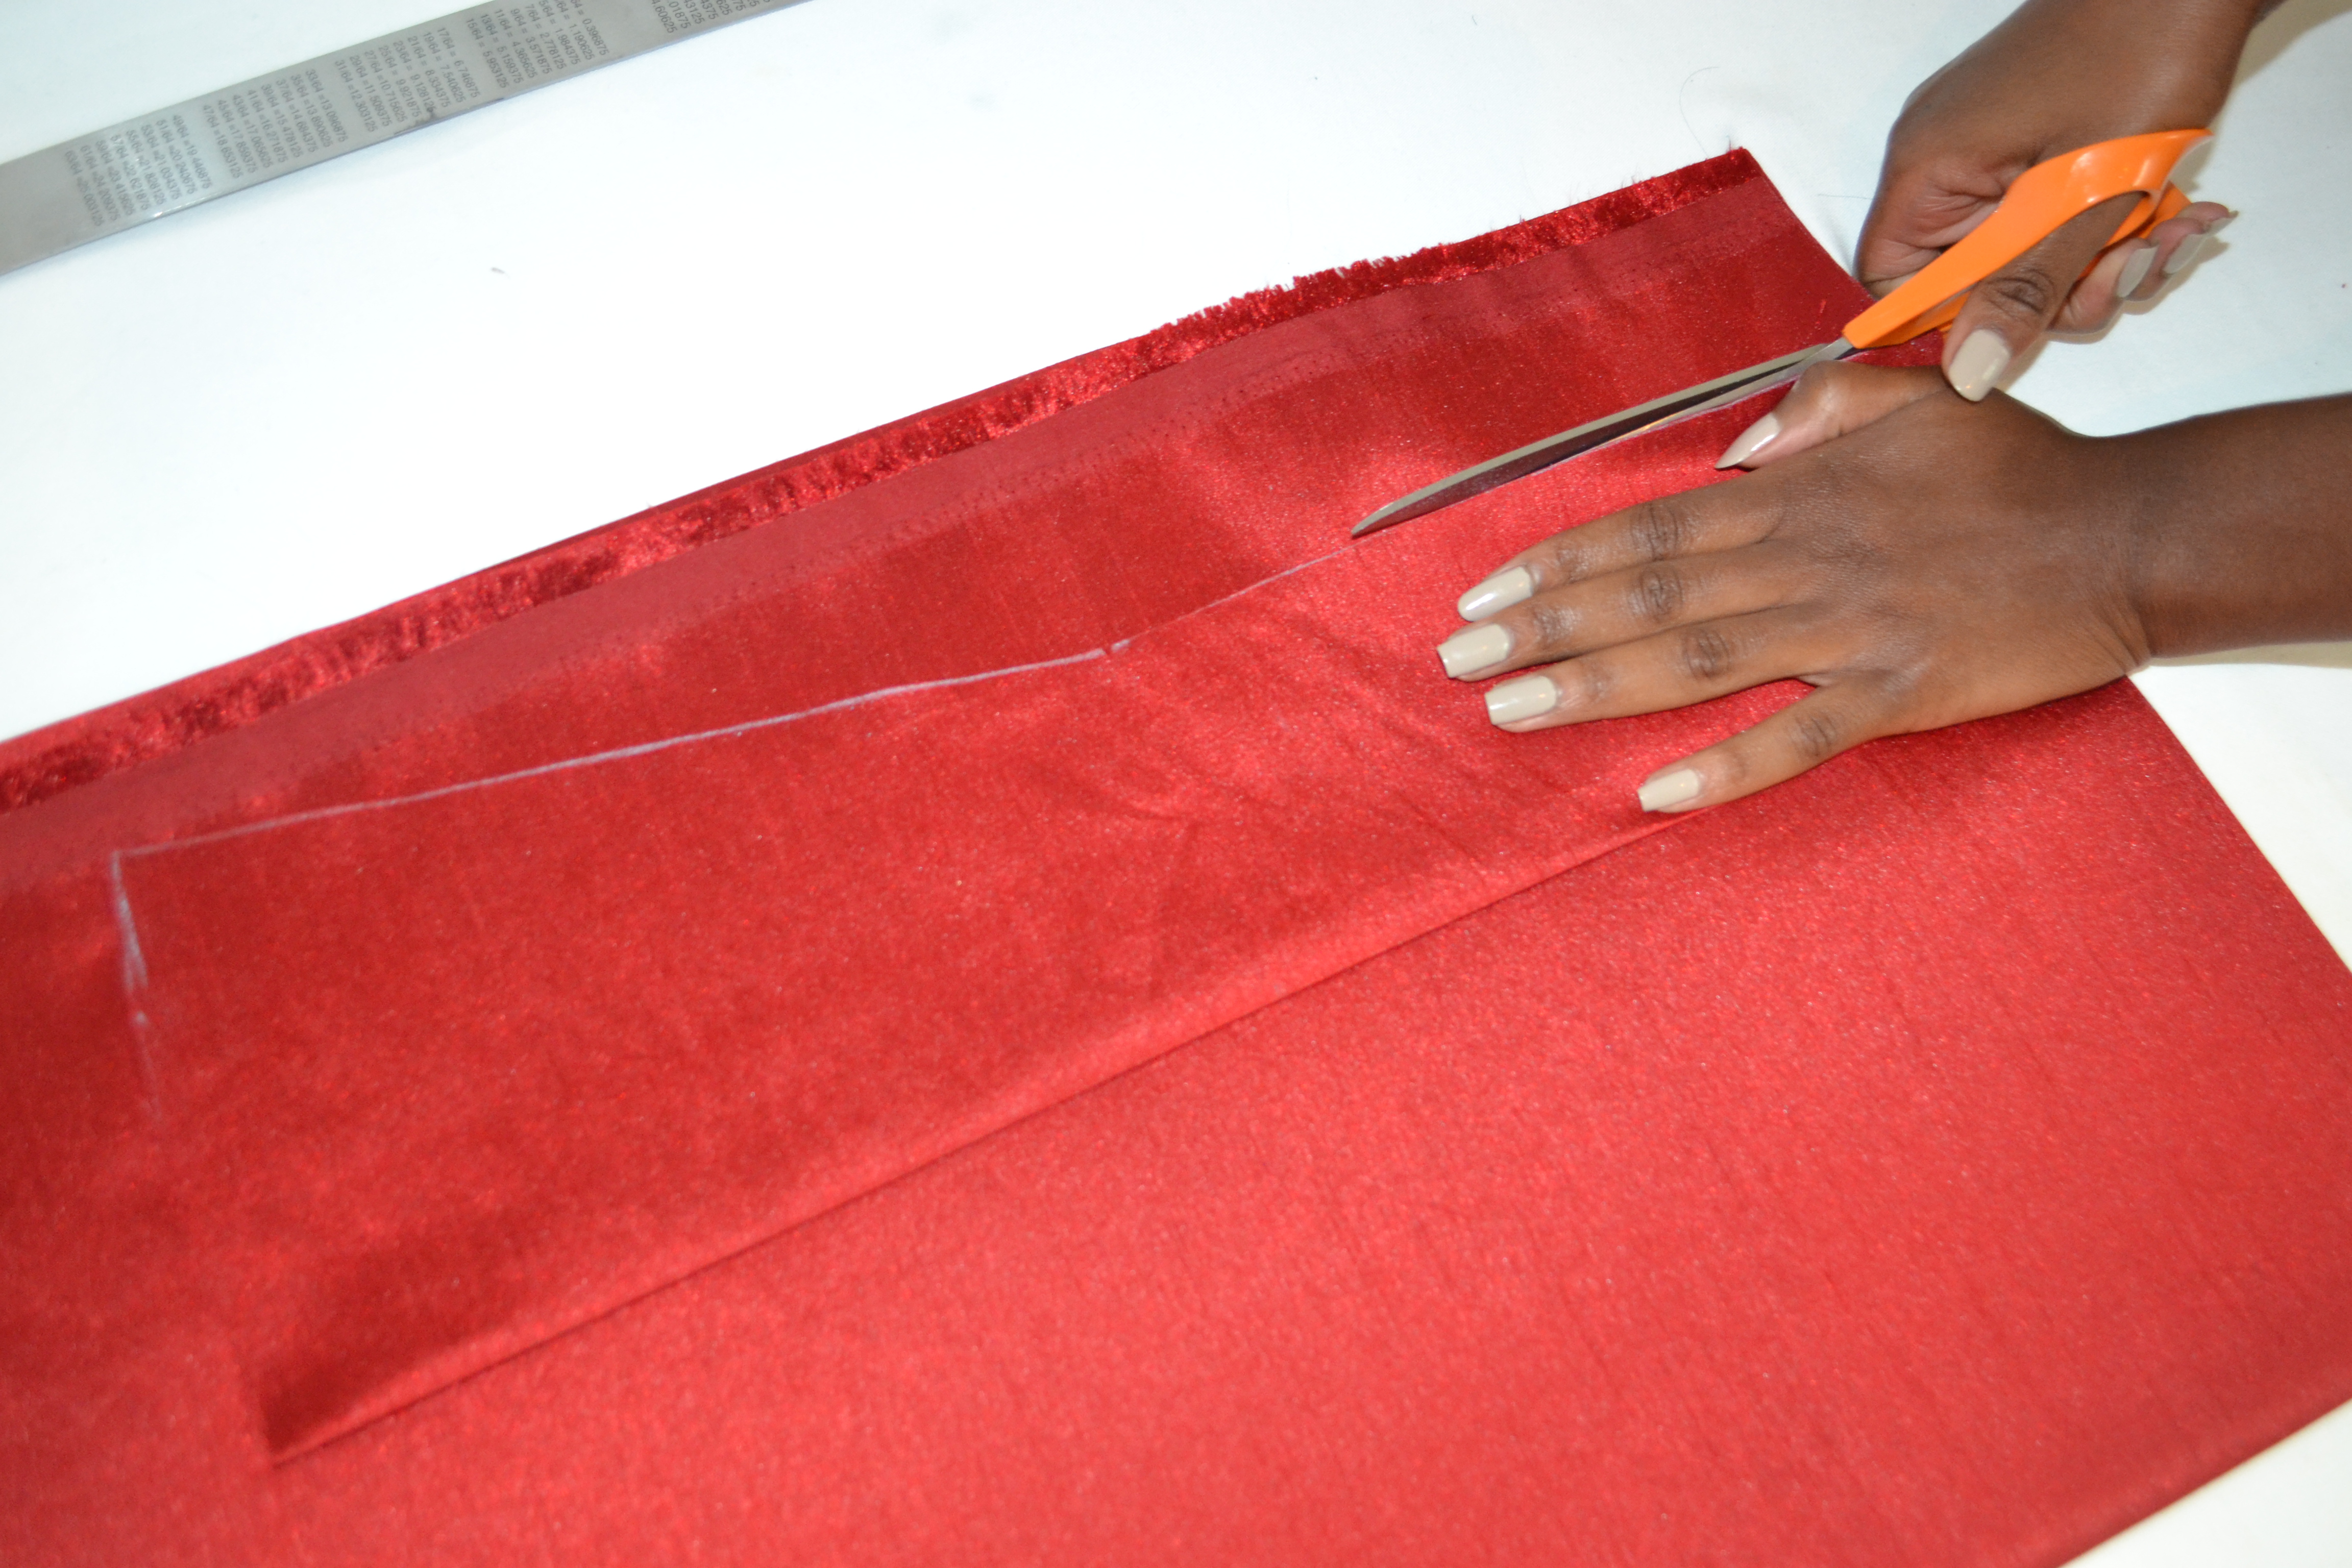
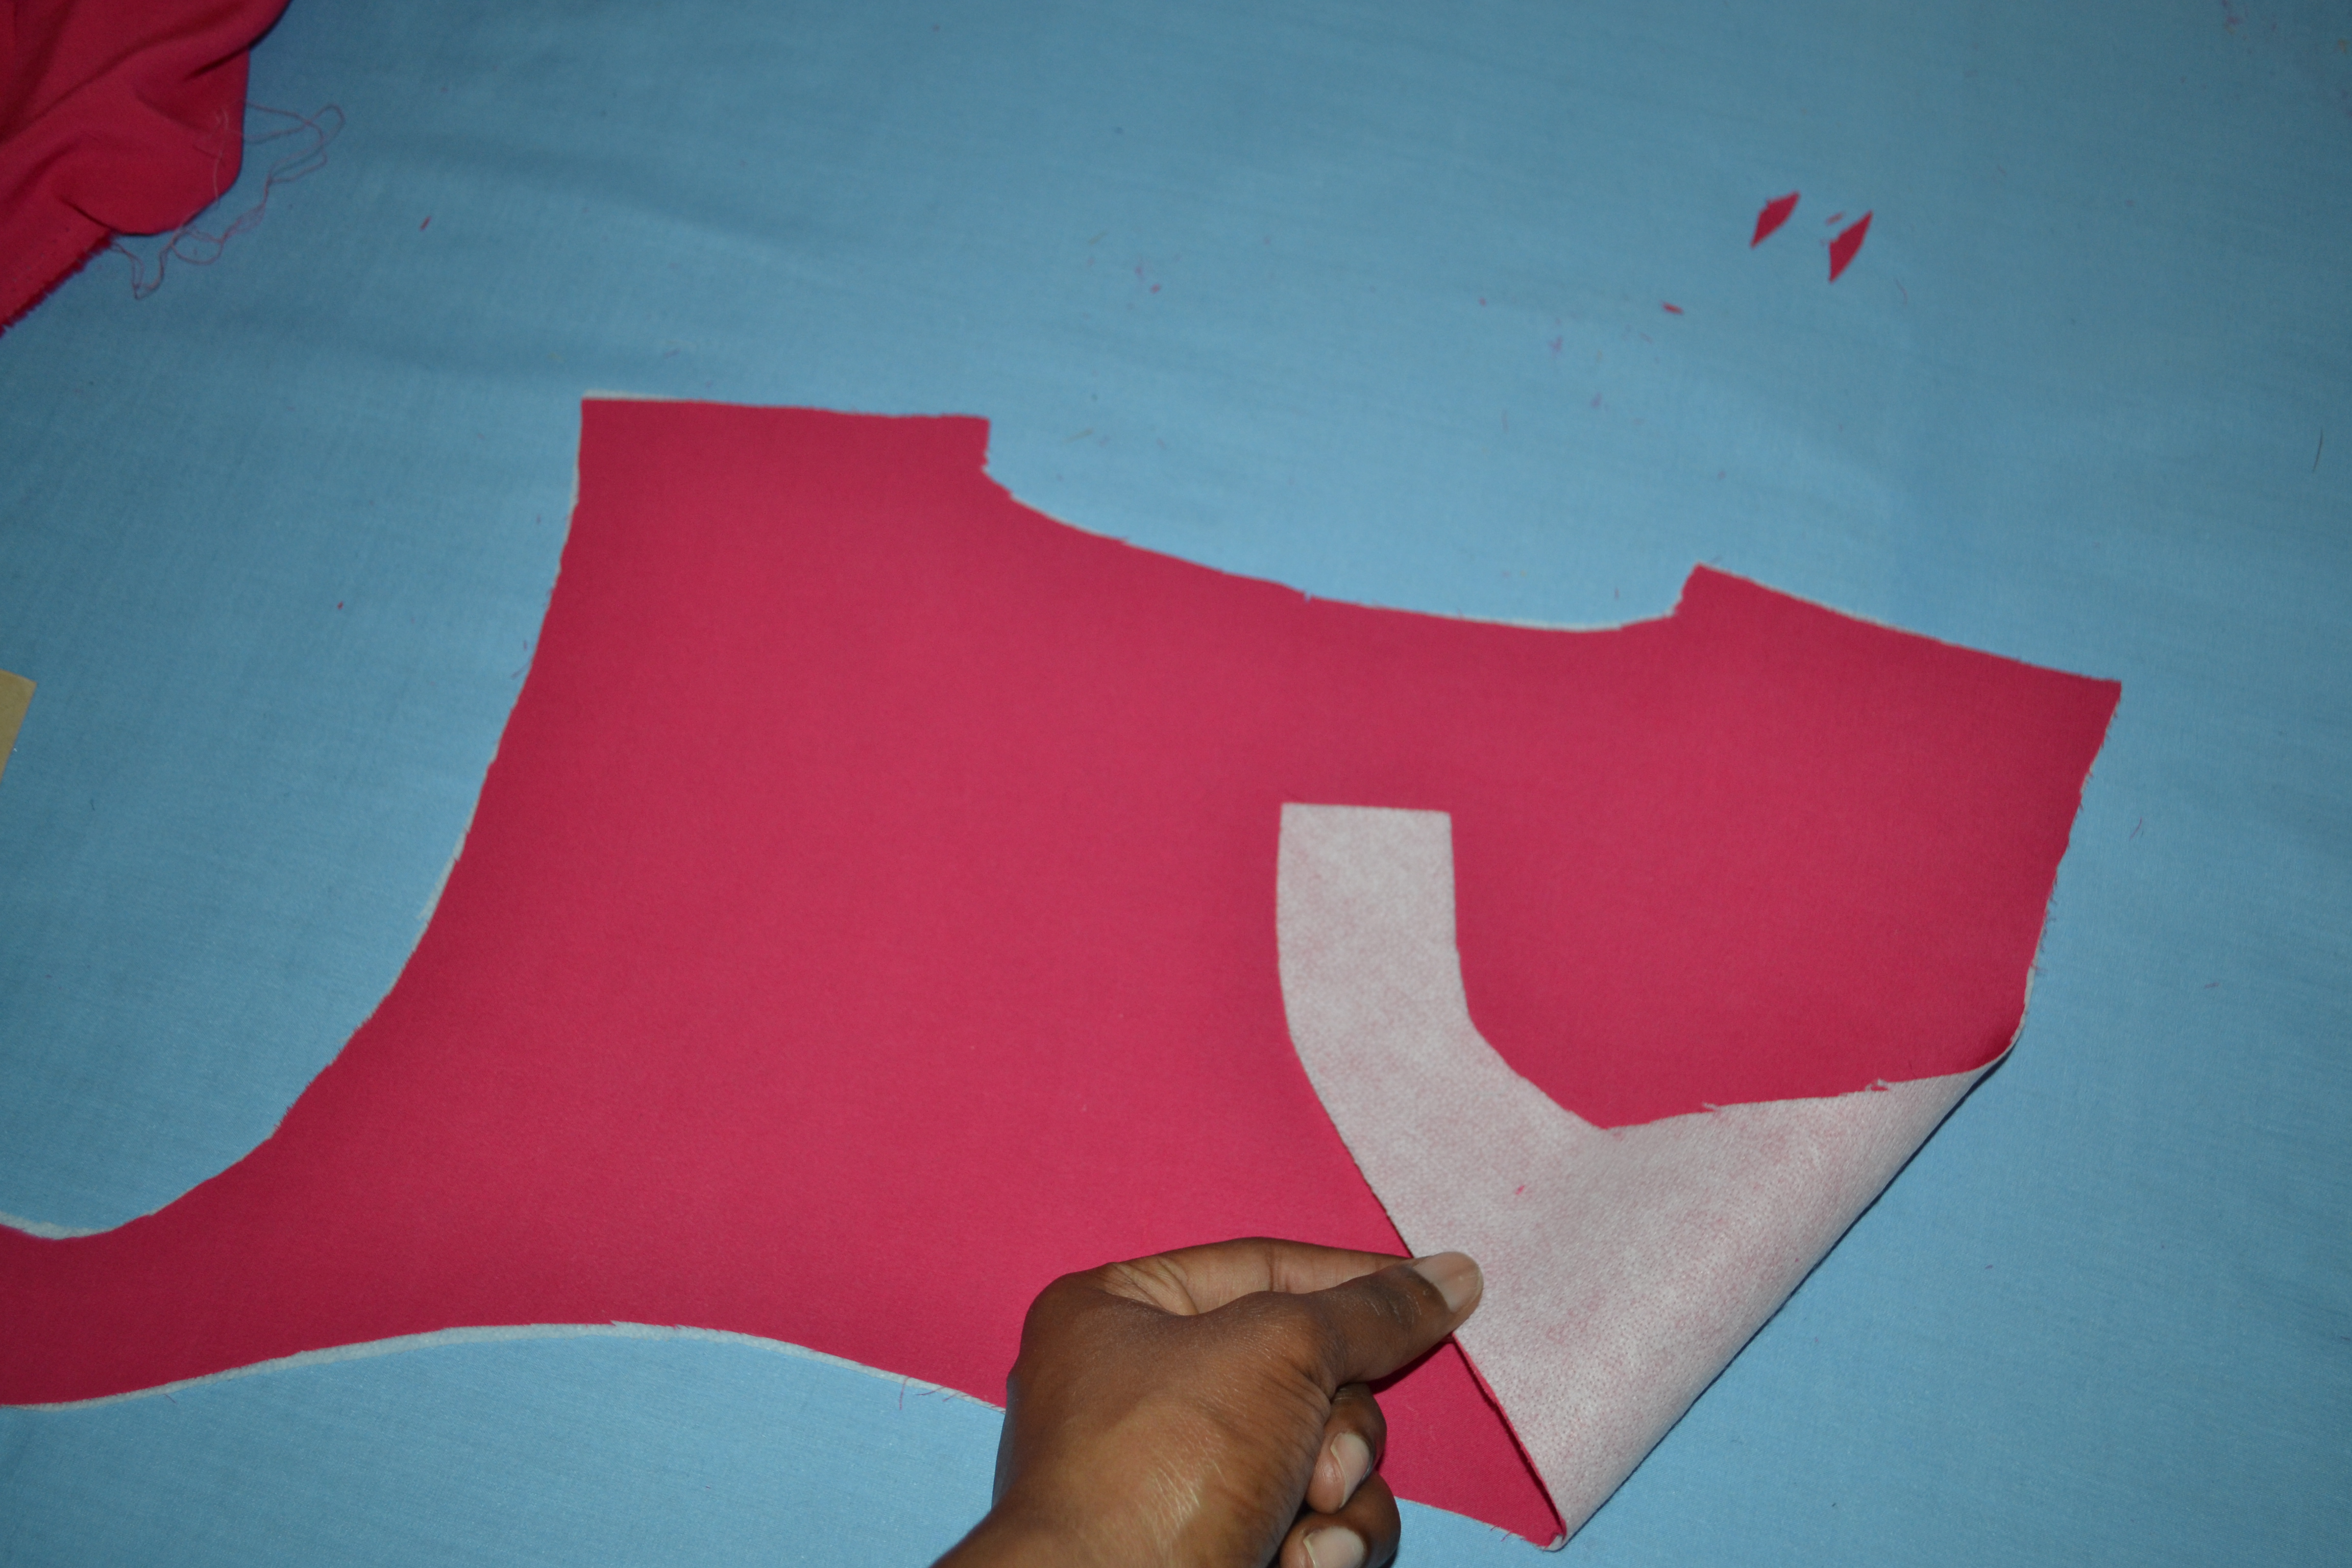
Step 11: To make the facing for the front and back pieces, lay the template pieces on the fold of fabric cut right around the neck, shoulder and armhole, stopping 1.5″ beyond the armhole, along the side seam. lift the template up and draw an arch that curves towards the neckline.

DSC_0003 DSC_0004


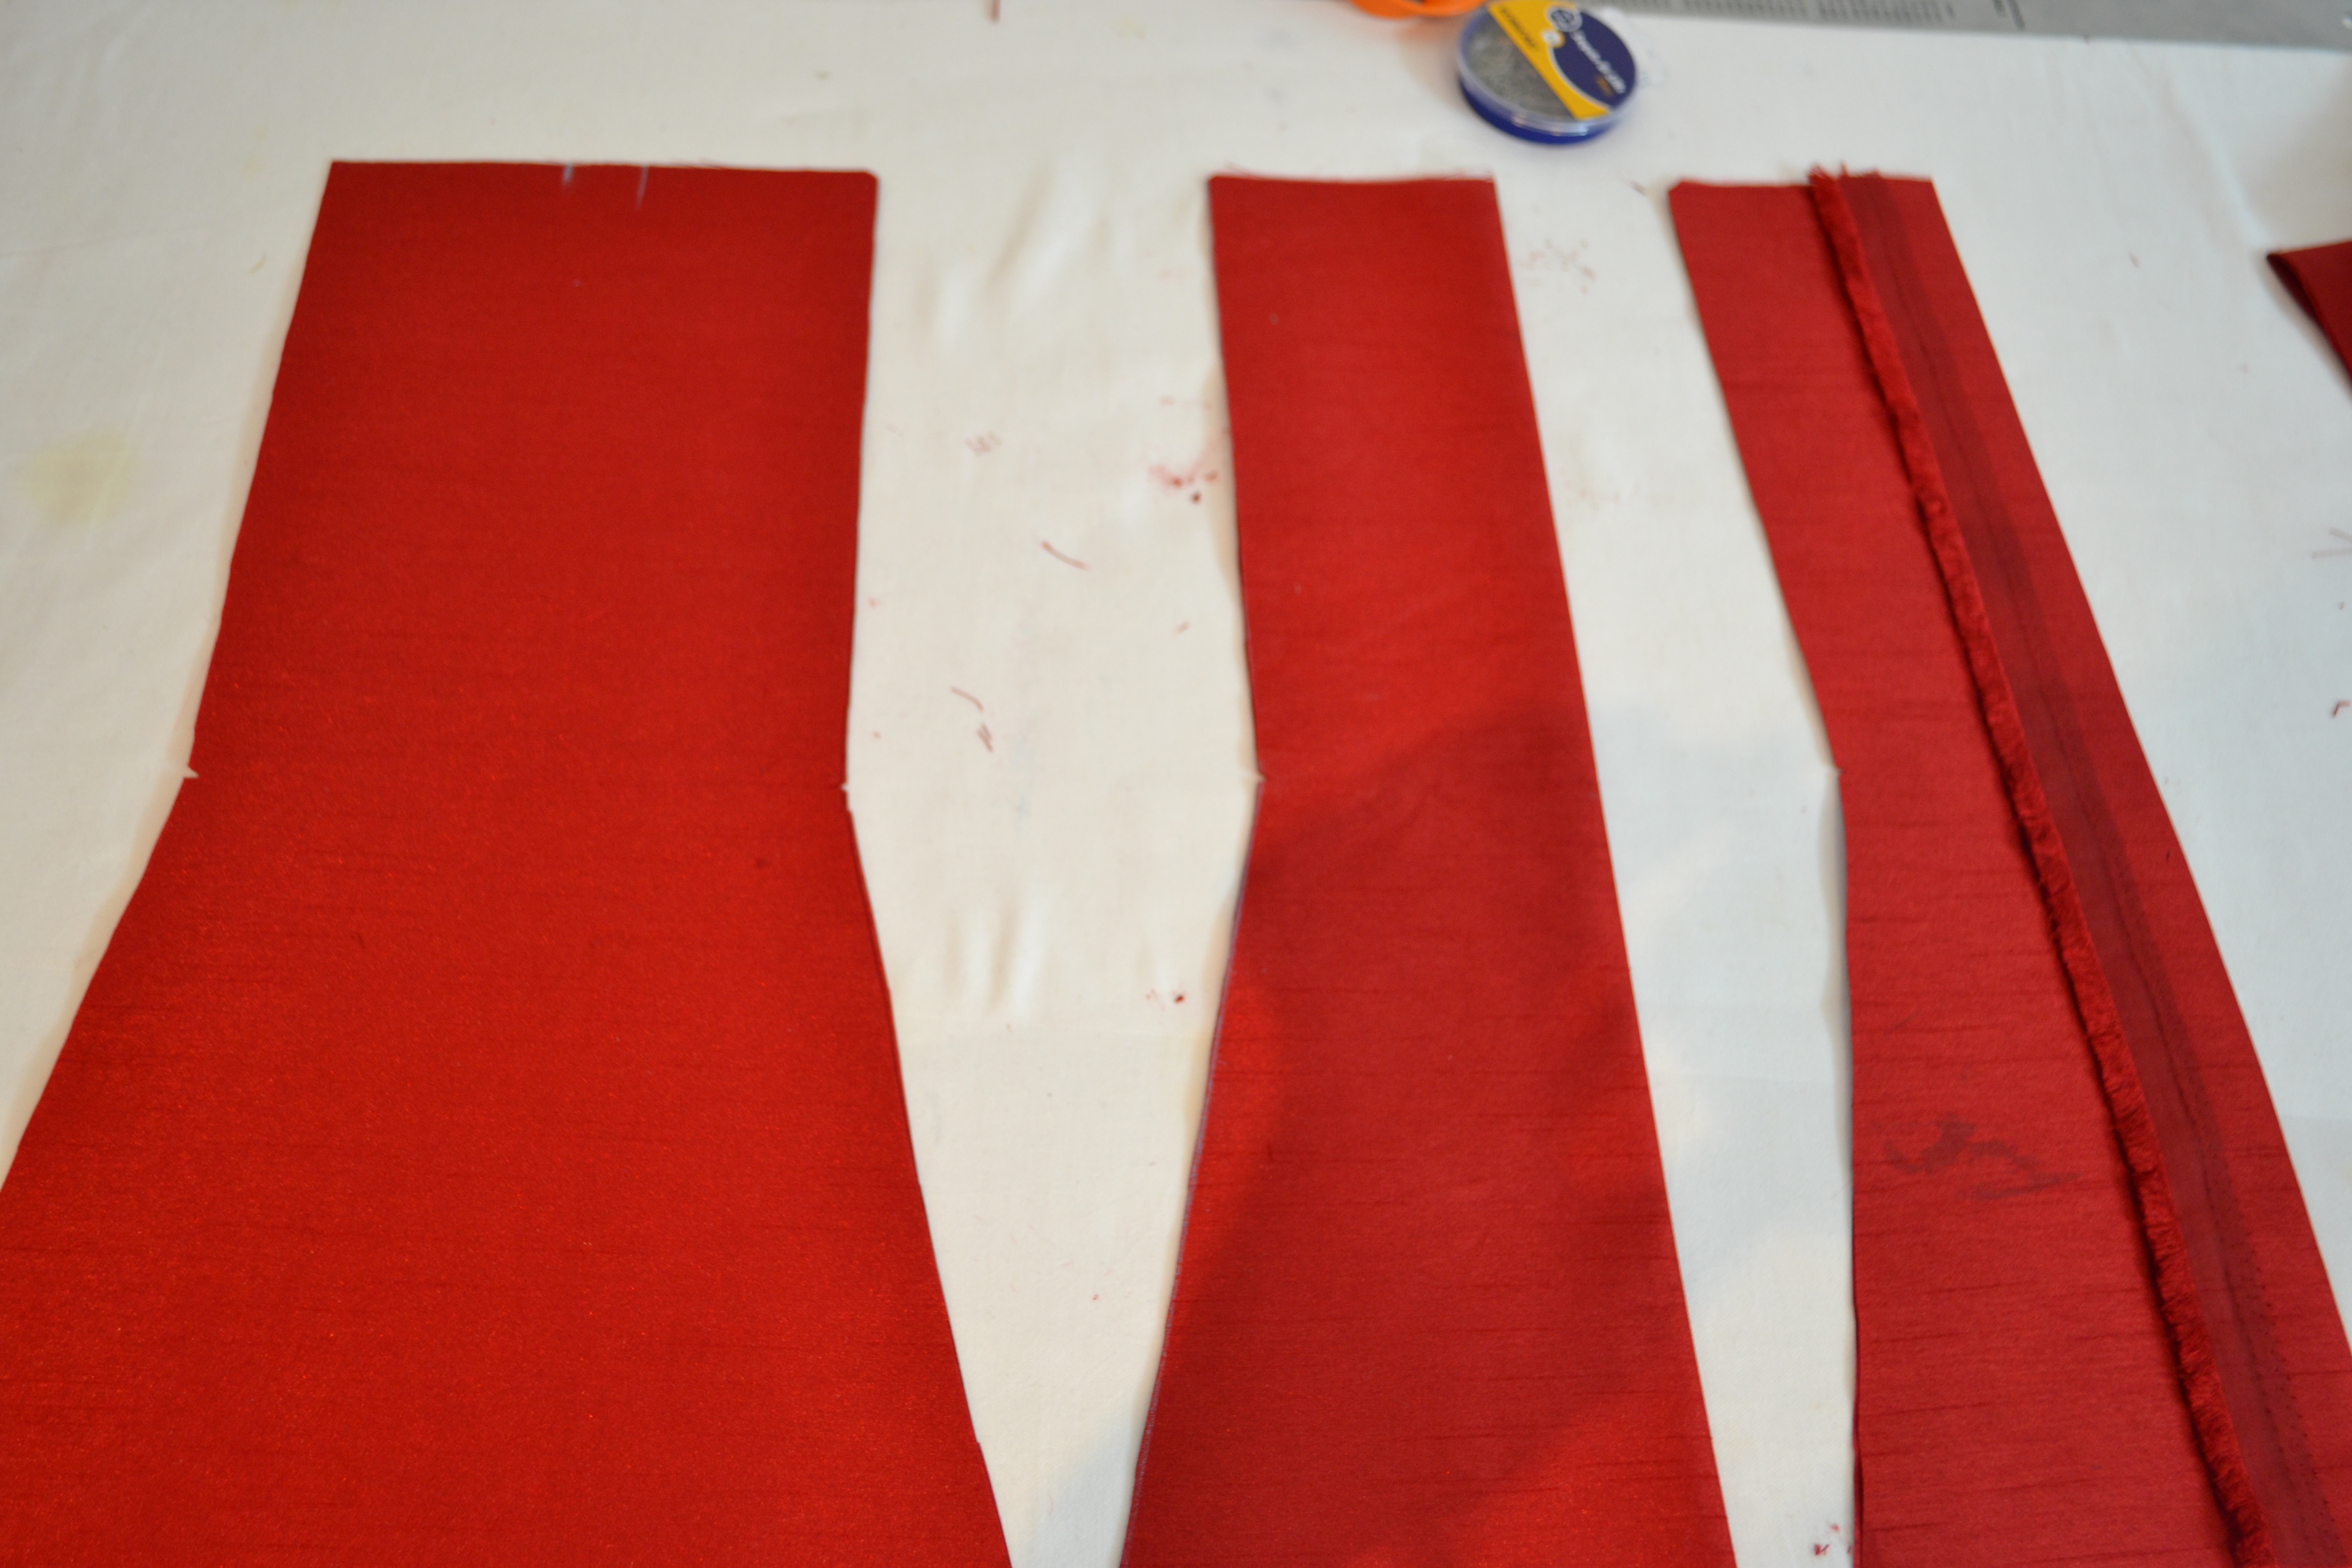
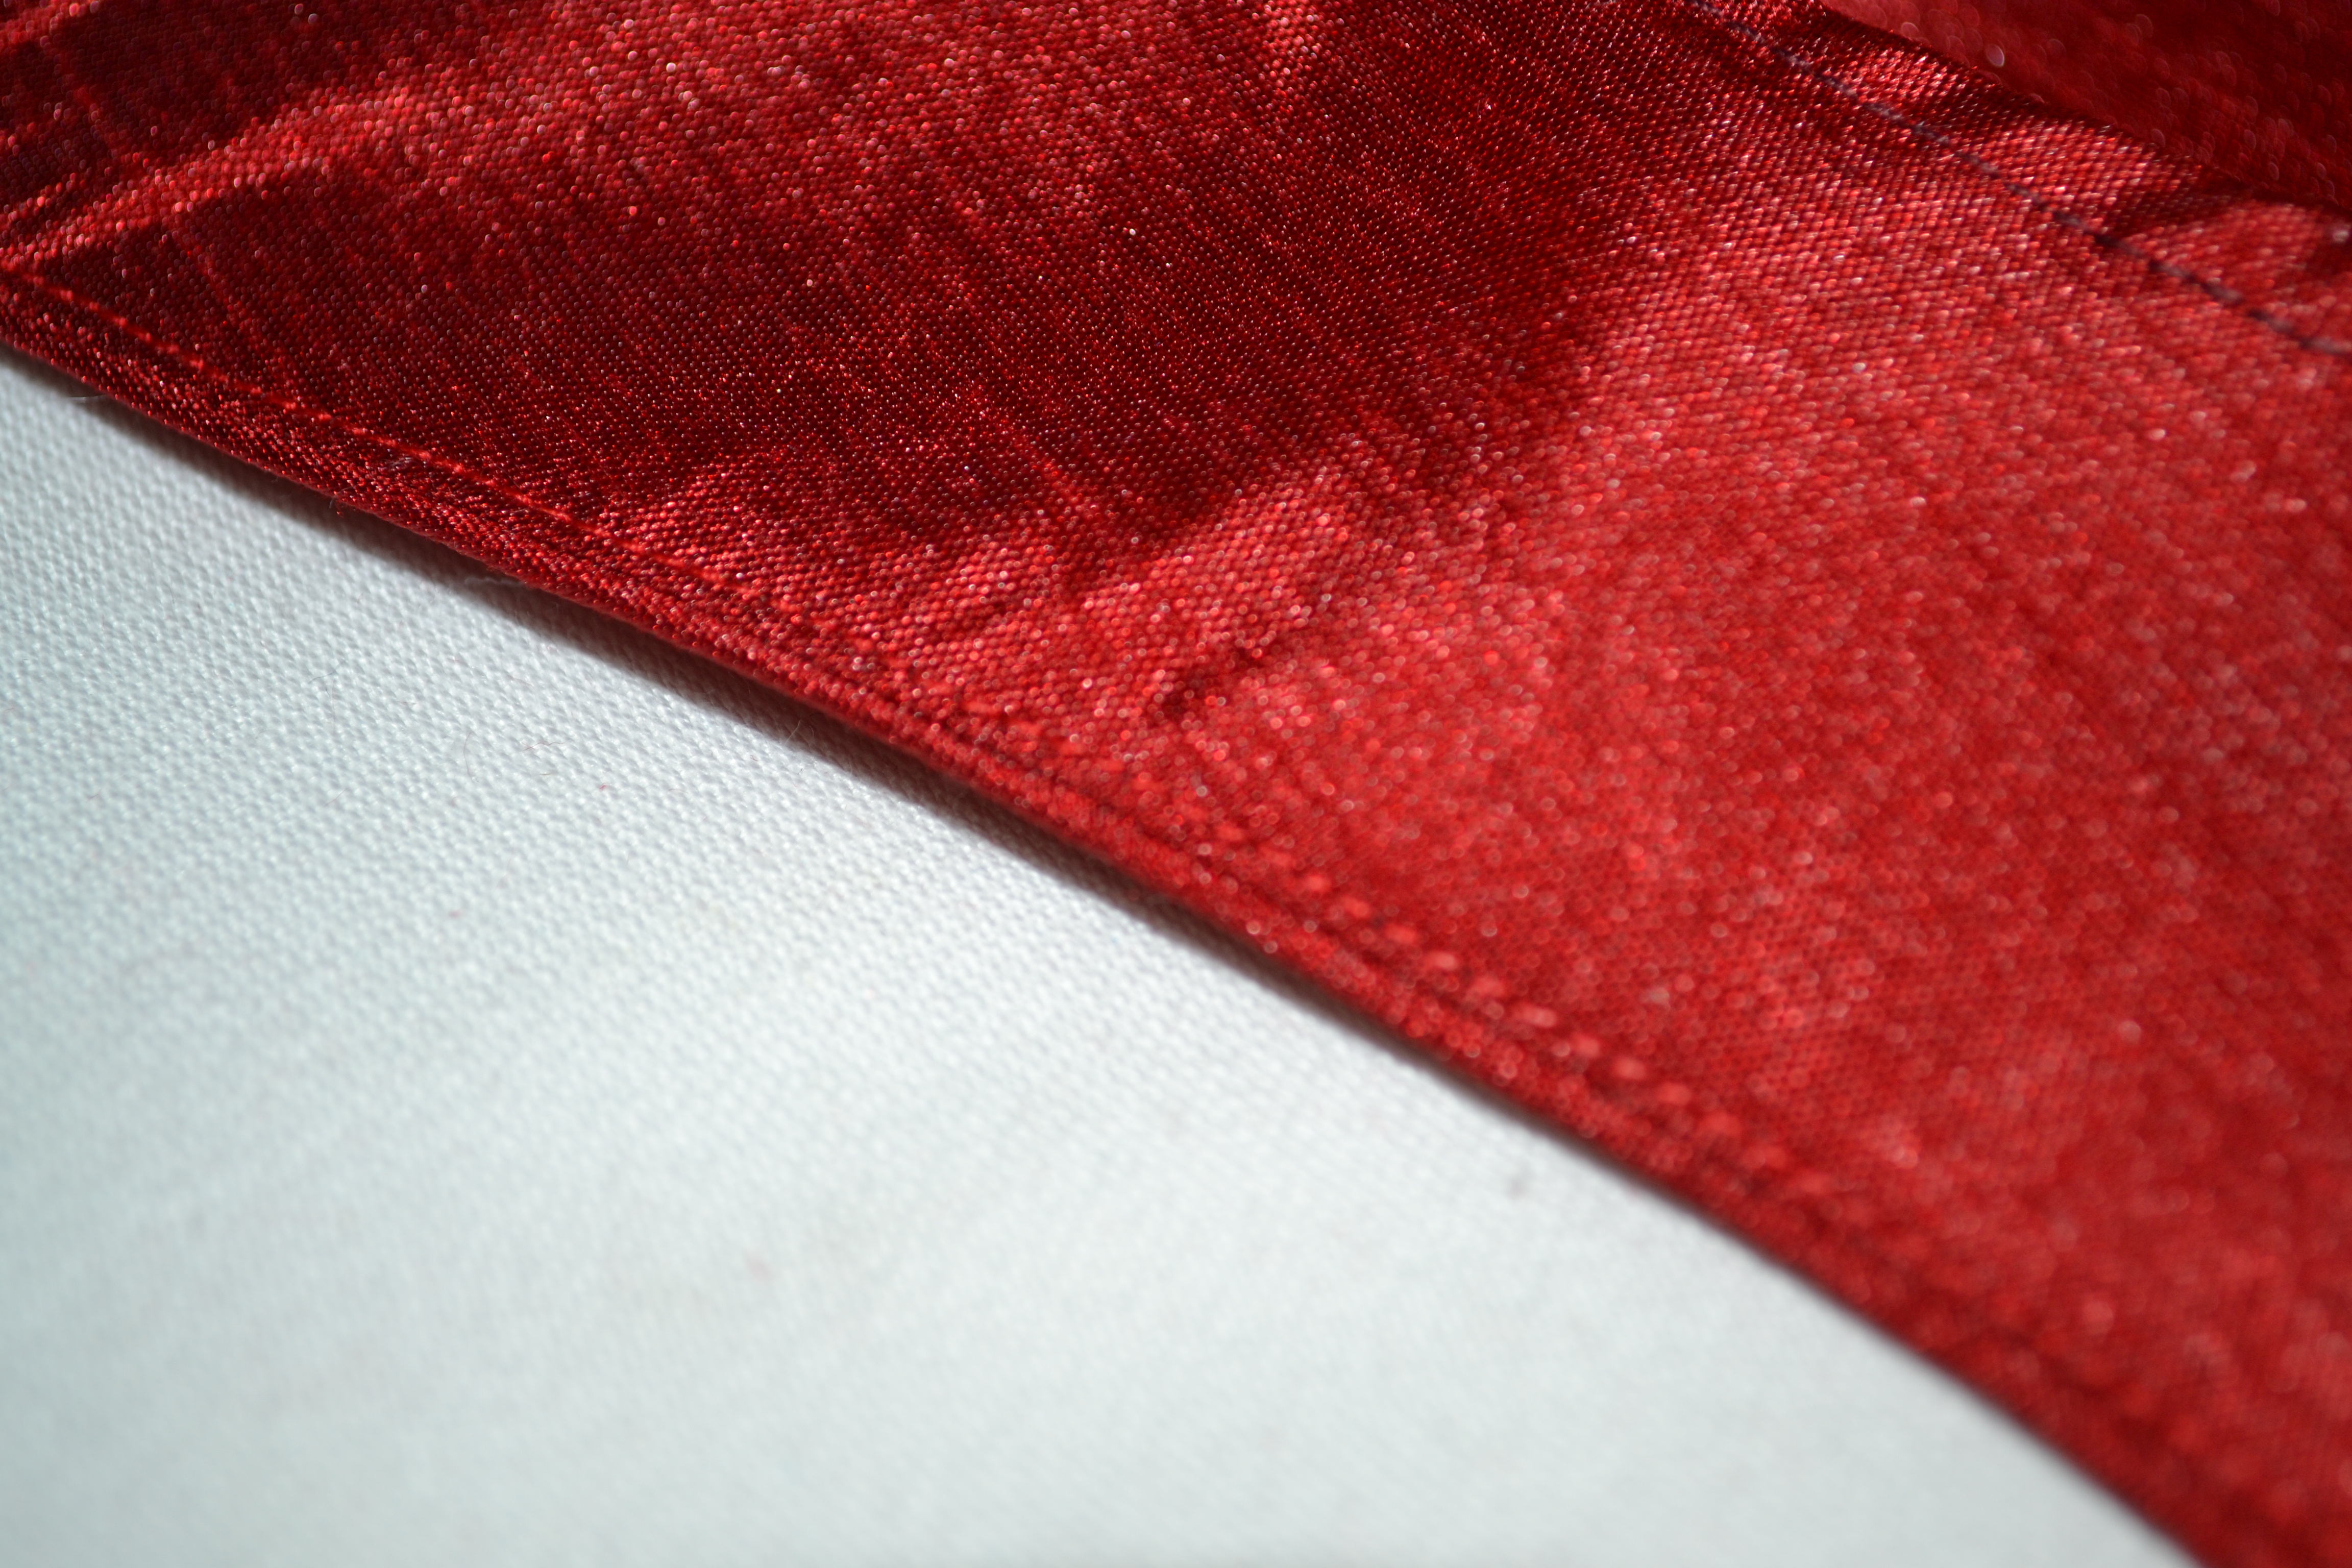
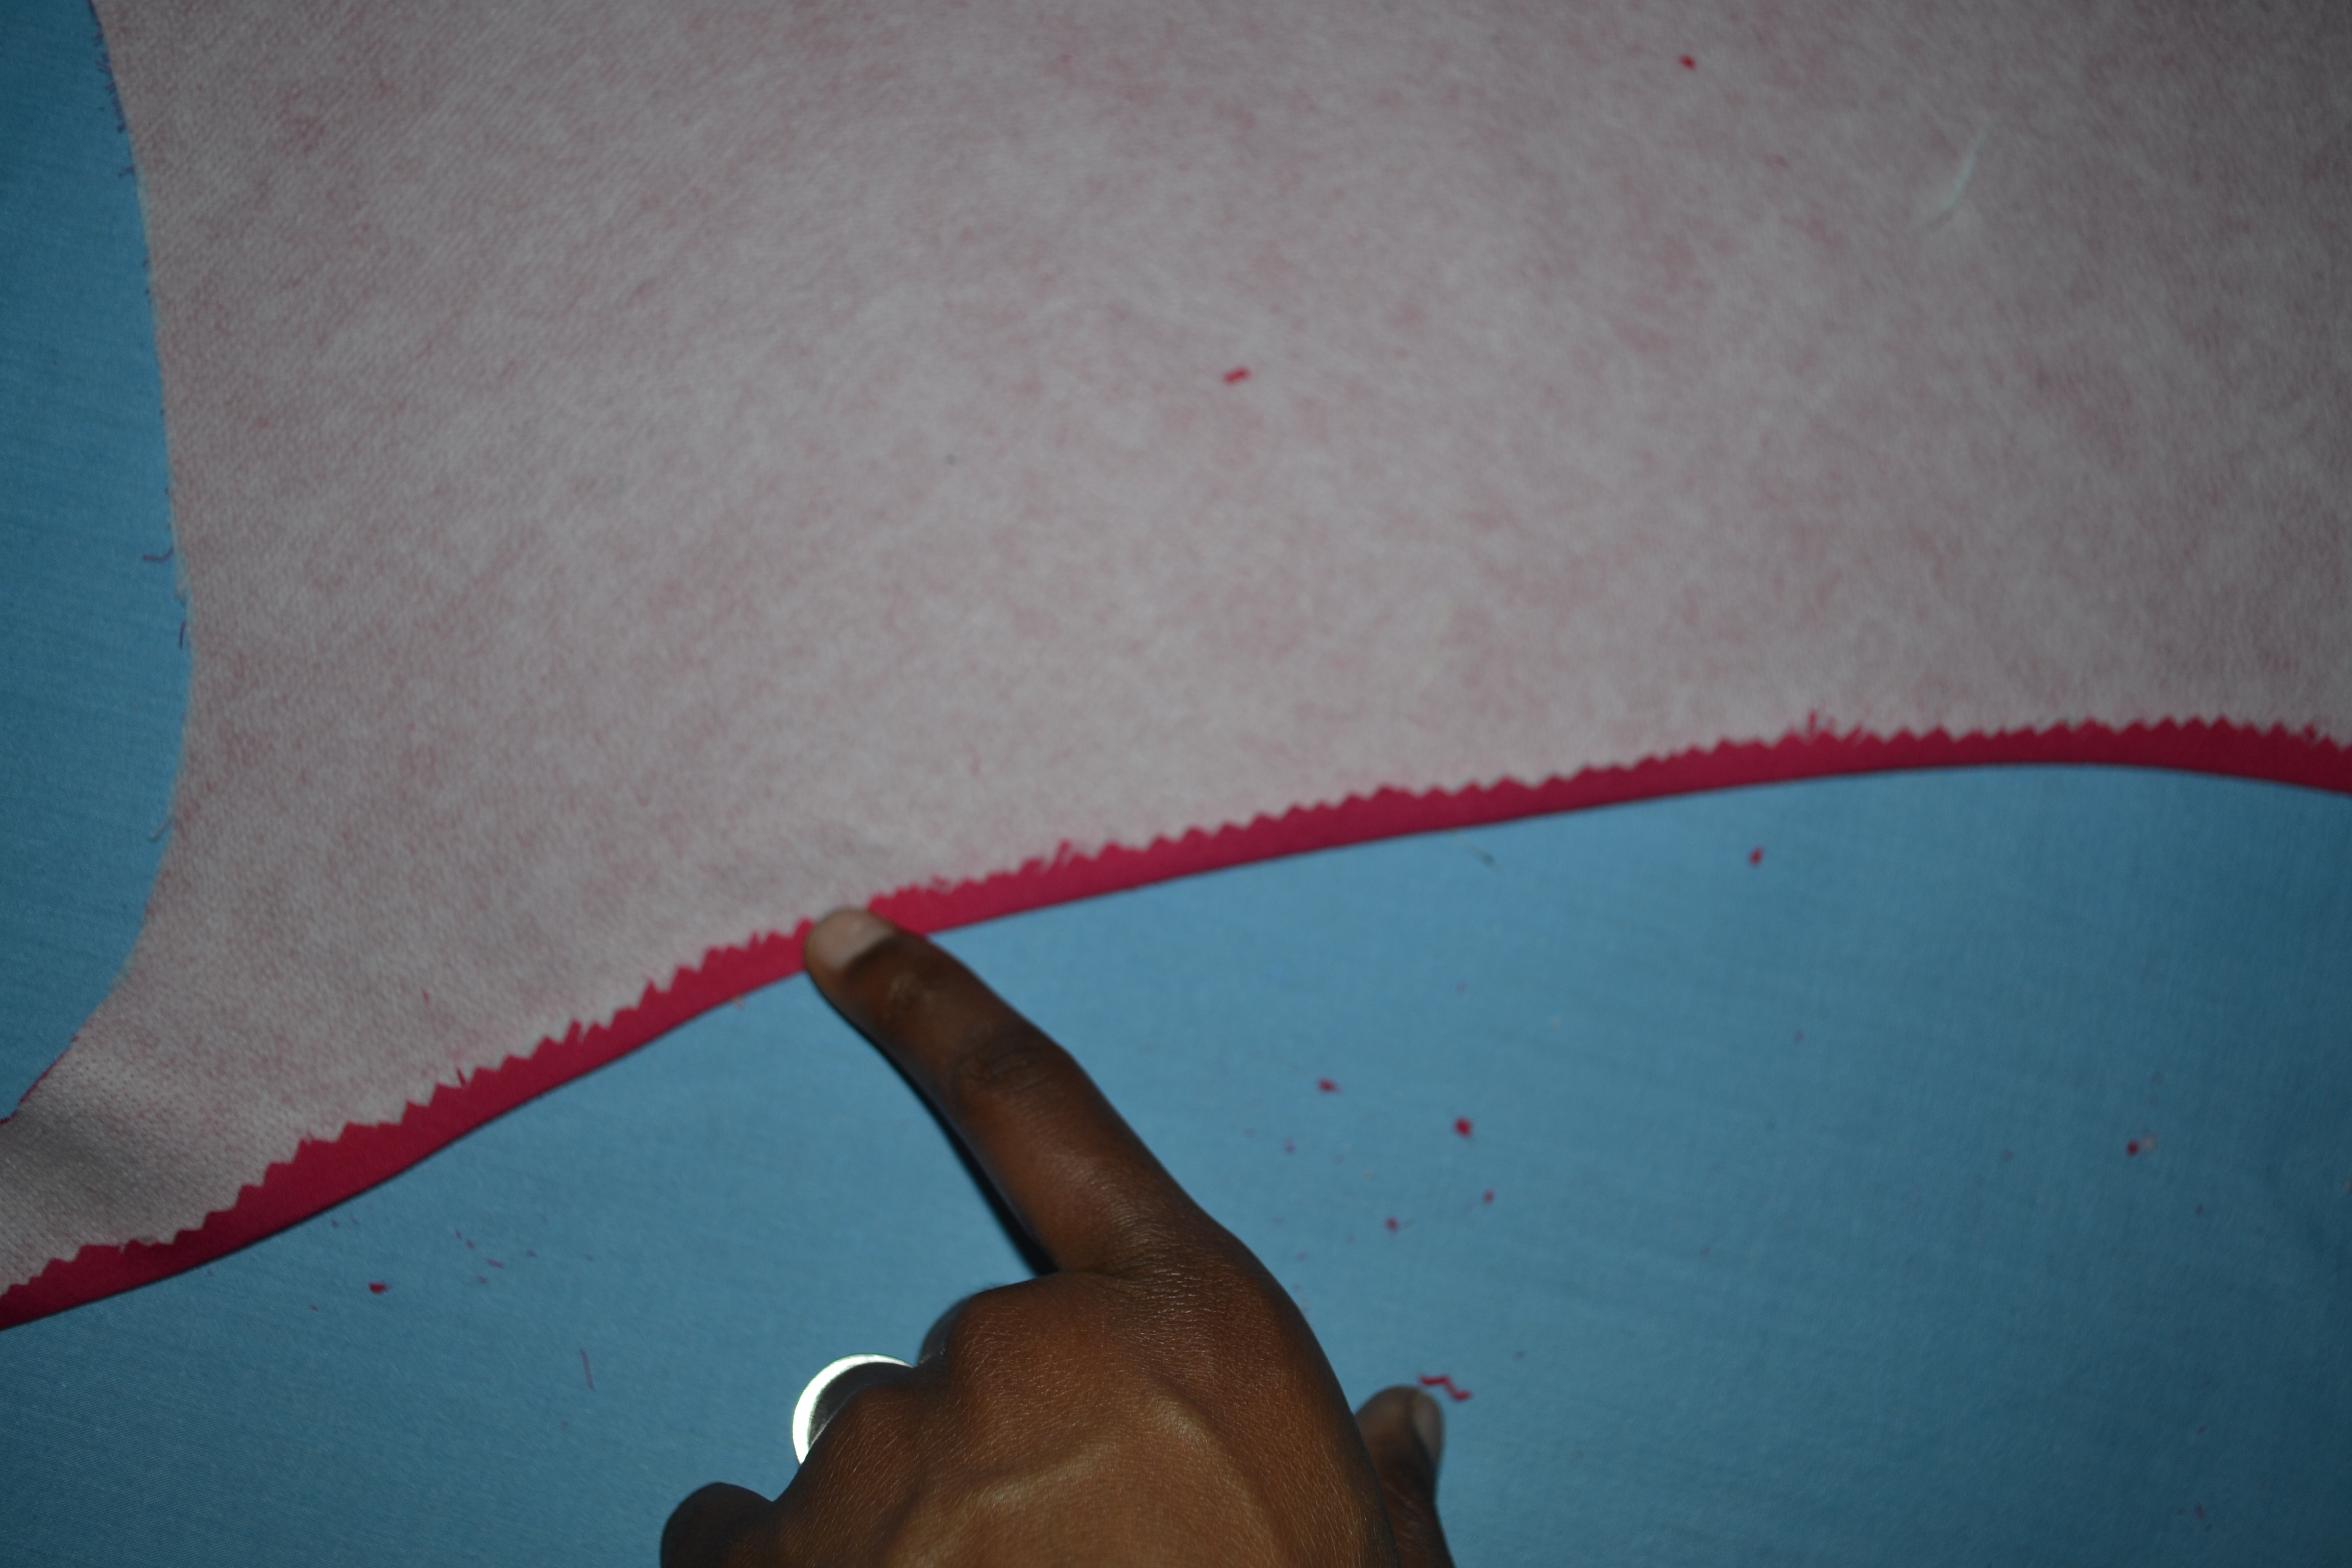
Cut this out and use the pieces as templates for cutting the matching fusible interfacing.  Fuse the interfacing to the facing, snip along the bottom edge with pinging sheers, turn up a single 3/8″ hem and sew.

DSC_0005 DSC_0007


Construction

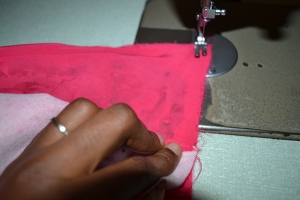
Step 12; sew your darts

Step 13. Lay the facing over the relevant piece, right sided facing each other, pin (if you must) and sew with a 3/8 seam allowance. Press the seam allowance towards the facing and top stitch on the right side of the facing (this is done right at the edge of  the seam). press

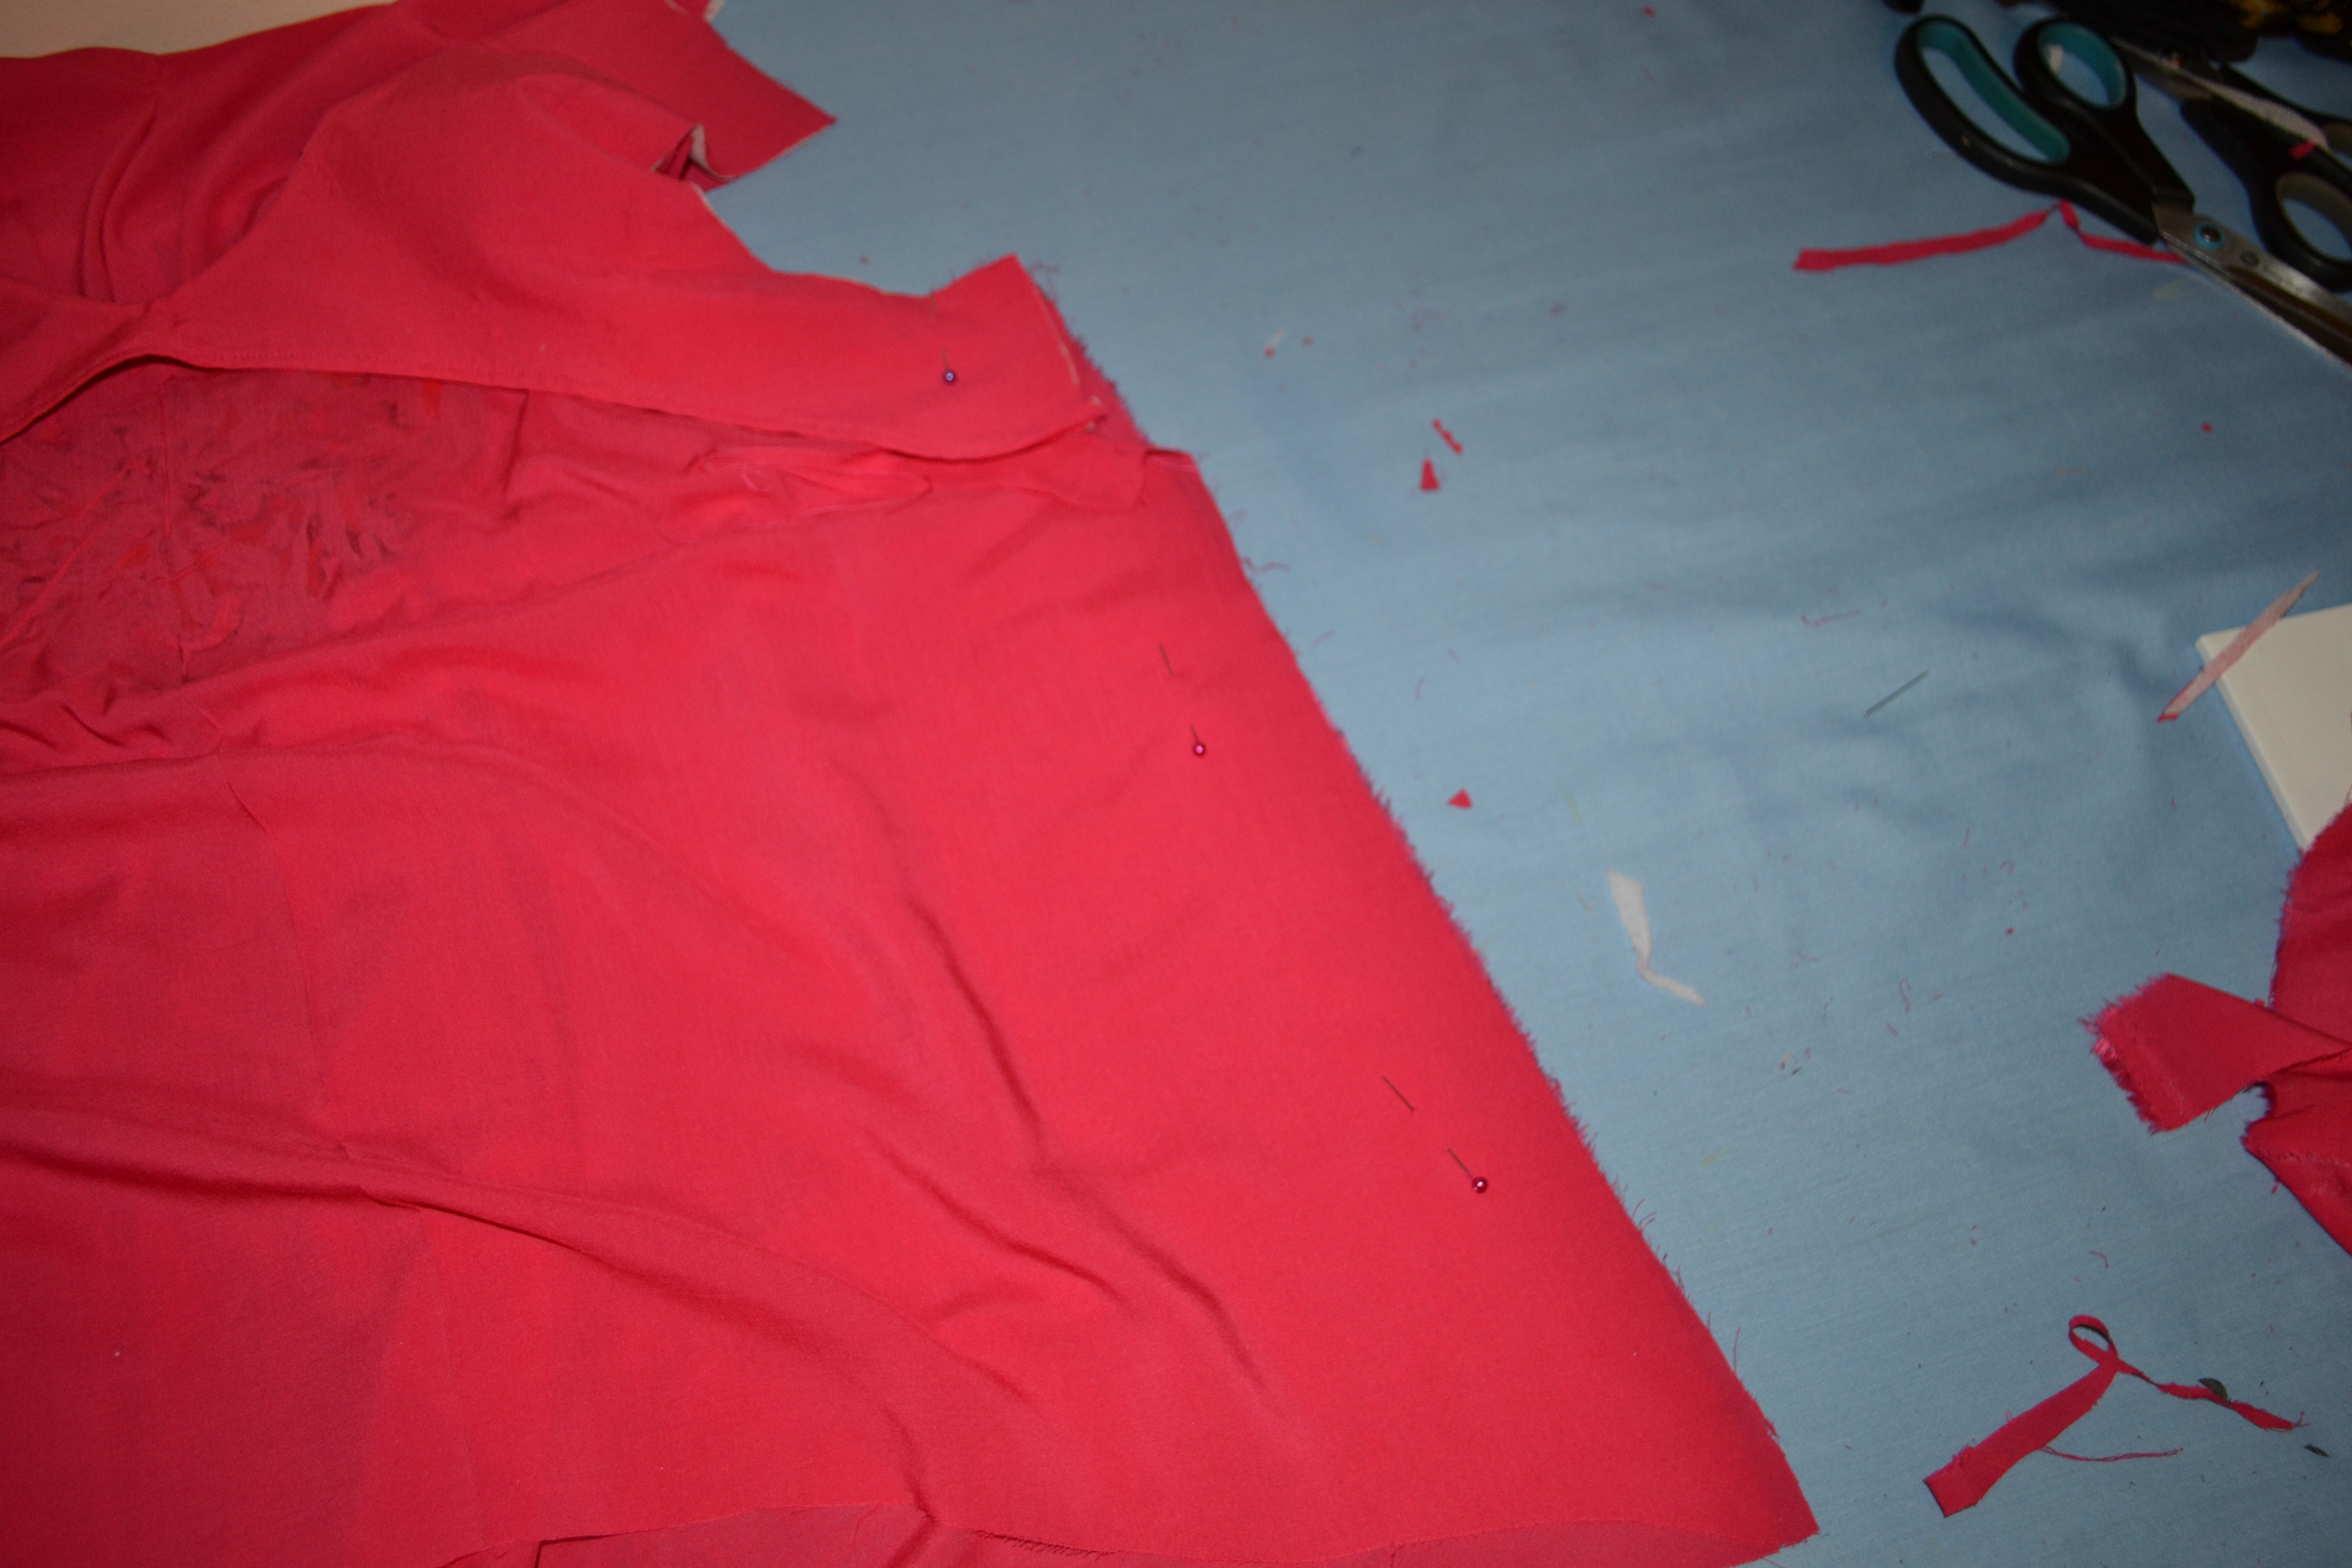
step 14. You will now treat the facing and the top pieces as one. Lay the front piece on top of the back piece, right sides facing inwards, pin the side seams

DSC_0026


sew with a 0.5″ seam allowance.

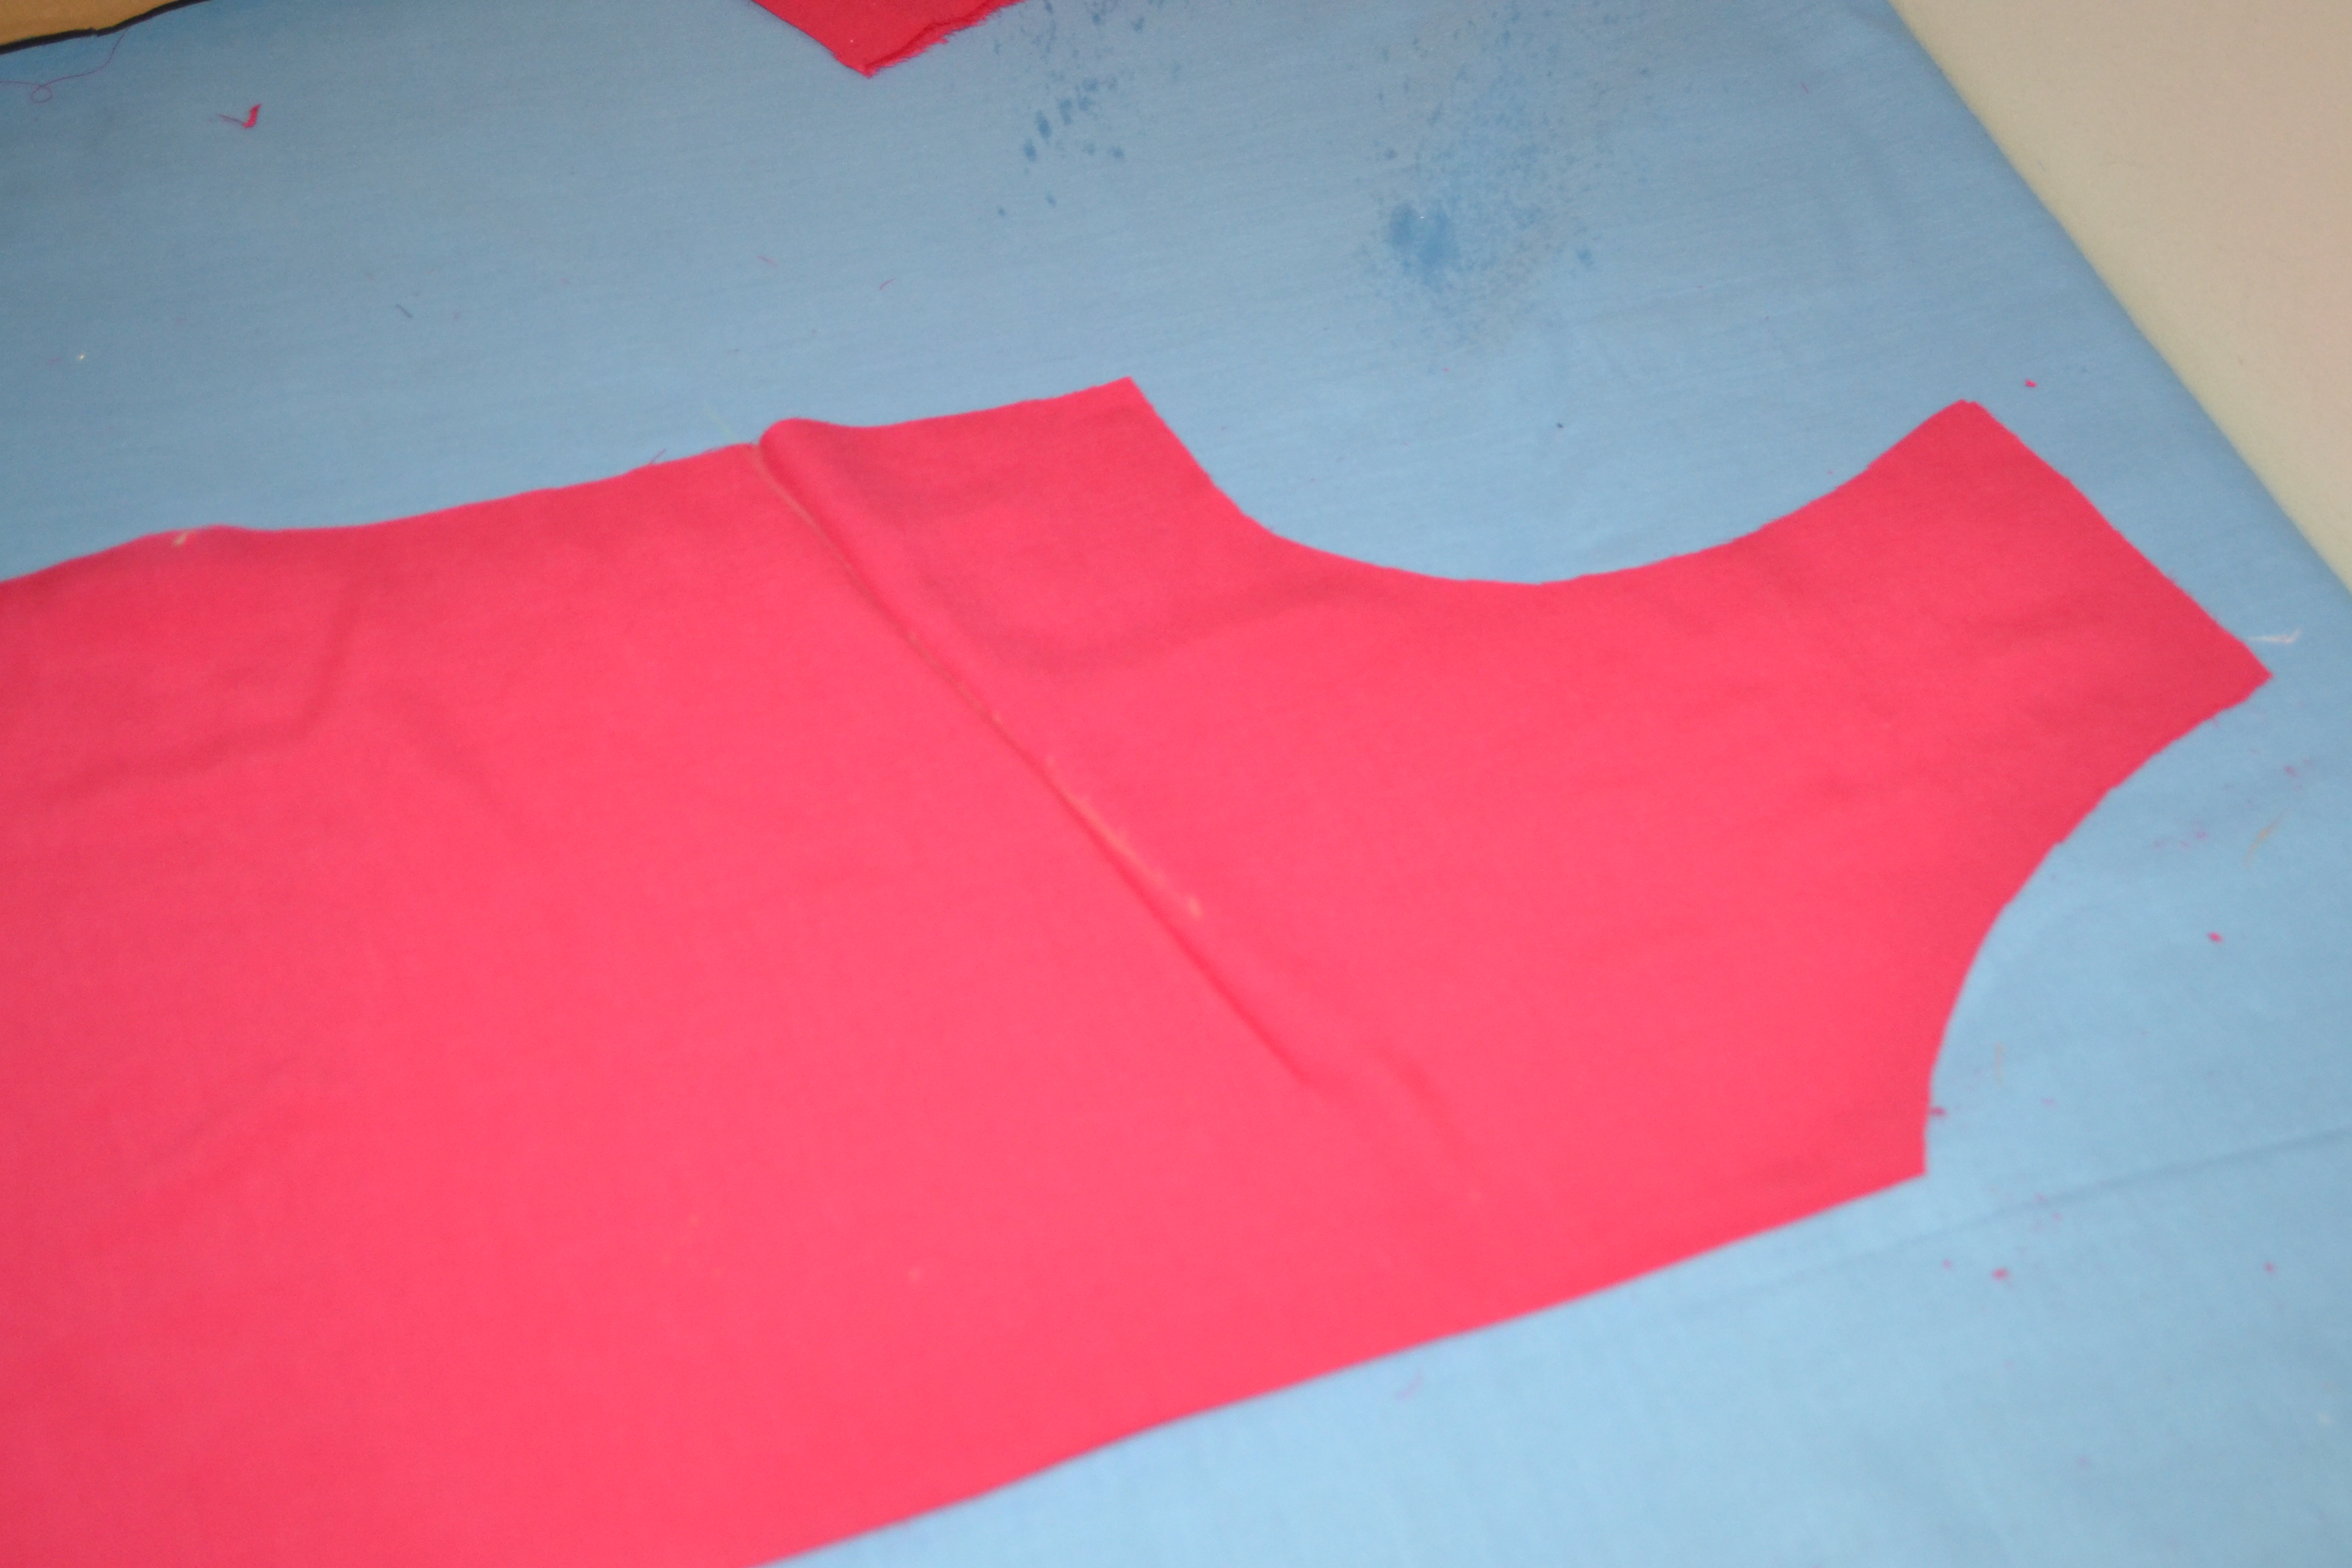
step 15; open the shoulder seams so that the right side of the facings are facing each other and the right sides of the front and back piece are facing each other, sew it like this:

DSC_0027


your top will now look like this inside out:

DSC_0028

Finish the hem by doing a double turned hem, I thing this is the best way for this top.

for sleeves follow my tutorial on sleeves, the link is: http://chinelobally.com/2014/02/04/busy-bee-how-to-cut-a-sleeve-without-a-pattern/

sew in your sleeves and there you have it, the most forgiving top ever.

I have added a leather appliqué to the neckline of mine and also added shoulder pads for extra sharpness. I’m thinking, black skinny jeans and heels?.

I really hope give it a go, and please send me pictures of your completed garments, I get sew excited (sorry, I couldn’t help that) when I see what other people have done. As ever if you have any questions just send them over and I will try my best to answer.

Have a blissful week

xxx

Thank you all xxx!!!

Hi Stitch-hearts (lamest pun ever but I like it)

Its been a while since I posted on my blog but I’m sure everyone can appreciate how hectic it has all been, but I am giving my scouts honours word that I will be posting a new tutorial more regularly.

Firstly, and most importantly, I will like to say a huge thank you to all of you who have supported my sewing bee journey, I am so grateful for all the kind messages that have kept me very busy responding. to all the new followers, welcome to my blog and I hope it will be a useful resource for you.

I really felt the support of the British public and  am so pleased with how my approach to sewing has been received. Doing sewing bee is an experience I will never forget and I am so thankful to have been short-listed for the programme. I know the application for next years series has closed but I will strongly recommend anyone considering taking part in the one after to go for it.

Being in a room full of people who shared my passion for sewing was amazing and something I had never experienced before. All the contestants were fantastic; a really good bunch and I loved every minute of it.

When it came down to the final and it was just Heather, Tamara and myself, I must admit that it induced some bitter-sweet feelings; I was proud to be competing with such experienced sewists in the finals but was also afraid of that same fact. I have to say that losing the crown to Heather, was not a loss at all, technically, Heather is a fantastic sewist and she is highly skilled, she deserved her win!

?????????????????????????????????????????????????????????????????????????????????????????????????????????????????????????????????????????????????????????????????????????????????????????

I’m sure everyone remembers my tie melt down. Gosh that was a very wordy pattern and not being a pattern girl it completely threw me. Prior to the sewing bee I had never used a pattern, but when I was confronted with my first pattern for the show, I relied heavily on the pictures for direction. So sorry to all those who were disappointed with the melt down, but hey, I never have to make a tie EVER again (I say that now but something inside me tells me I will soon post up a tutorial on making a tie freehand).

I love making glamorous gowns so designing my finale dress was O so joyous to say the least. I have to say a massive thank you to my bestie Rose for being my model, I still cant believe it, she doesn’t even do phone cameras so imagine my utter shock when she walked in to a room full of broadcasting cameras for a BBC programme, talk about conquering your fears!! Extreme! The dress looked amazing on Rose and I was very happy with it.

image (4) image (5)

Wish I had some more time to press out all those creases though.

After the show aired on Tuesday I have had hundreds of emails about workshops so I have added a couple more dates for London!!! the link for these is below but they are filling up fast so if you are interested get in there as soon as possible

https://www.kazoova.com/activity/407/

I have also had loads of interest from readers and viewers outside the UK and I am working on ways to get you free-handing so once things have been confirmed I will  put up a post to update everyone, but there are loads of exciting things happening so expect some good stuff  😉

Have a wonderful day

With Love

Chinelo

xxx

Exciting News!!! First workshop Ready

Hello stitcher

I hope everyone has had a good week and are eagerly awaiting tomorrow’s sewing bee.

My sewing bee freehand antics seems to have a few of you interested in learning to do this also, so due to popular demand I have decided to set up a workshop to teach just this.

The workshop will hold on Saturday the 5th of April from 13:00-18:00, in the very trendy Bow area of East London.  This is an all inclusive 5hr workshop; all the fabrics, equipments, haberdasheries  you need to make the top/dress will be included and I have taken it upon myself to make sure you have unlimited tea/coffee and biscuits (O what a hard task!), who knows I may even bake a cake ,not promising though.

There will only be 12 in the class because I want to make sure that you get as much of my attention as possible.

This workshop does require you to have a bit of sewing machine experience and the ability to sew a straight line, I am offering a 30min sewing machine refresher, just before the workshop begins, because I know that some of us have had our machines gathering dust for a looooooooong time and have become a bit rusty with operating it. This is at no extra cost, so if you feel you need this just show up at the venue half an hour before the workshop is due to start.

We will be making this peplum top:

IMG_2473[1]

or you may wish to extend the length of the peplum to make a skater style dress, whichever you choose to make on the day, it will be beautifully fitted to you and a stylish addition to your spring/summer wardrobe.

Here’s the link to book the workshop //www.kazoova.com/activity/376/

Hope to see you there!!!!

Summer Dress with Full Skirt; Juniors Edition.

Hey Guys

Hope you enjoyed the bee. This week I will be showing you how to make a little girl’s summer dress with a full skirt (no pattern of course). This is truly a deviation from my usual escapade so I feel the need to explain why: there are two reasons really, 1. its juniors week on the sewing bee so in honour of that and 2. one of my god-daughters watched the preview for this weeks show last week and was traumatised by the JOKE!!! I made about me not liking kids, this 7 year old sweetheart actually refused to go to sleep that night until she understood what I meant by that comment (which was a joke)! so I have decided to dedicate this weeks post to my little rug-rats. I have made them these cute little summer dresses, now these little divas are ready for some sunshine

IMG_2427

Here’s what you’ll need:

IMG_2362

Measurement – back, chest, waist, shoulder to chest, shoulder to waist, shoulder to hem.

Tape

Fabric (preferable a nice cotton fabric)

Something to mark your fabric with (chalk, biro)

Scissors

Ruler

Iron

Pins

Zip (I used an invisible one)

Bias binding

Method

Step 1: Cut a piece of fabric that is the width of the largest measurement on the bodice+6″ and the length of the shoulder to waist measurement+1″

Step2: fold in half width wise and press, then on the open ended edge (opposite the fold) fold 1″ in towards the fold then bring the fold over to line up with the edge you just created. Press. These are now your centre front and centre back bodice.

IMG_2365 IMG_2367


step 3: half the back measurement and mark this along the top edge starting from the centre front and back edge

IMG_2369

Step 4: from the top edge (working vertically) mark the shoulder to chest measurement+0.5″

IMG_2368

Step 5: Along this point you just made, mark a quarter of the chest measurement + 1″

IMG_2370

Step 6: Back at the top again! measure the neck hole as wide and as deep as you like in the top corner of the centre front and back (I did, 3.5″in and 3″ down.

IMG_2371 IMG_2372


Step7: Join these to marks with a curve to make the neck hole

IMG_2373

Step 8: Along the bottom edge mark a quarter of the waist measurement+1.5″

IMG_2375

Step 9: using a ruler join the chest and waist mark, then freehand a curve from the chest mark to the back mark along the top edge, it should look like this:

IMG_2376

Step 10: Measure 0.5″ down from top of the curved line, then with your ruler slanted from the top edge of the neck hole seam, draw a straight line to the mark you just made

IMG_2377IMG_2379


now cut this out and separate the front and back pieces.

IMG_2381


Step 11: measure 3.5″ in from the centre edge and fold and press (this is your dart lines)


IMG_2382 IMG_2383


Invert the dart lines that are outwards facing on the right side of the fabric, now you are ready to draw your darts

Step 12: starting at the bottom edge of your folded dart line , measure a dart that is 0.5″ deep and 3.5″ to 4″ long

IMG_2385IMG_2387

do this for the front and back bodice pieces (with the back pieces you can make the darts 1 or 2″ longer)

sew and press darts.

Step 13: now you are going to make make the circle skirt for the dress, quarter the waist measurement. Get a piece of paper, take your tape and make a quarter circular curve in the corner, mark on one edge where the tape ends.

IMG_2389 IMG_2390

place the top corner point of the 0″ mark of your tape on the top corner of your piece of paper, measure down to the length of the mark you made (this is now your reference length), now pivot your tape (keeping the top corner in the same position) and mark the reference length in intervals:

IMG_2391 IMG_2392

Join these marks with a smooth curve and using your tape measure make sure that the curve is a quarter of the waist measurement+(0.25″ to 3/8″). if the quarter circle is too big or to small, shorten or lengthen the reference length and repeat until  you get a close enough match to the waist measurement.

IMG_2393 IMG_2394

Cut this out and reserve as a template.

Step 14: Minus the length of the bodice from the shoulder to hem measurement then add the length of the reference to this, (this is now your skirt length)

Step 15: cut 1st piece of fabric double the skirt length+2″ width wise by skirt length, length wise, fold in half, then fold 1″ in towards the folded edge and press (this is the centre back zip allowance). Cut 2nd piece of fabric double the skirt length width wise by skirt length, length wise. fold in half, press and line the fold with the zip allowance.

Step 16: working directly on the fabric, repeat the pivot action, only this time make it the skirt length measurement. them place your template in the top corner and cut around the 2 quarter circles

IMG_2395 IMG_2396IMG_2397

Step 17: working on the back skirt piece measure down 8″ from the waist seam in the zip allowance, then sew that down to the hem


IMG_2405 IMG_2407

Step 18: attach the skirt to the bodice making sure the centre folds line up (I often start sewing from the centre)

IMG_2408 IMG_2409

step 19: Insert your zip

IMG_2411

I am adding an organza belt to mine (I think it’s really cute in little girls dresses), to do this, cut a long enough strip of fabric to go around the child’s waist and tie a nice bow, cut it in half and fold each strip in half  length way, sew around the raw edges leaving one shorter end open on each strip. Turn them out and iron. Attach the raw ends to the side seams of the back of the dress like this:

IMG_2412

Lay the front of the dress on the back of the dress, right sides facing. Make sure the waist seams match up, sew the side seams with a 0.5″ seam allowance and the shoulder seam with a 3/8 seam allowance, I finished off my neck and arm hole with bias binging and did a rolled hem.

IMG_2413

This is what my little girlies looked like in their dresses

IMG_2414[1] IMG_2422 IMG_2434

As usual I would love to see how you get on, please send me your pictures, questions, comments, and suggestions

xxxx